Set up the Stage for Video Mapping
How to setup the Stage for a Video Mapping project with Smode
Create a projection
 Surface
A
Surface
Stage Elements
defines a surface on which you want to project some content with a
 Video Projector
.
Video Projector
.
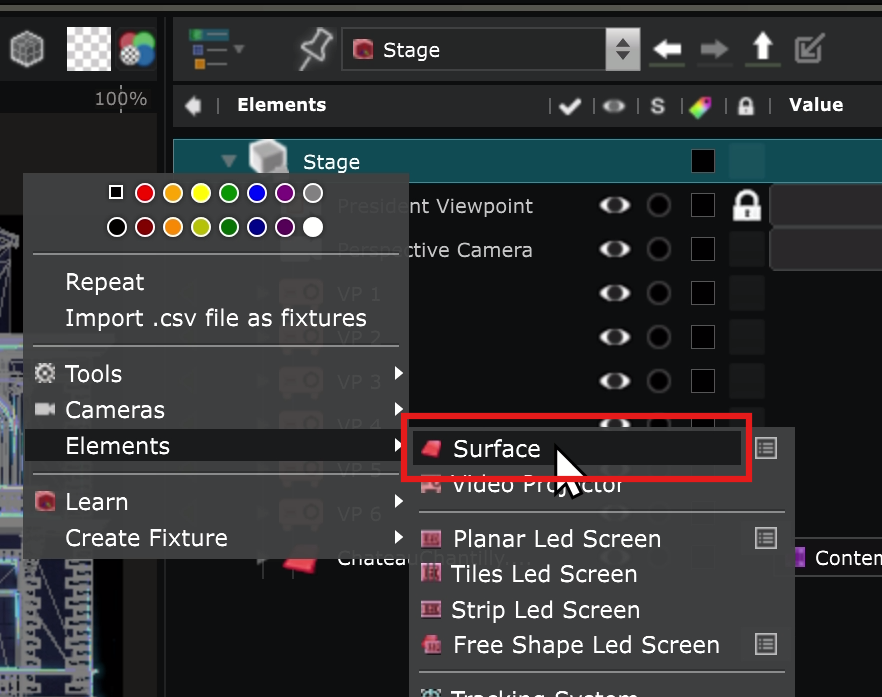
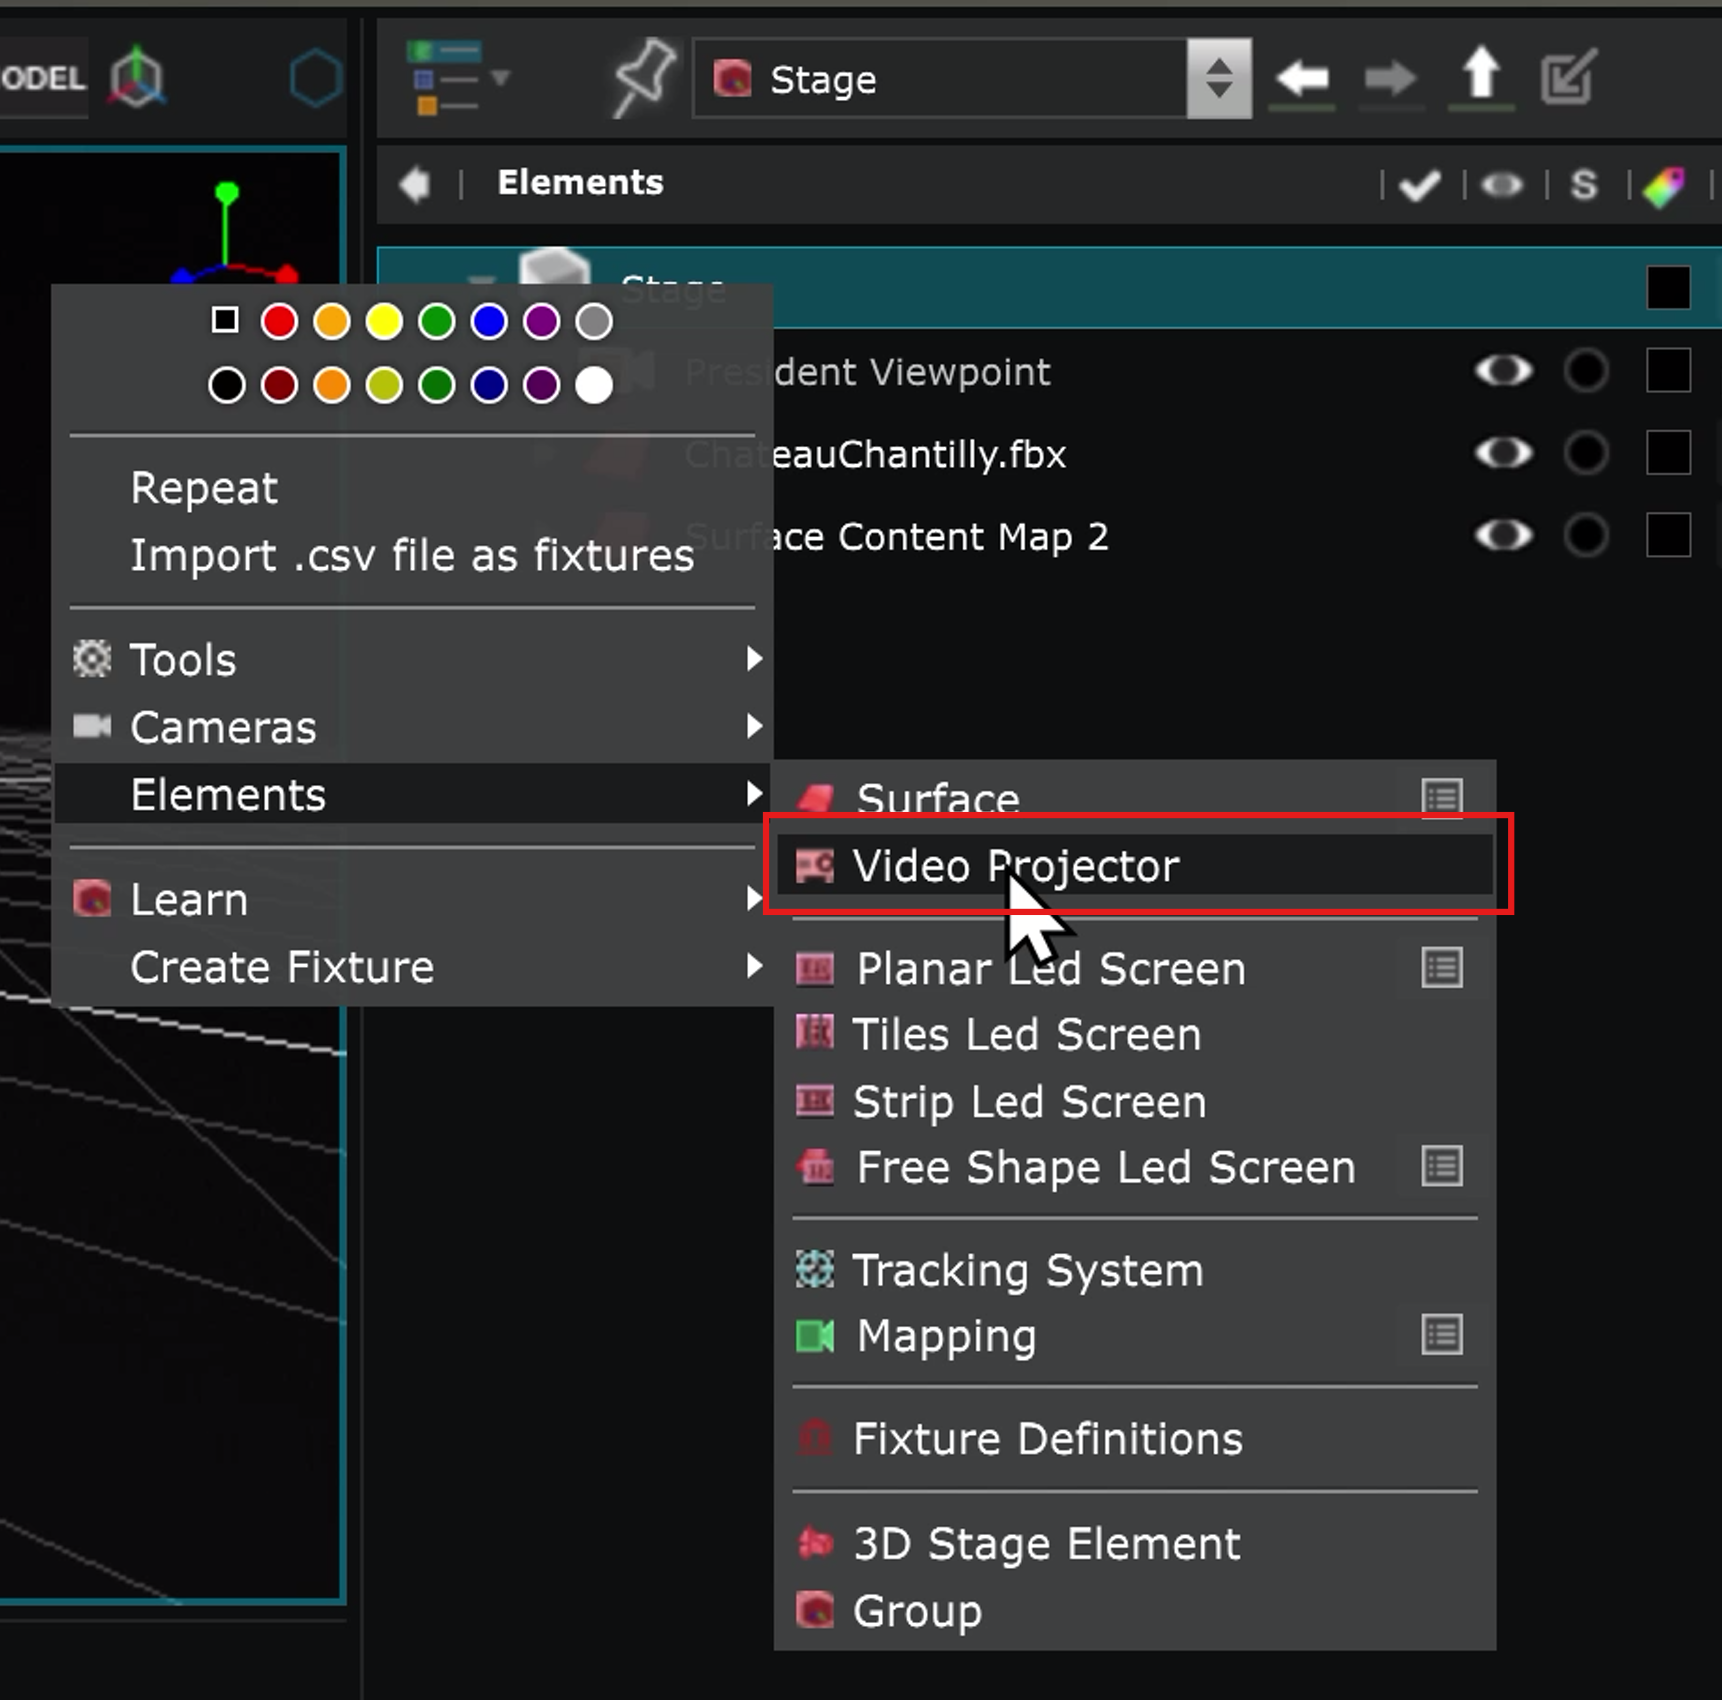
Right-click in the
 Stage
part of the
Stage
part of the
 Element Tree
to create a new
Surface
:
Element Tree
to create a new
Surface
:
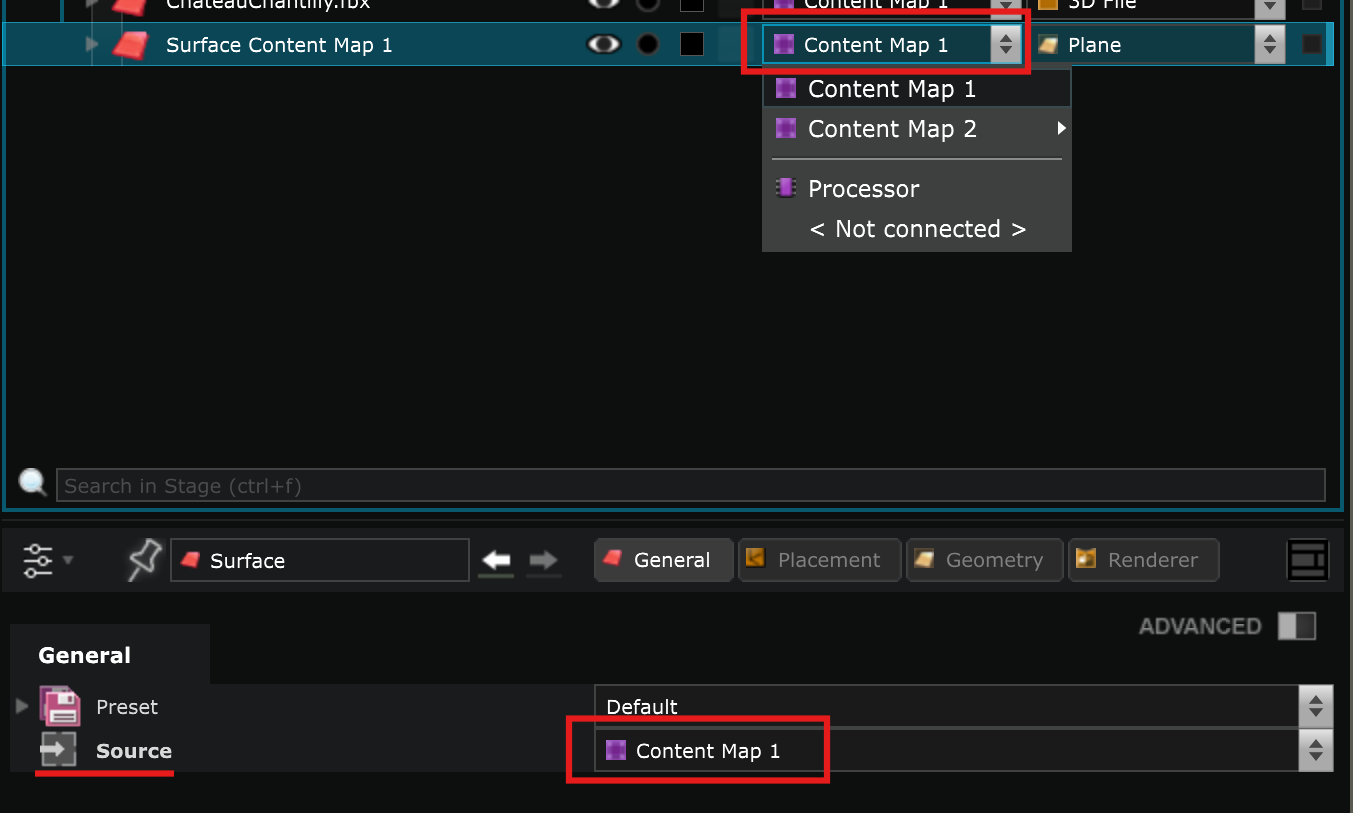
Choose what content you want to display on that
Surface
by selecting a
 Content Map
Source.
Content Map
Source.
Import a
 3D File
as projection
Surface
3D File
as projection
Surface
You can create
Surface
in Smode or import a
3D File
and select Reference as Surface to import custom shape surfaces.
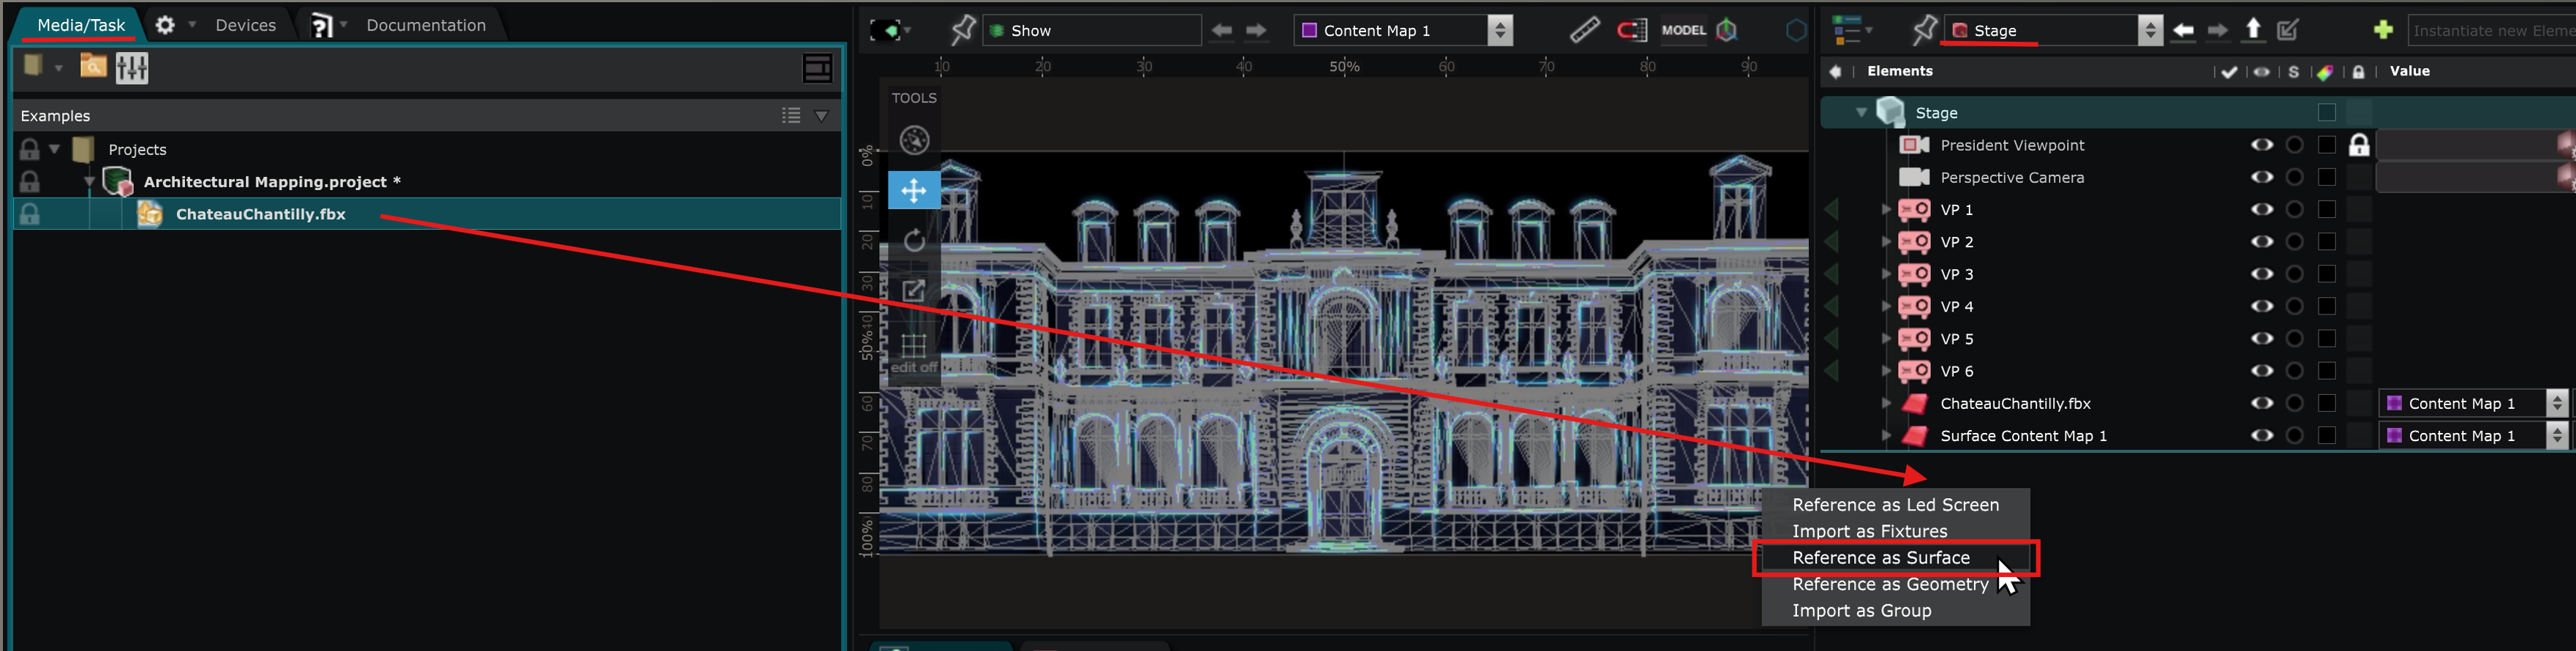
To learn more about the limitations, refer to the
3D File
documentation.
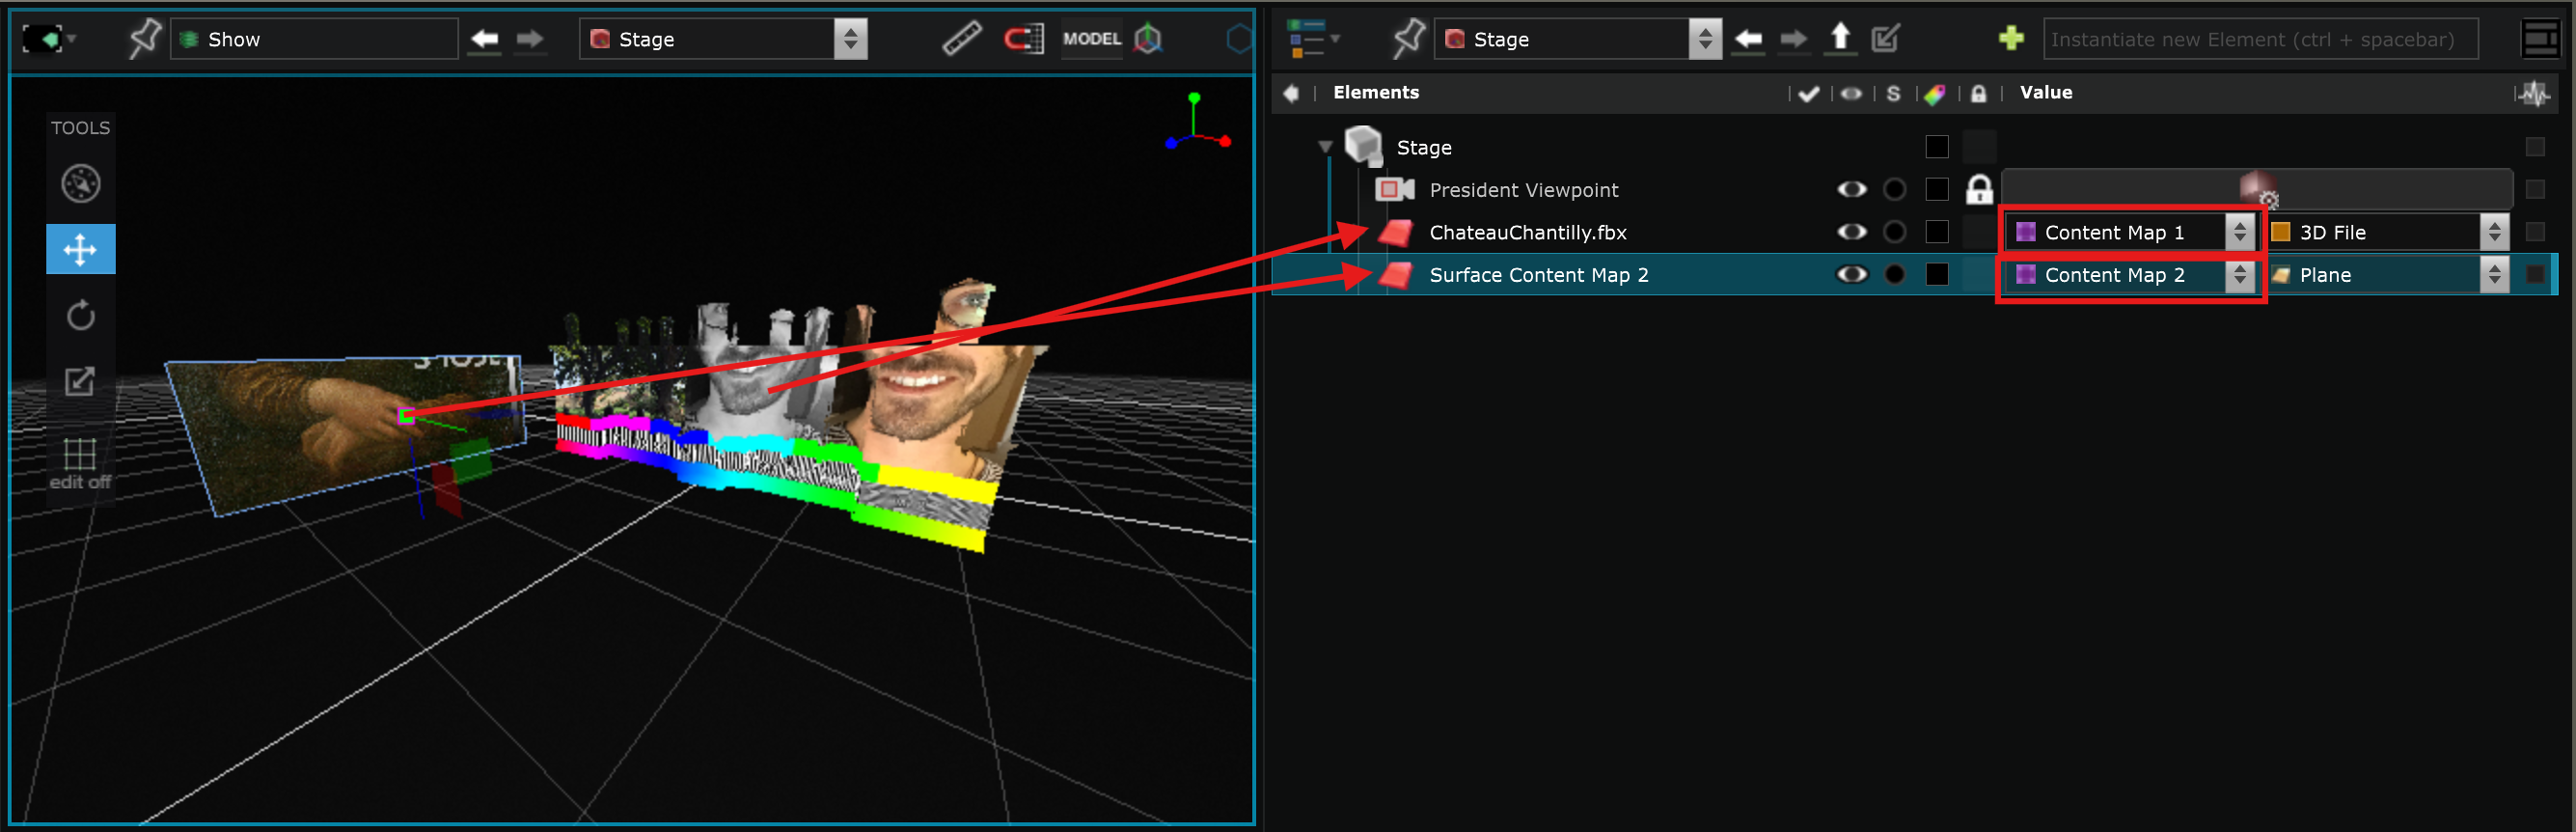
Just as for a
Surface
created in Smode, you have to choose which content to display in the imported
Surface
:
Create a
Video Projector
The virtual
Video Projector
of SMODE’s
Stage
are used for real life mapping and are usually directly connected to the
 Video Output
.
Video Output
.
Right-click in the
Stage
part of the
Element Tree
to create a new
Surface
:
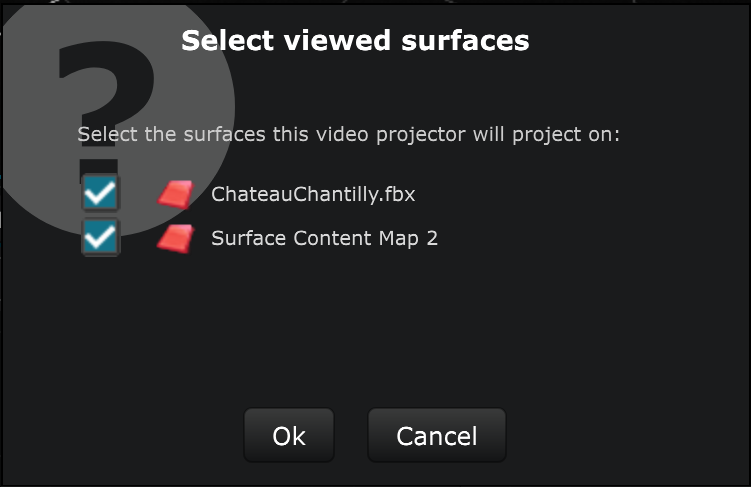
When you create a new Video Projector in the Stage, you have to choose which Surfaces you want it to project on:
There are many parameters available like the Focal Distance and Throw Ratio for instance.
Refer to the
Video Projector
documentation for more information.
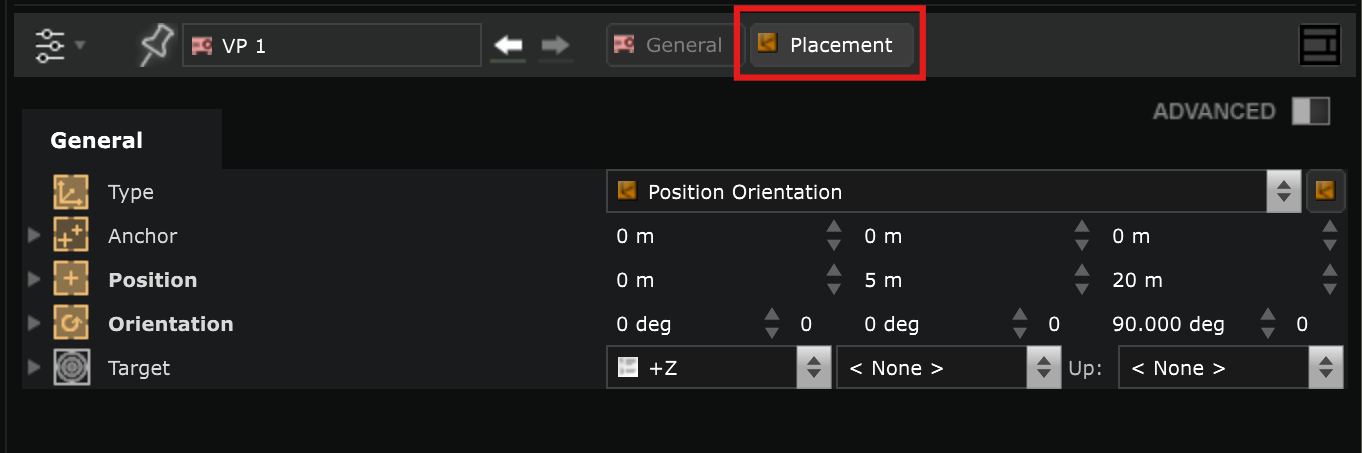
Move elements in the 3D space of the
Stage
Similarly to the way you move objects in the 3D space of a
 Compo
, you can either move it directly in the
Compo
, you can either move it directly in the
 Viewport
using the helpers
Viewport
using the helpers
or by changing the values in the
 3D Placement
parameters for more precision :
3D Placement
parameters for more precision :
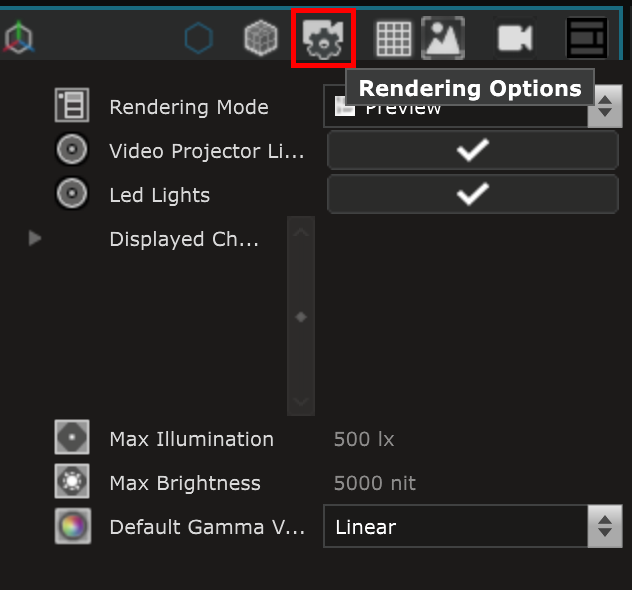
Change the Stage rendering options
When working on the
Stage
, you may want to simulate the light emitted by your
Video Projector
to simulate how the content would actually be projected.
To do so, you can use the
Stage rendering options
by clicking on the Camera and Gear icon on top of the
Viewport
and selecting Simulation :
Read the Stage rendering options documentation to learn more about the different options.