Create a Multi Video projectors dome with a Vioso calibration
Build a 6 Video-projectors dome setup with Vioso calibration file (www.vioso.com)
In this sample, the 6 videos projectors are in WXGA2 resolution (1280x800 ).
Configure Outputs
- At first, we must:
-
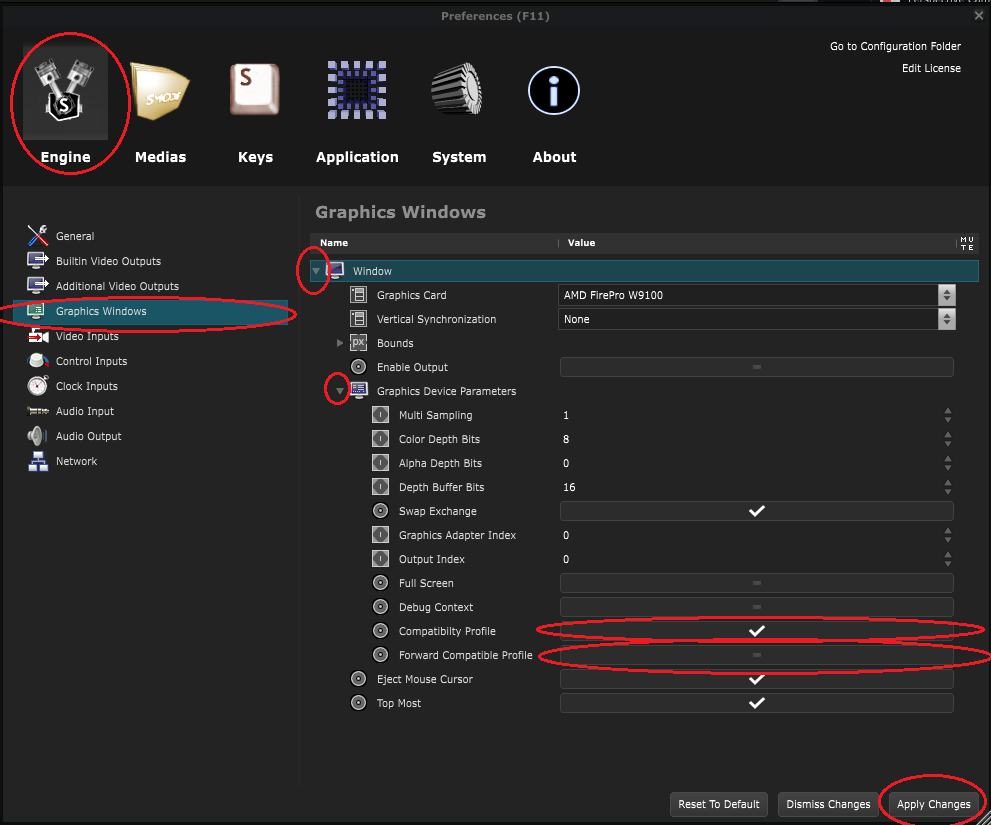
enable compatibility profile
-
disable forward profile
-
apply changes and restart Smode
All of this can be done in the Graphics Device Parameter of the Graphics Windows of the Smode Engine Preferences:
If this action was not done before, Smode will ask you to do it when you switch to Vioso
 2D Renderer
.
2D Renderer
.
Then we need to configure 6 Standard Smode Video Output Device in the engine preference (F11 key)

Here I use only one HD monitor for the simulation at the left of my primary display,
That’s why I’ve set a negative x positions.
Because I want to fit all my 3x2 outputs inside this monitor,
I reduce them to an arbitrary resolution 640x400 with the same aspect ratio of my
 Video Projector
.
Video Projector
.
Then I set the stretching mode to “fit inside”
Create a minimal project
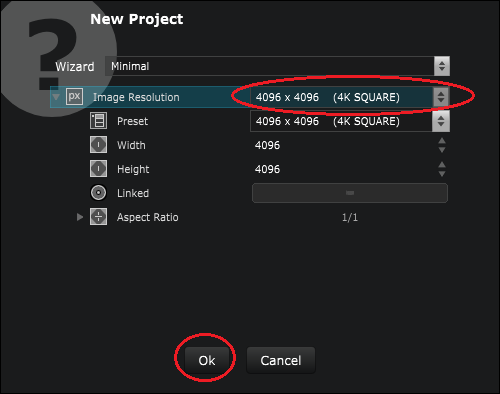
Create a minimal project with a square
 Content Map
(for dome-master format)
Content Map
(for dome-master format)
4096x4096 for instance
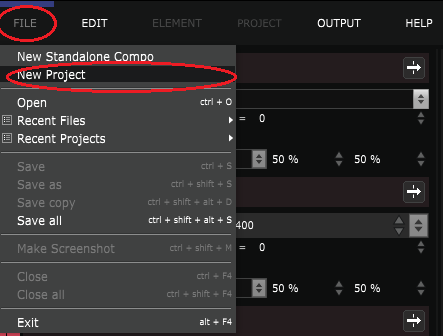
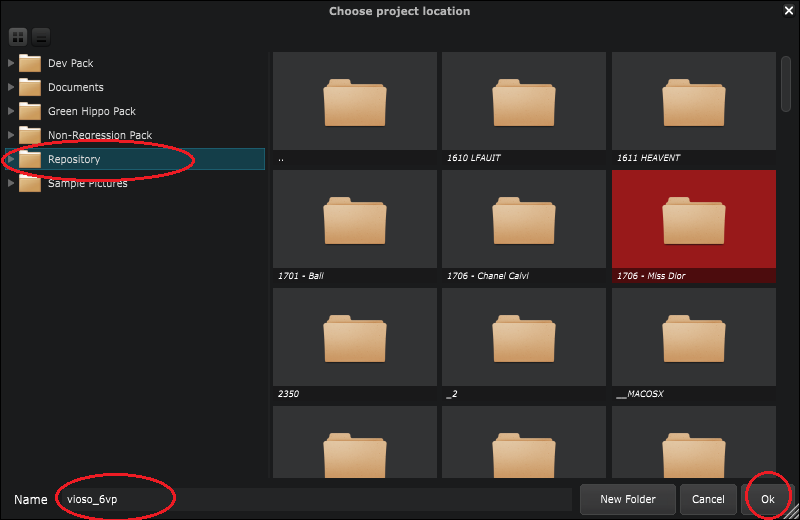
Chose a name for this project, and its location on your media directories.
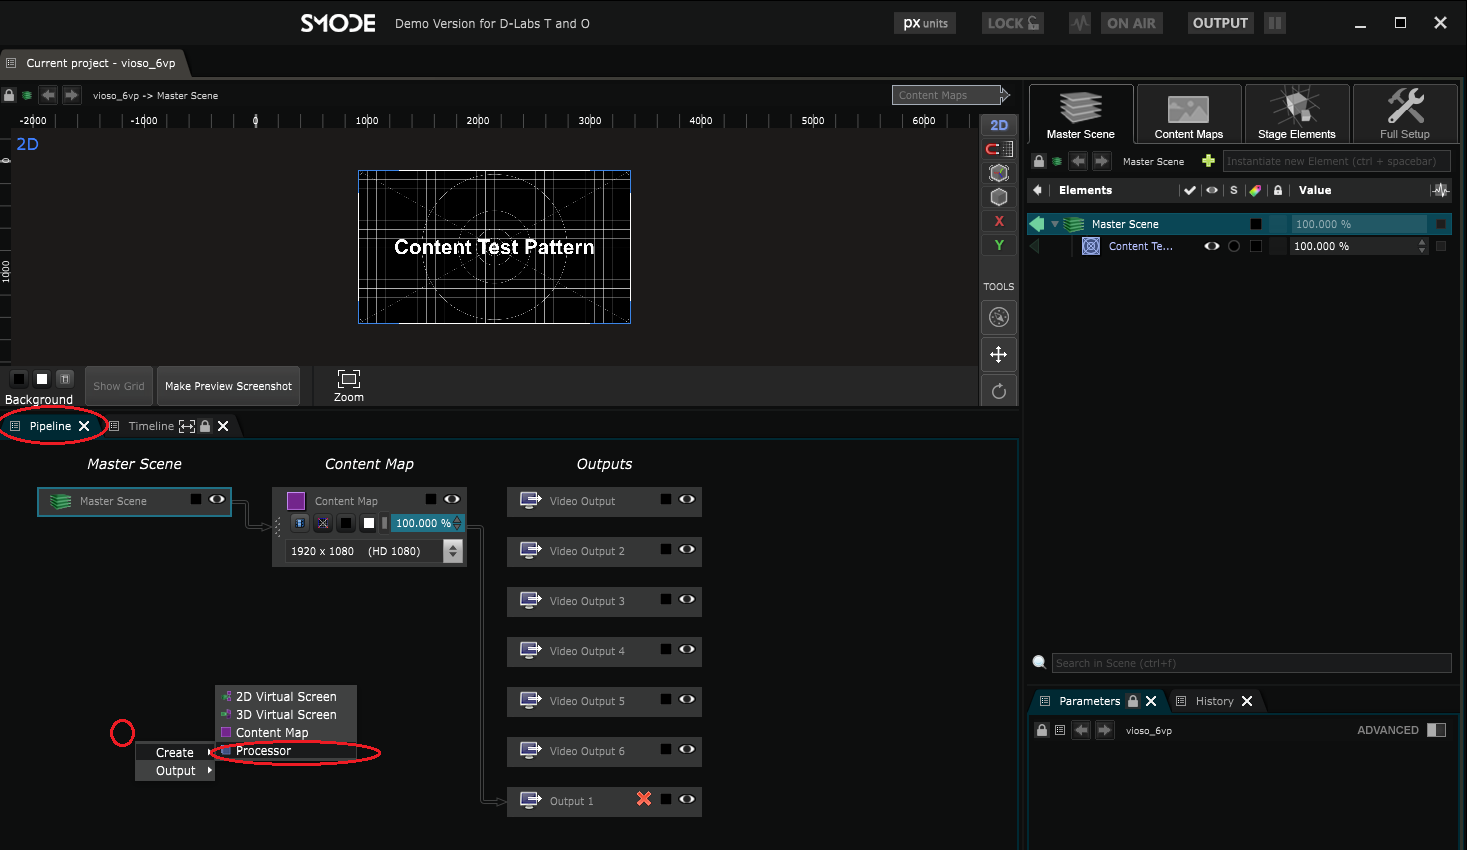
Create the project pipeline
Create a
 Processor
by right clicking on the
Processor
by right clicking on the
 Pipeline
of the project,
Pipeline
of the project,
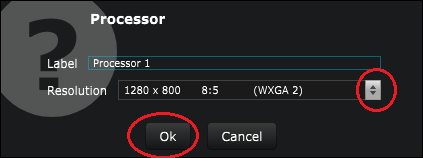
and select the resolution of the
Video Projector
:
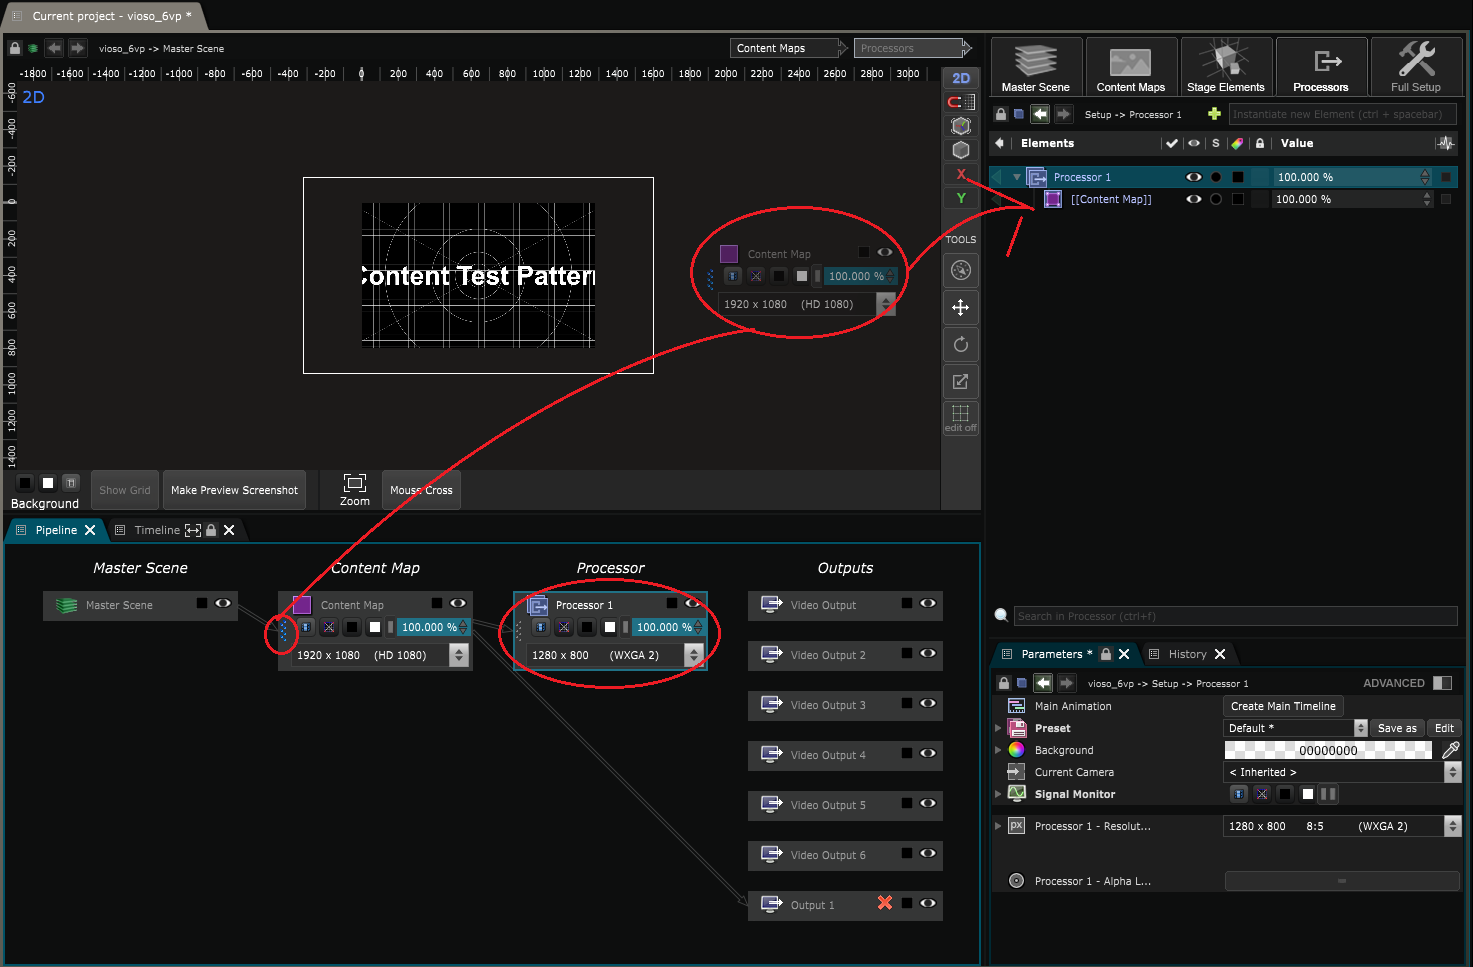
Select the created
Processor
,
Then create a content map
Then drag the
Content Map
by the grip into the Processor Elements tree.
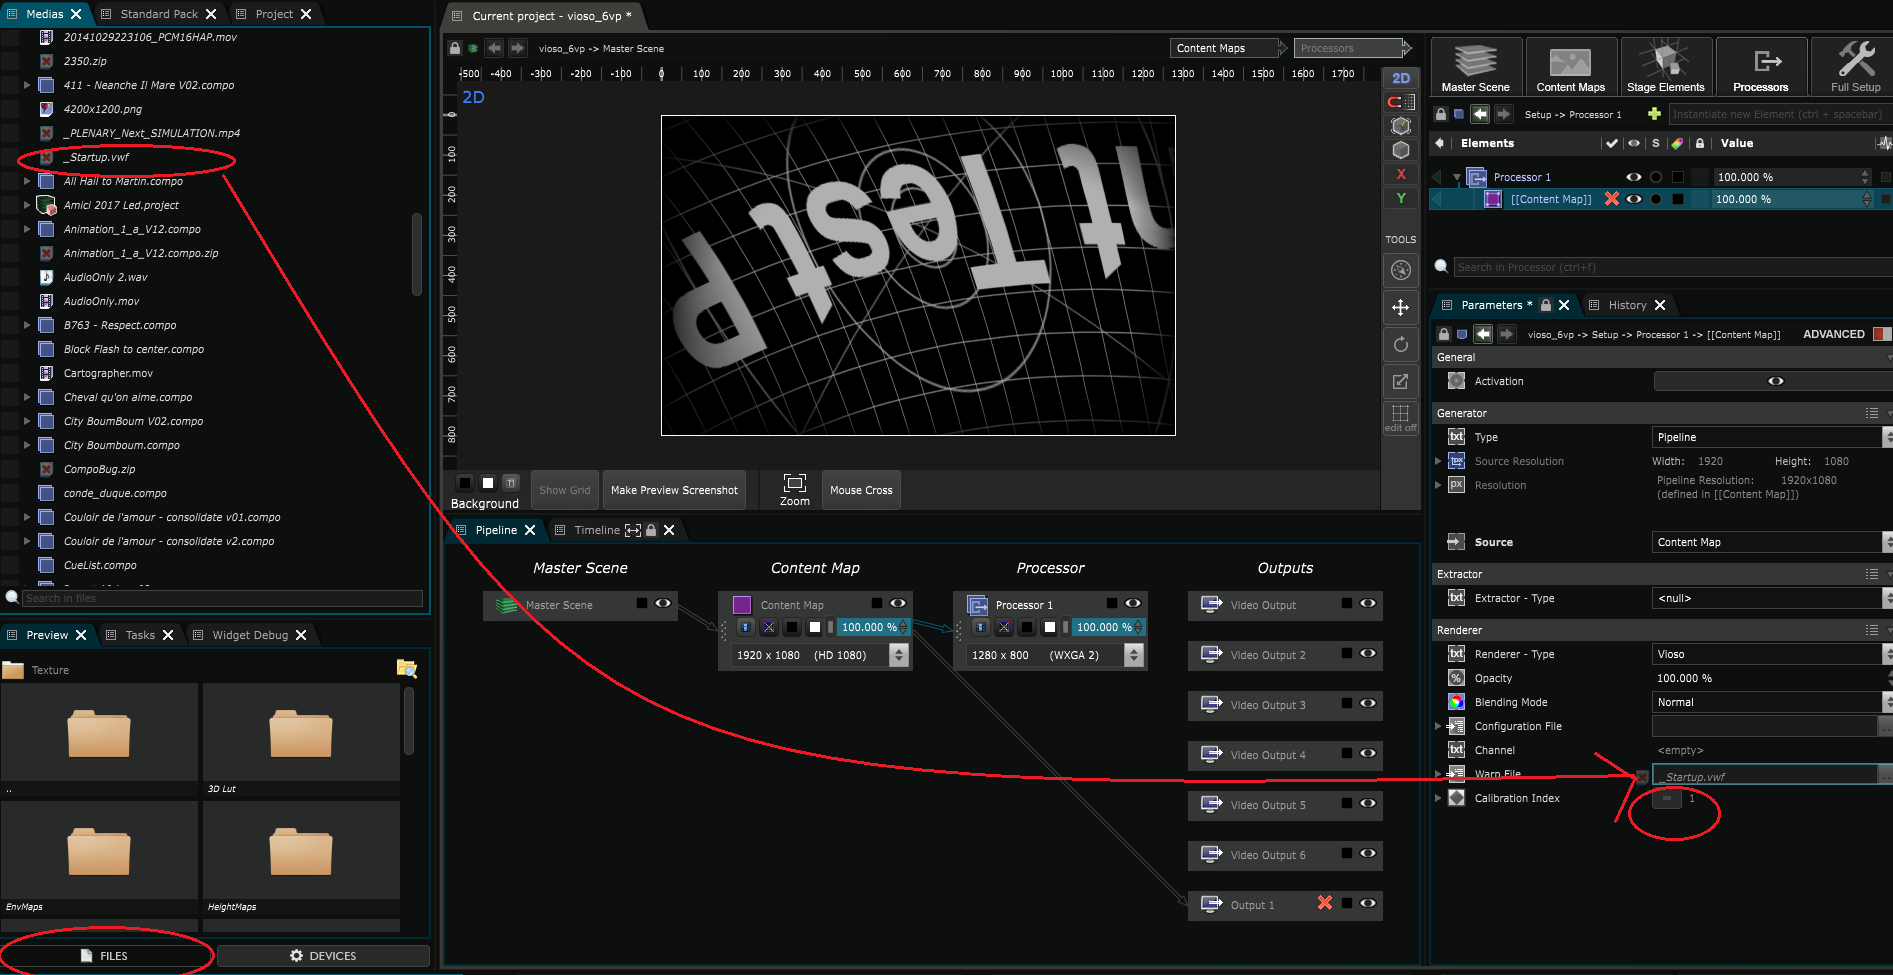
Select the
Content Map
in the Elements tree and change its Renderer type from “2D Renderer” into “Vioso”:
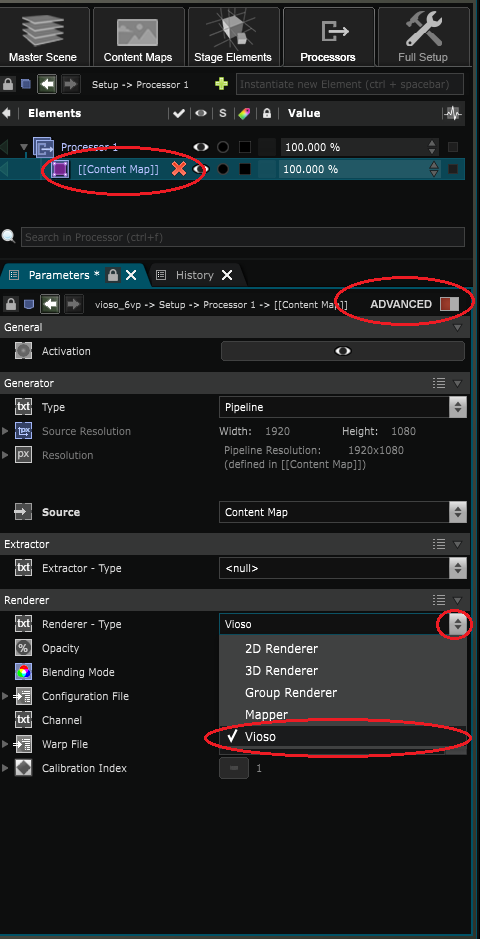
In your media directory, select and drag your .vwf calibration file into the Warp File of the Vioso Renderer.
Then check Calibration Index box to allow custom modifications of selected calibration, independently to your Vioso environment *.ini file or Channel settings.
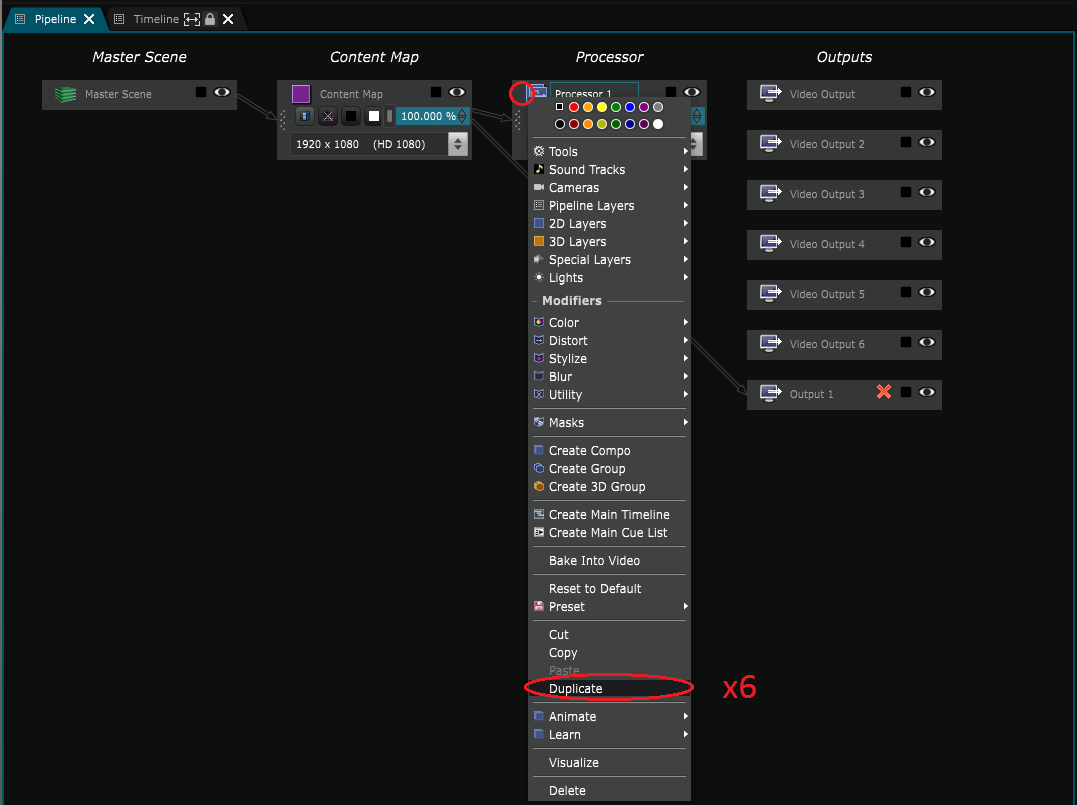
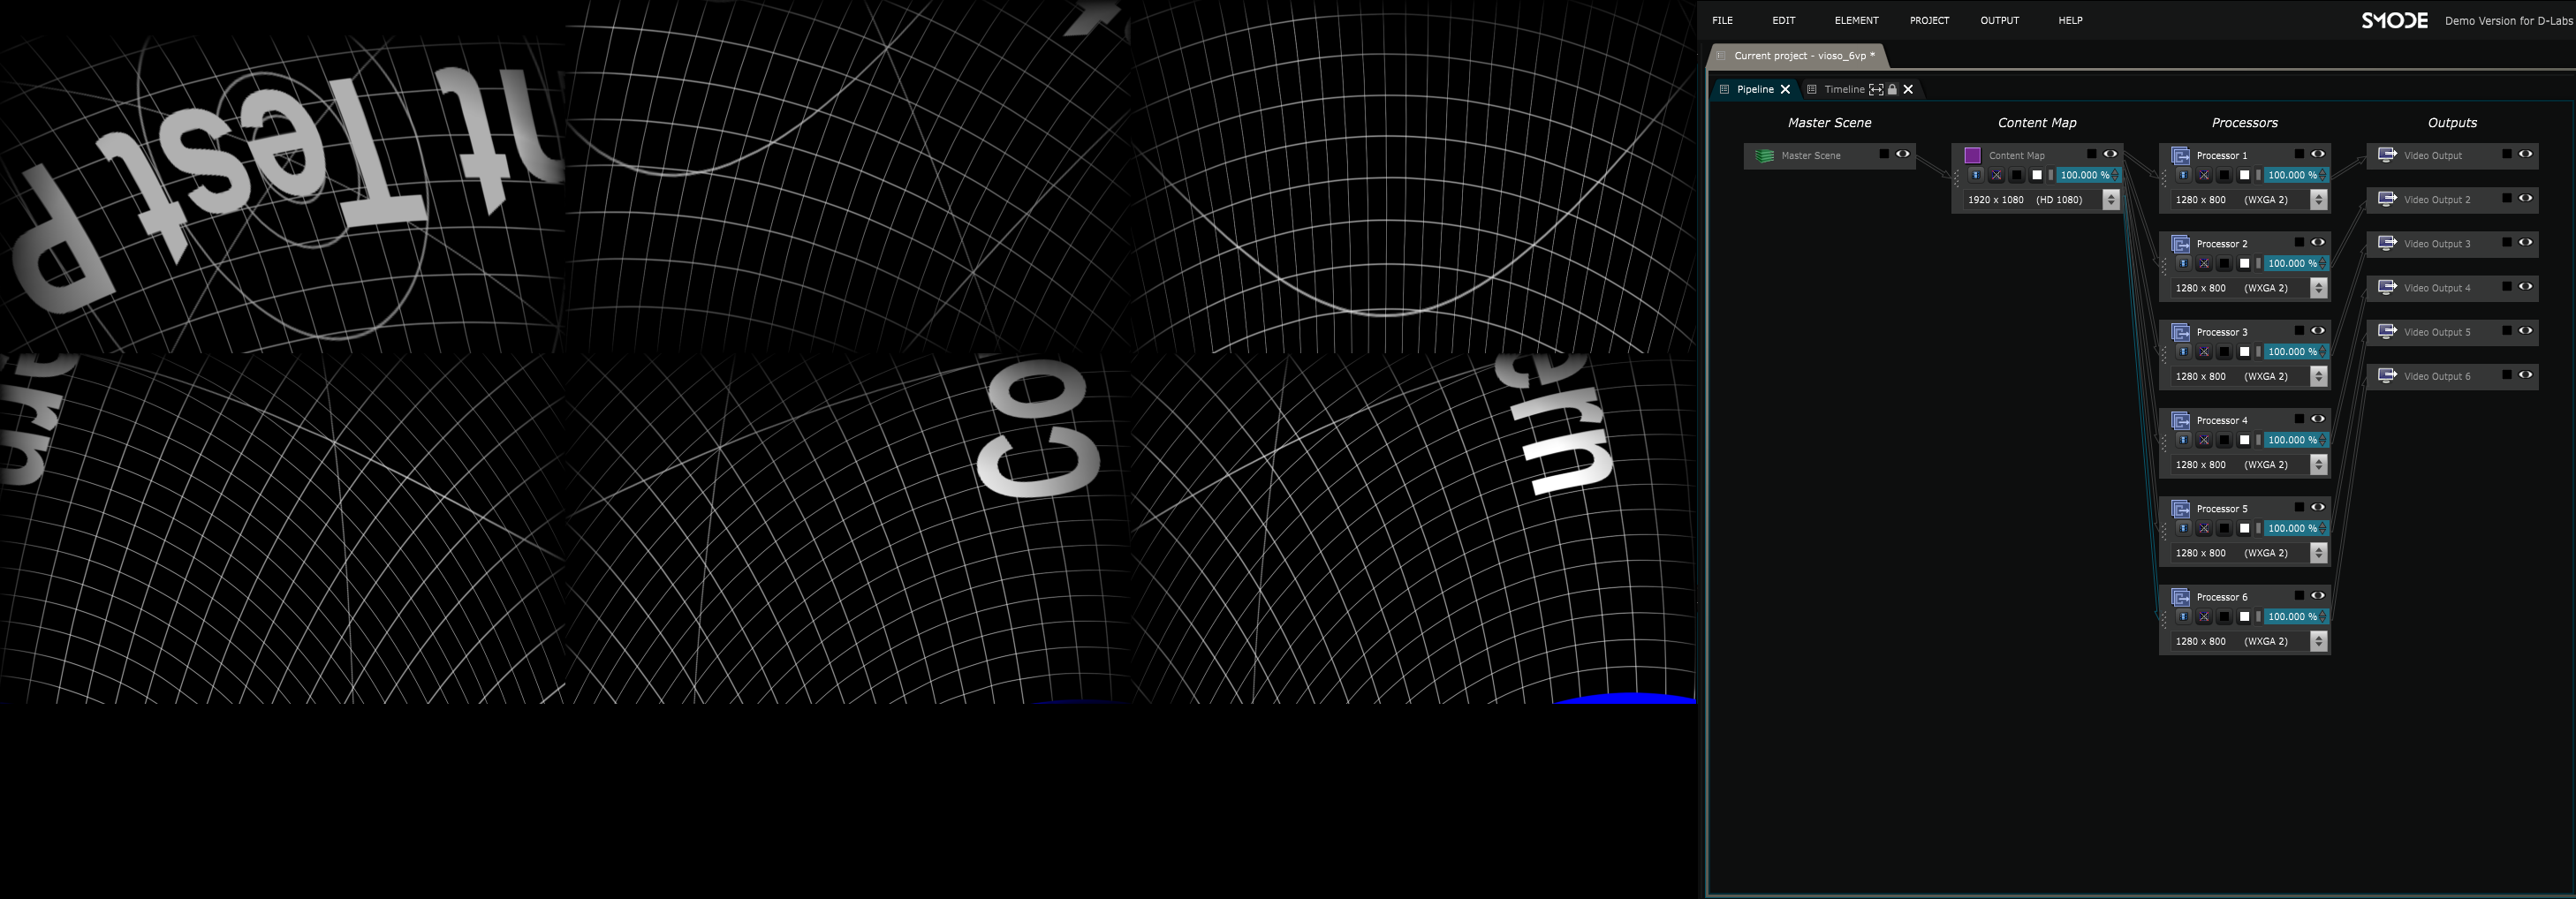
Duplicate settings and plug outputs
Right click on your processor in the
Pipeline
and duplicate it six times with the corresponding menu command :
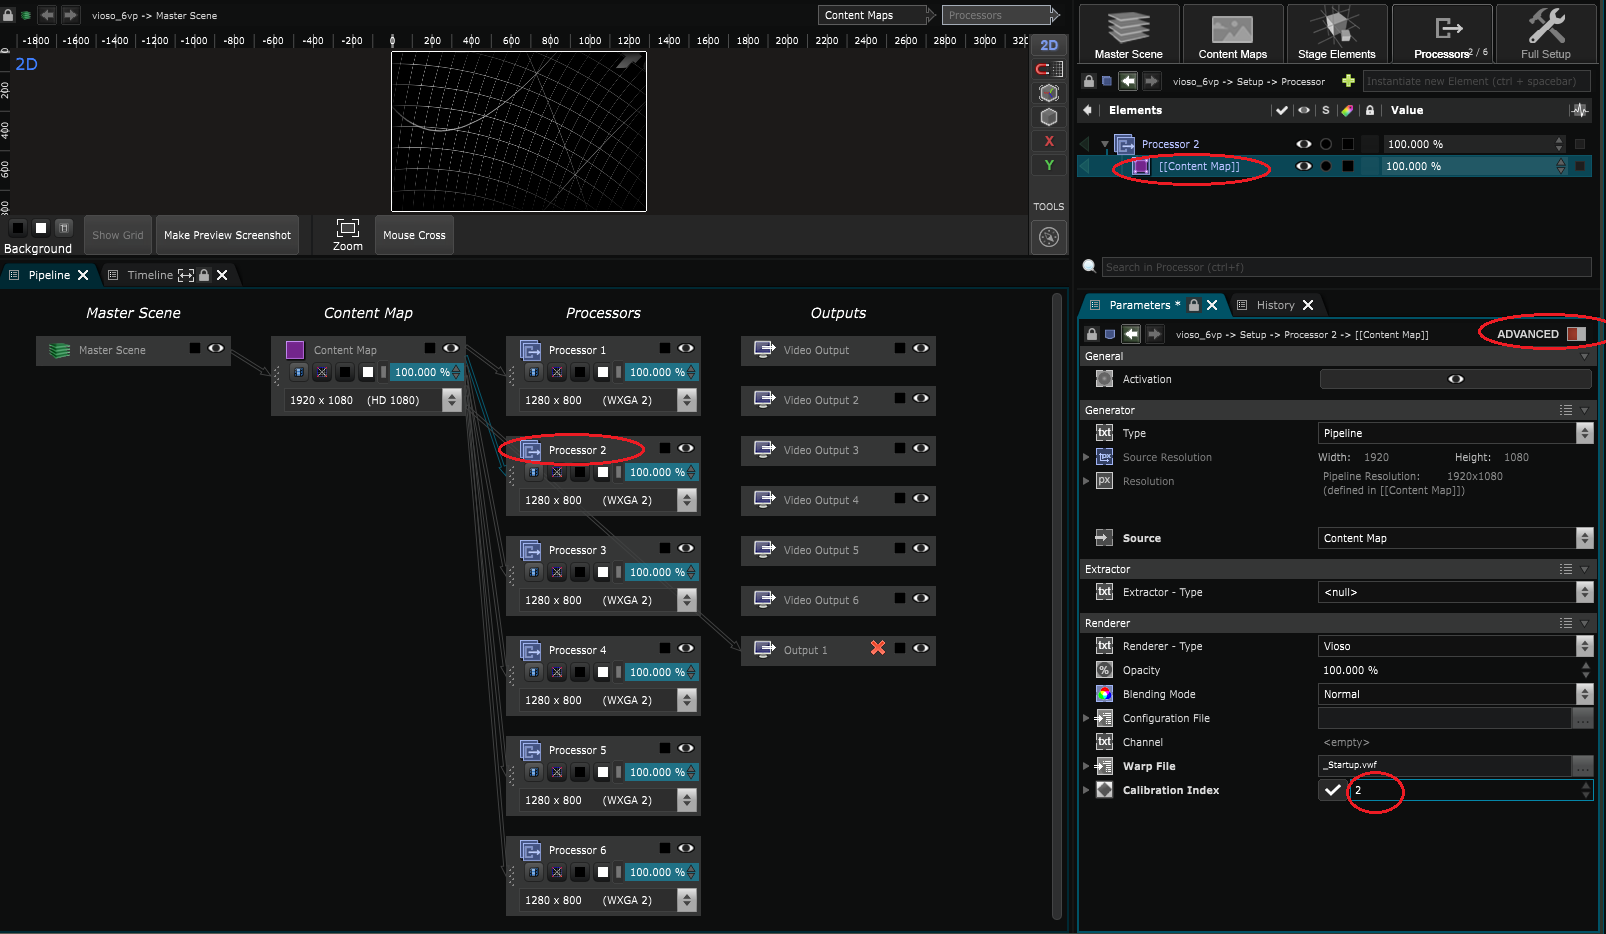
Select each processor in the Pipeline and modify their Calibration Index in each Vioso renderer for each
Content Map
.
For reach video output, select them and associat them to their related processors.
And just disconnect the source of the default “Output 1”.
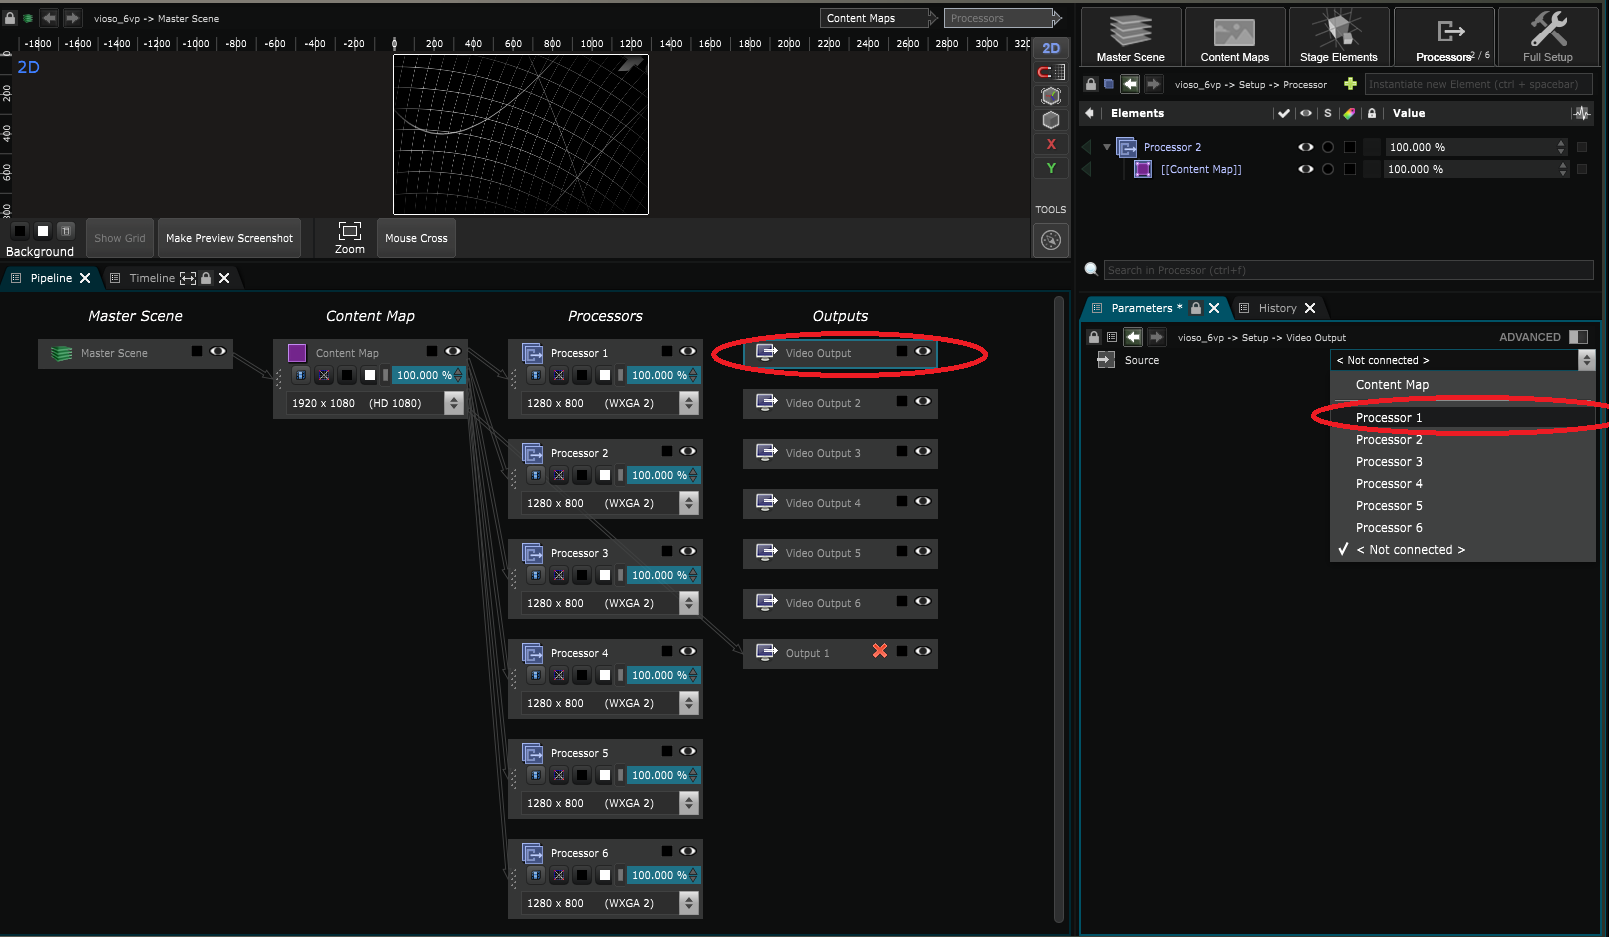
When you activate SMODE’S output? you should have your six output connected and visible in your secondary monitor :
Enjoy !