Quickstart
Your first steps with Smode
Please consult the Requirements and Installation pages first.
-
Install the latest version of Smode, or check for updates (see Installation above).
It’s recommended to use the latest stable version to access all the new features and bug fixes. -
Start Smode: Make sure you have an active license (or dongle with license) if you’re using Smode Compose or Smode Live.
-
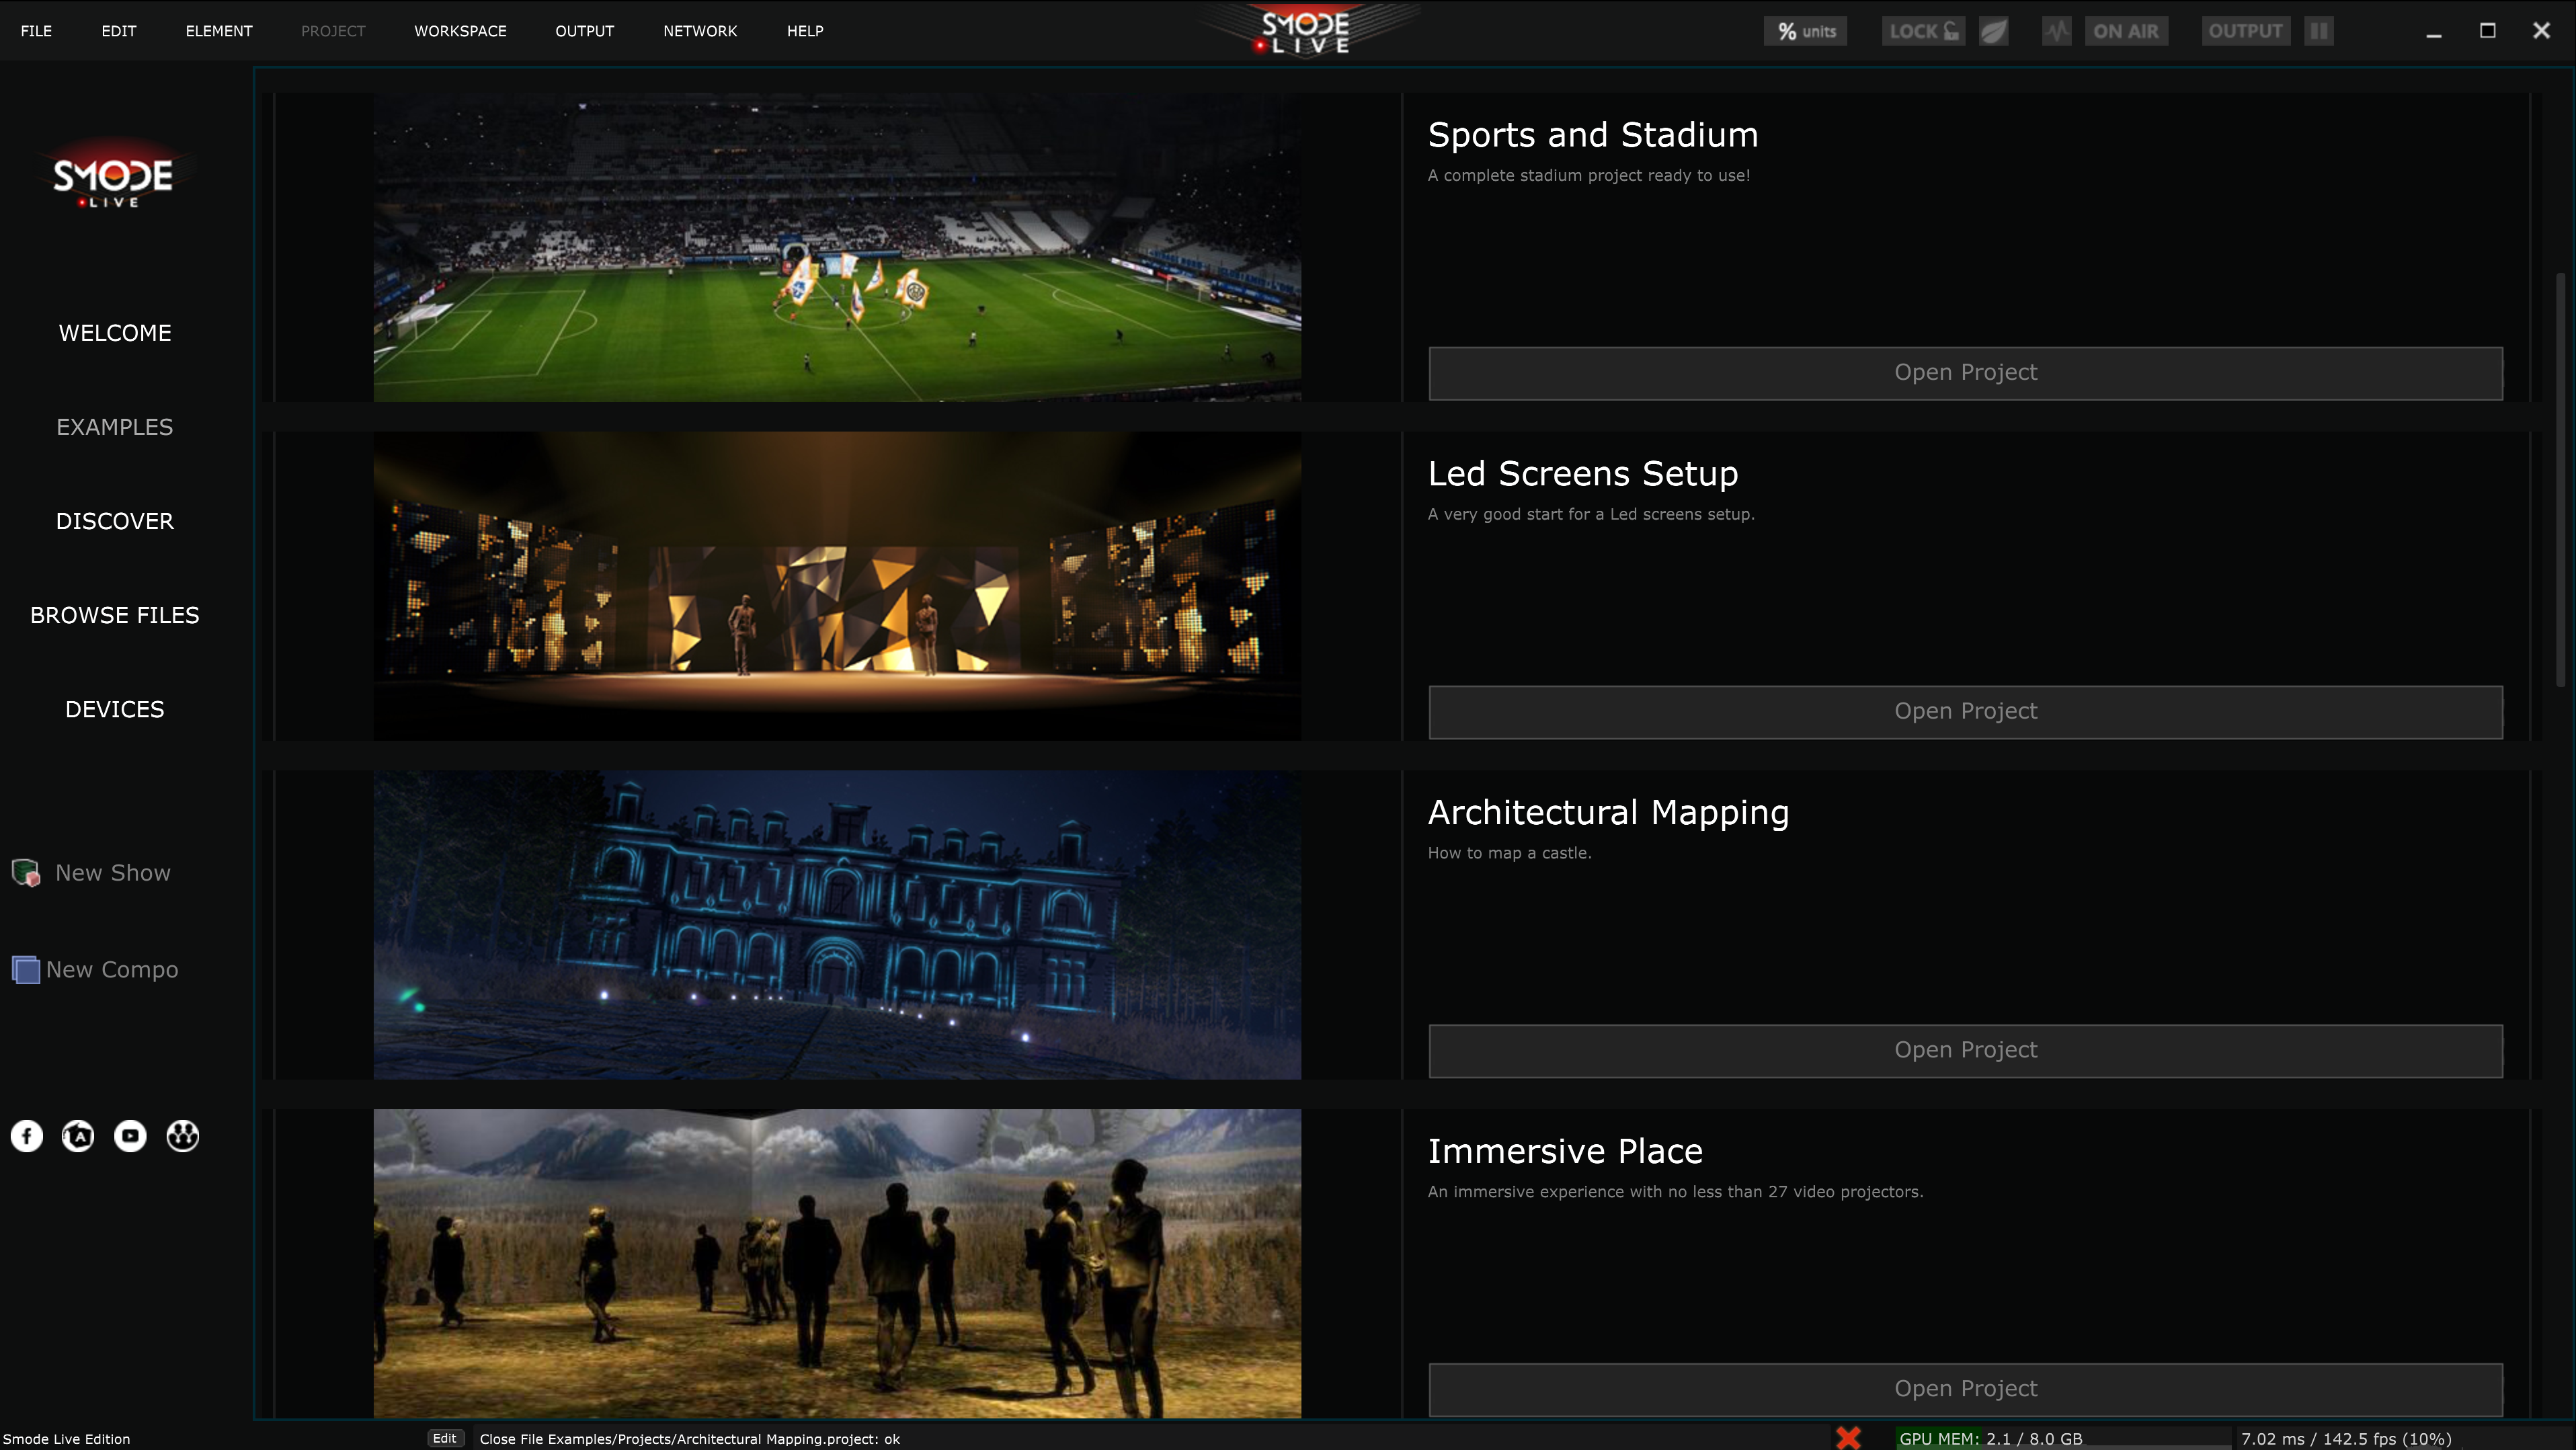
Homepage:
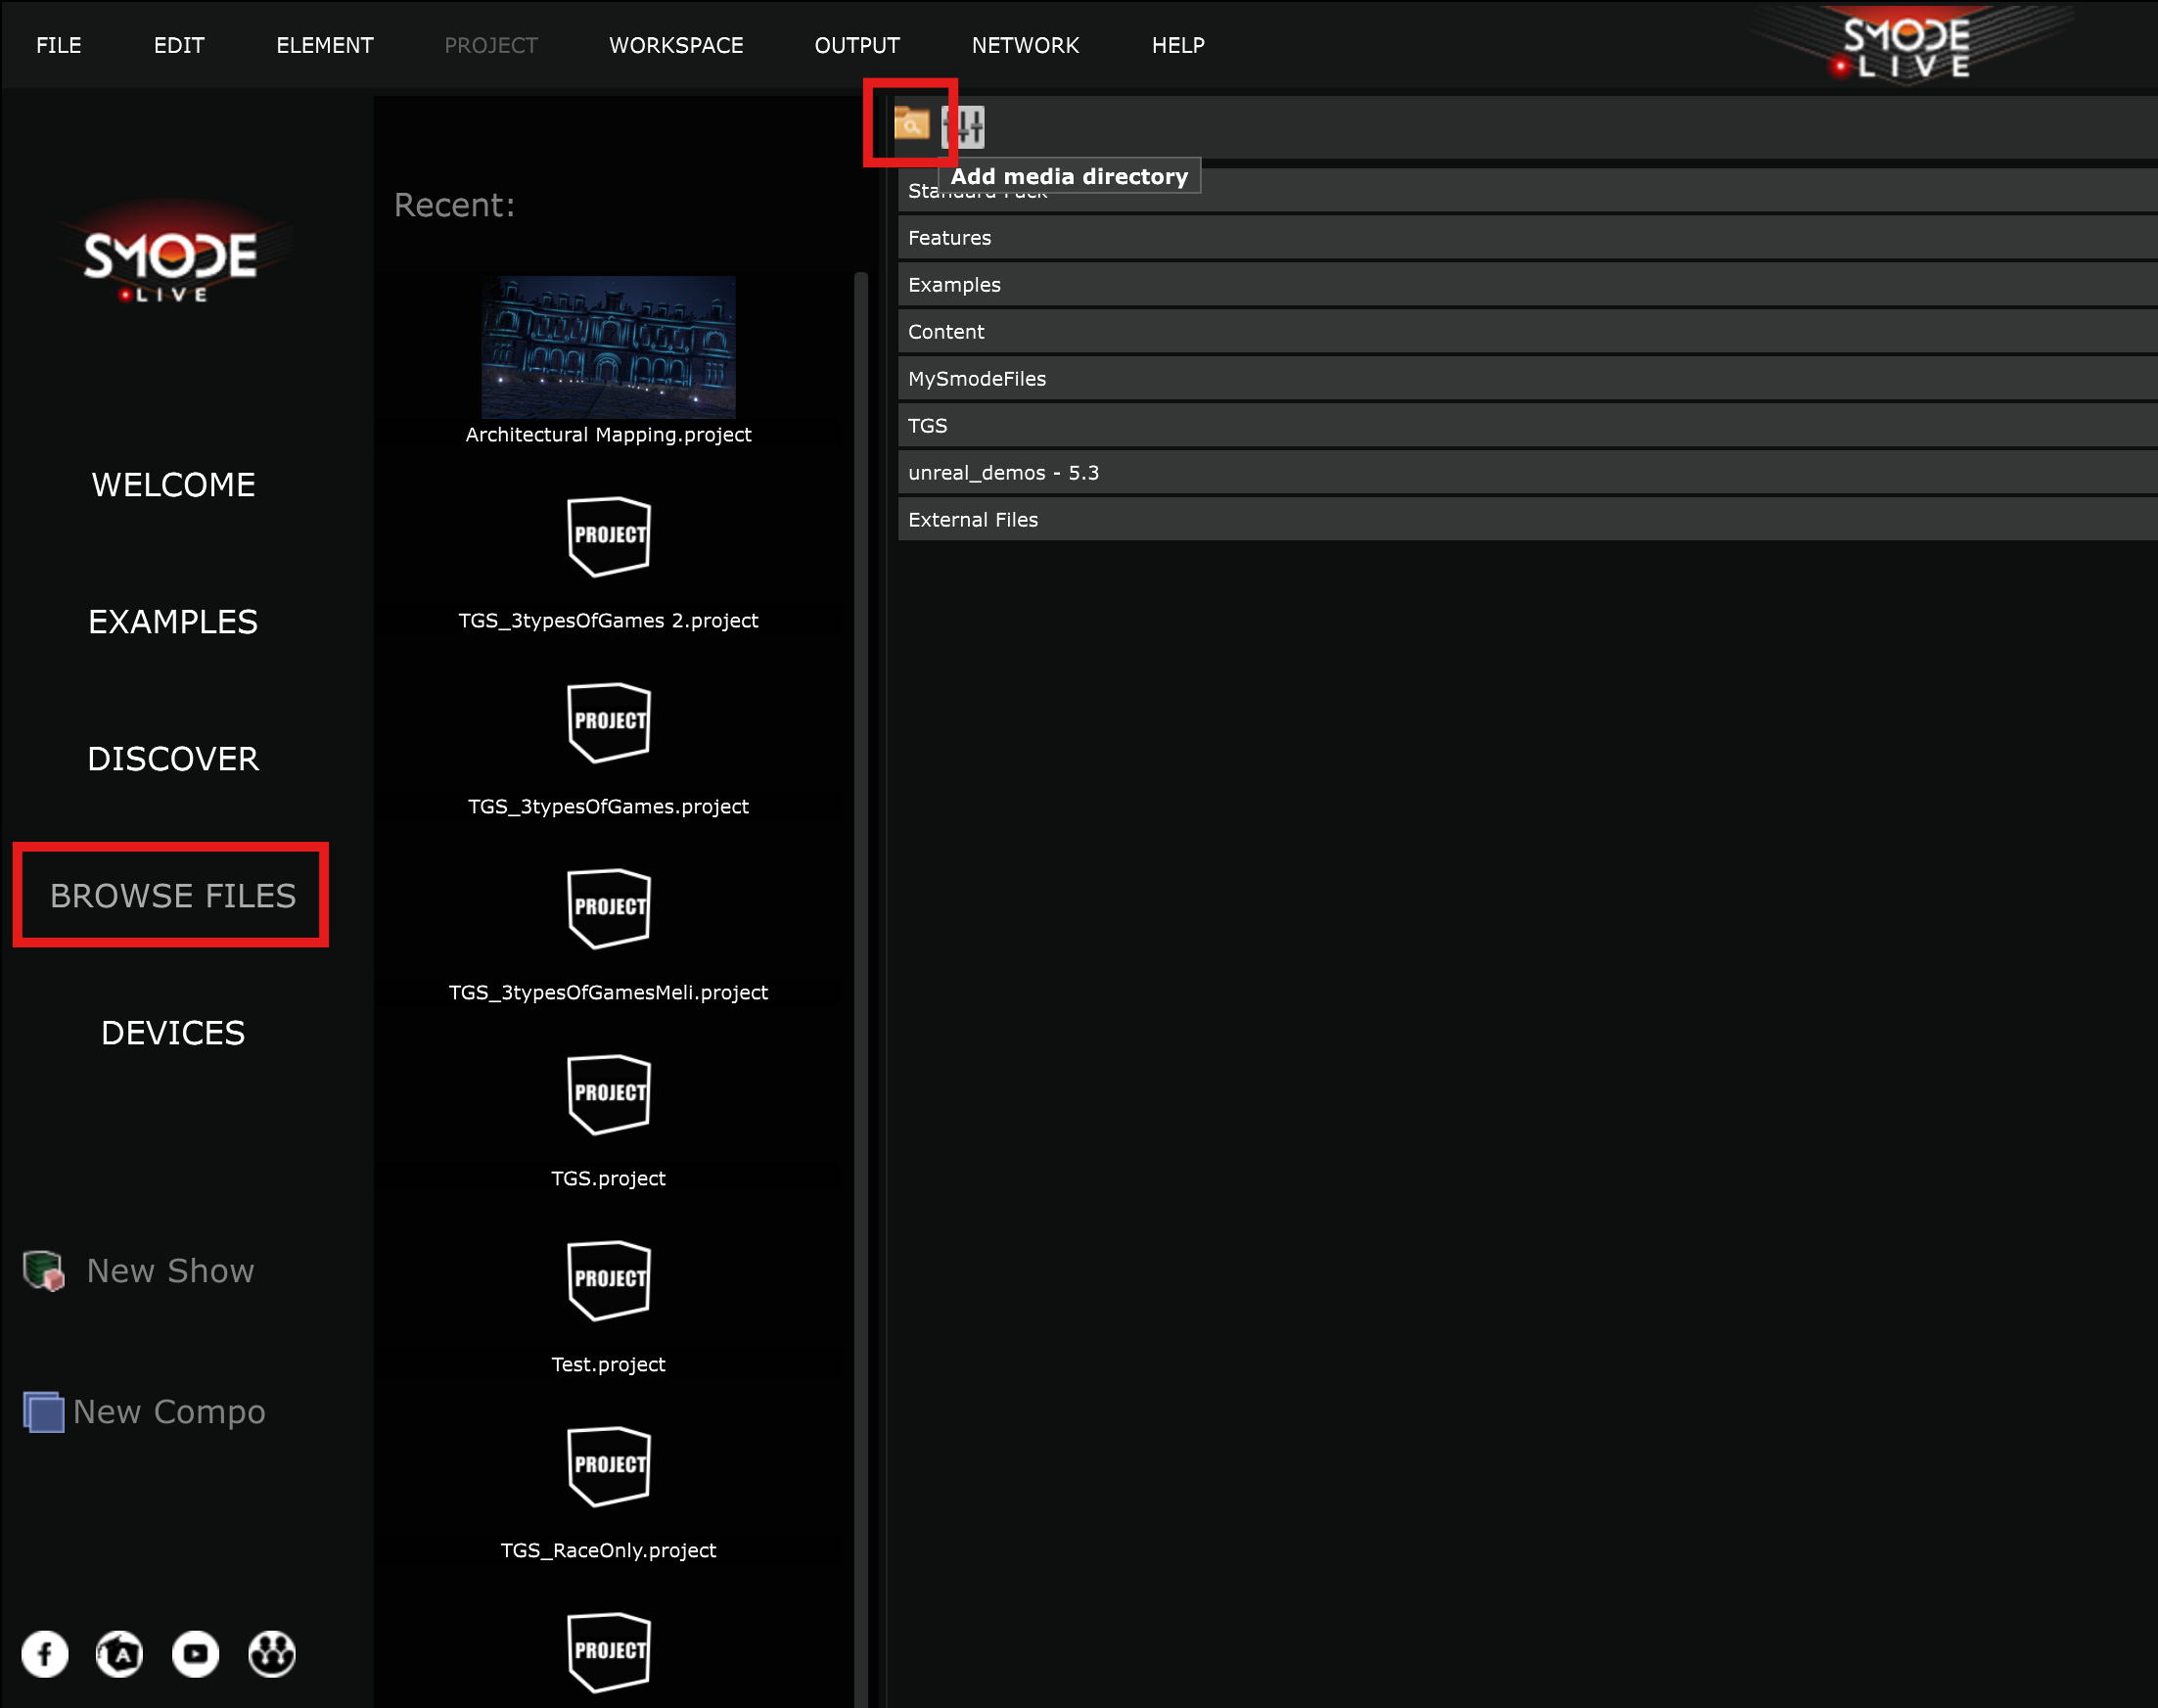
- Import a Media Directory:
 Media Directories
are shortcuts to local hard drive locations. It’s the way to access all your external files in a Smode project, like pictures, videos, 3d objects, Smode Compos etc.
Media Directories
are shortcuts to local hard drive locations. It’s the way to access all your external files in a Smode project, like pictures, videos, 3d objects, Smode Compos etc.
It is necessary to choose a save location to create a new Project
so you can start by adding a new
Media Directories
in the ‘Browse Files’ section by clicking on the button on top:
Project
so you can start by adding a new
Media Directories
in the ‘Browse Files’ section by clicking on the button on top:
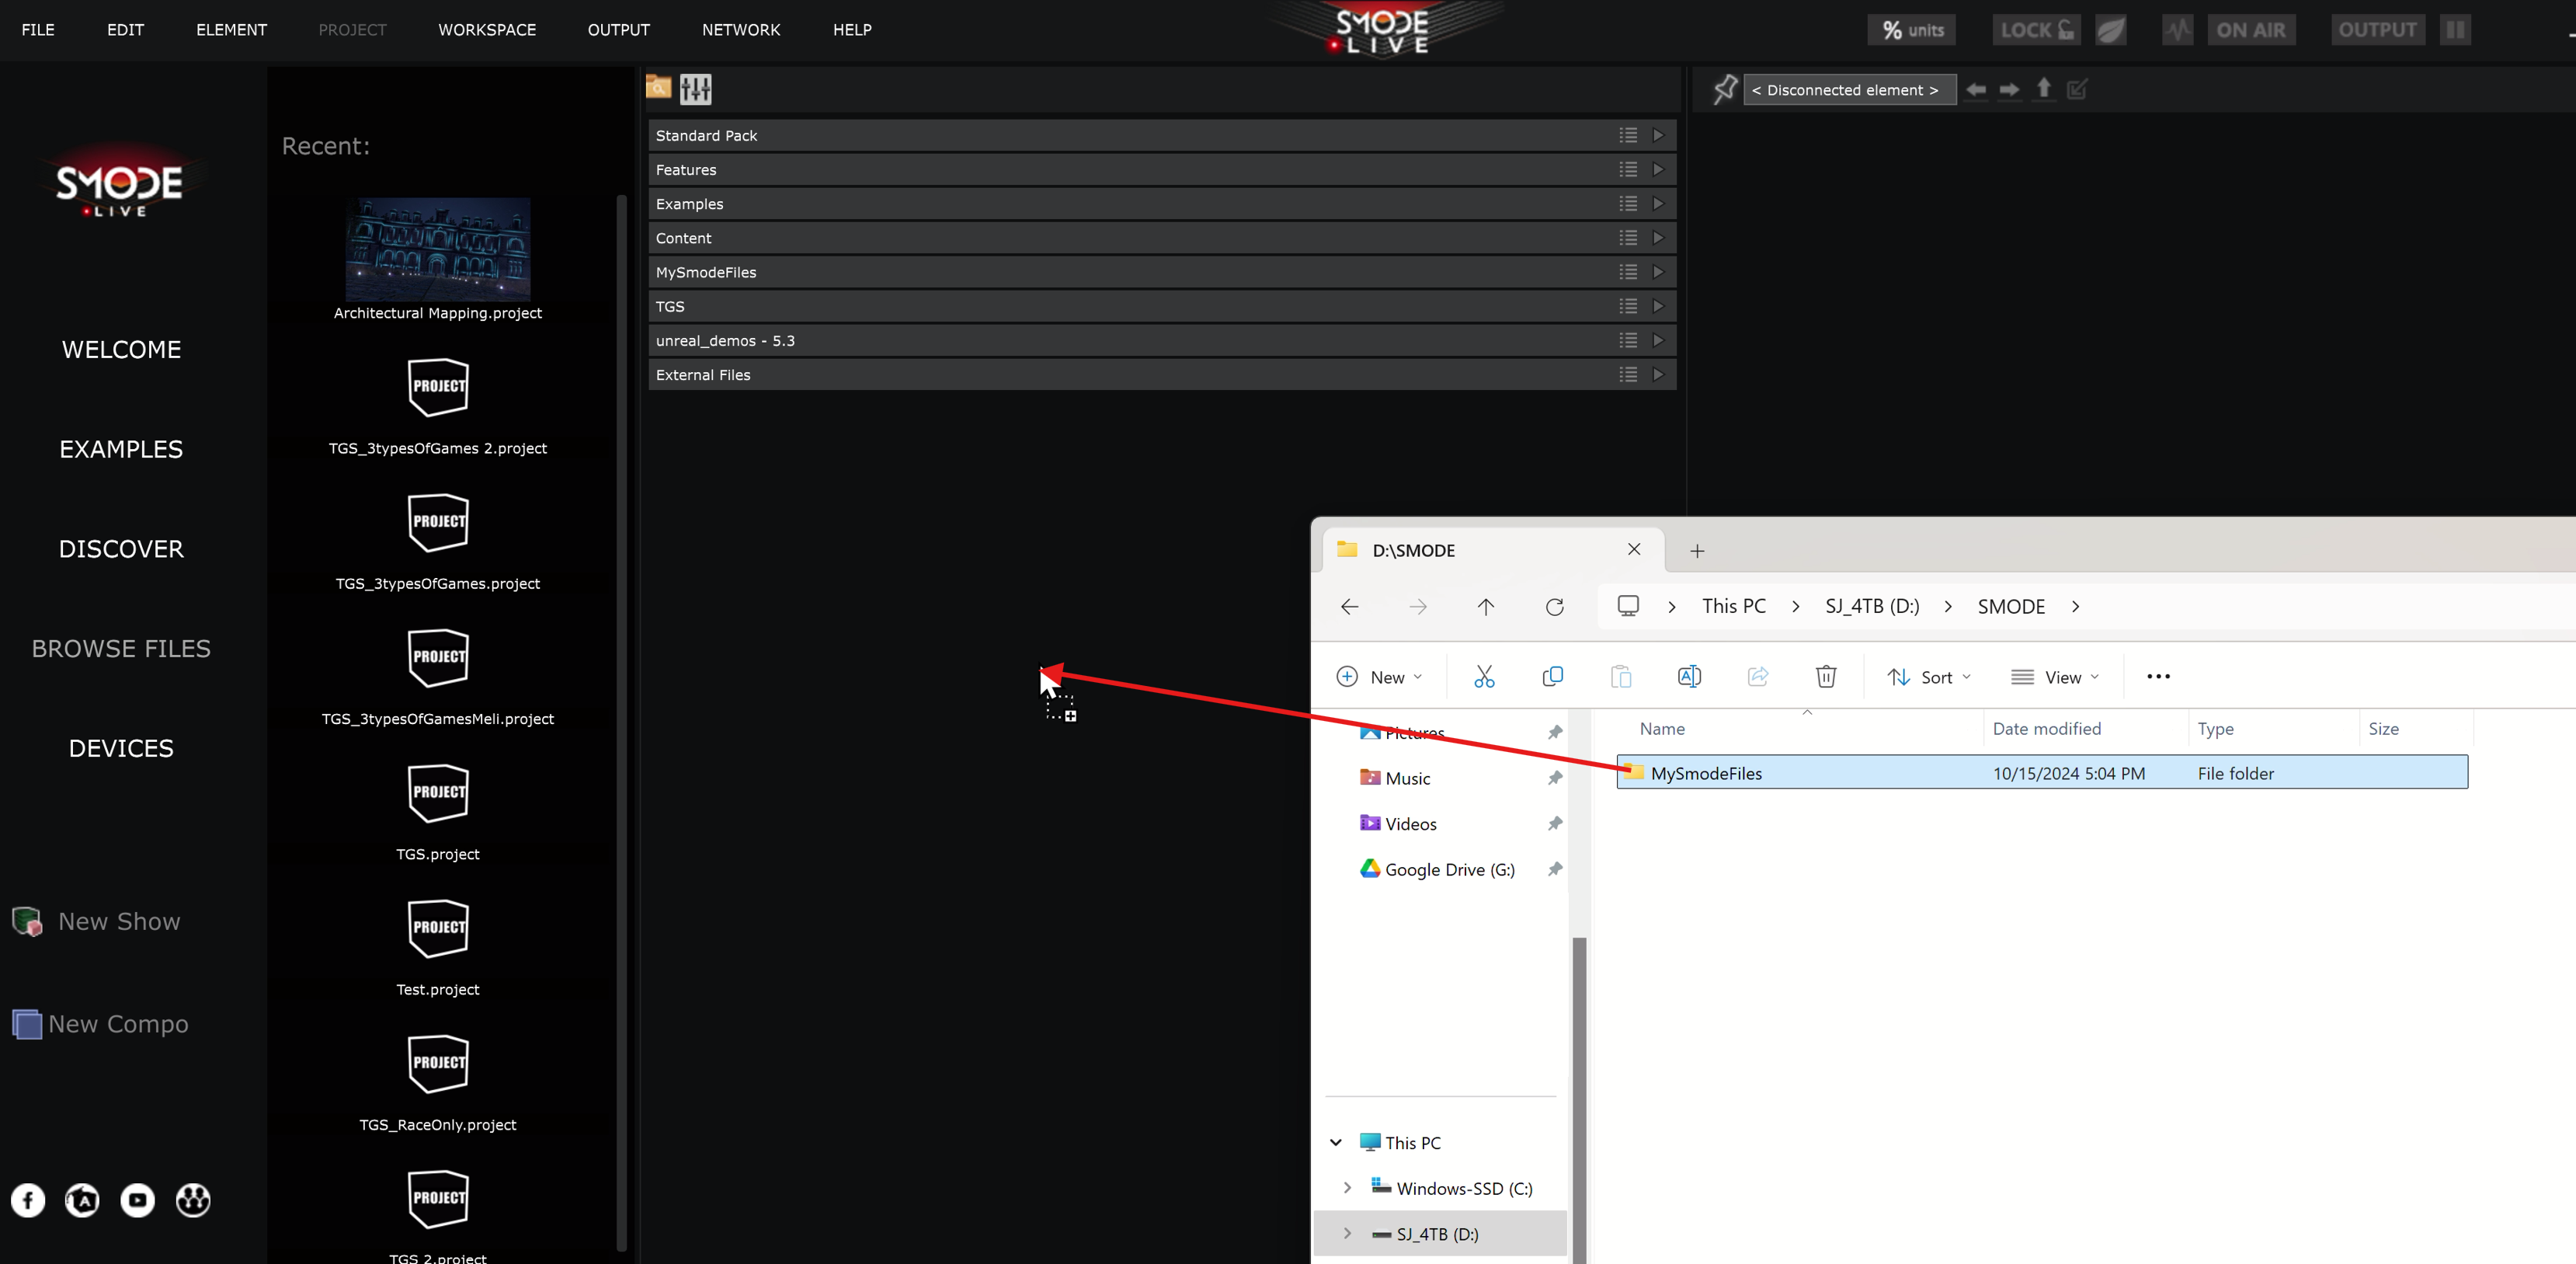
Or drag and drop a folder directly from your File Explorer :
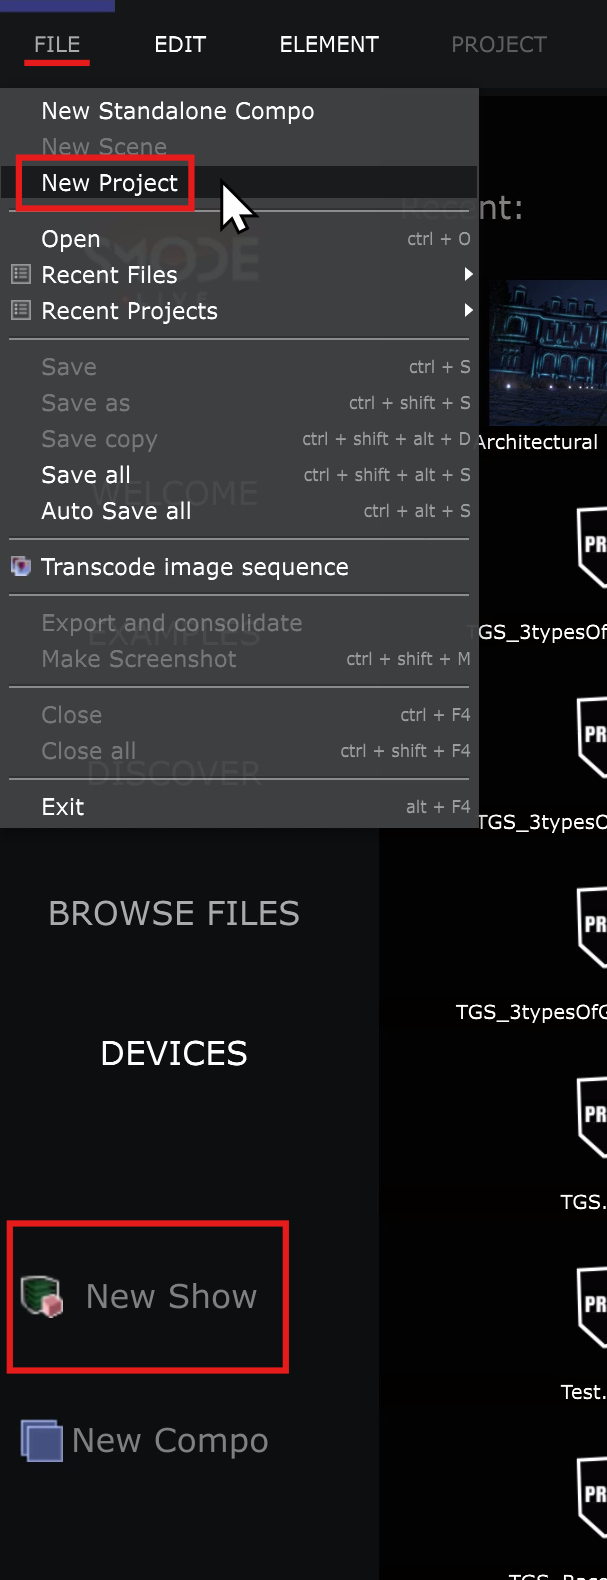
- Create a new Project: Create a new
Project
using the ‘File’ menu or use the button on the home page:
Choose a save location within the imported
Media Directories
:

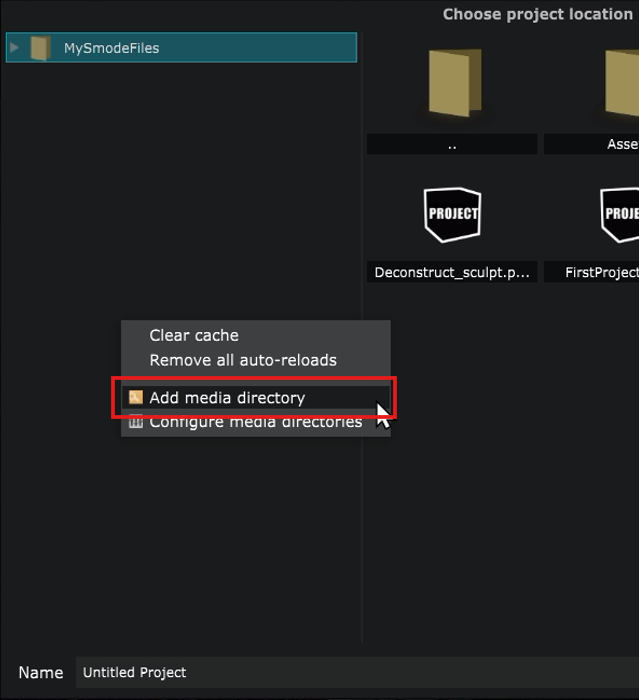
You can also add a new
Media Directories
at this step by right clicking and selecting ‘Add media directory’ :
- Once you have a Smode
 Compo
or
Project
running, check that you have the correct Requested Framerate.
Compo
or
Project
running, check that you have the correct Requested Framerate.
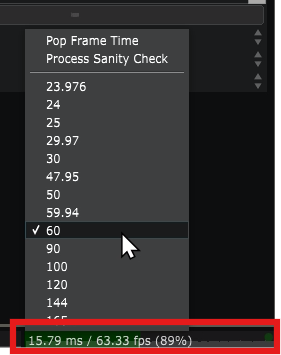
You can change it from the GPU Memory Meter
on the bottom right of the UI:
GPU Memory Meter
on the bottom right of the UI:
Or from the Preferences panel panel:
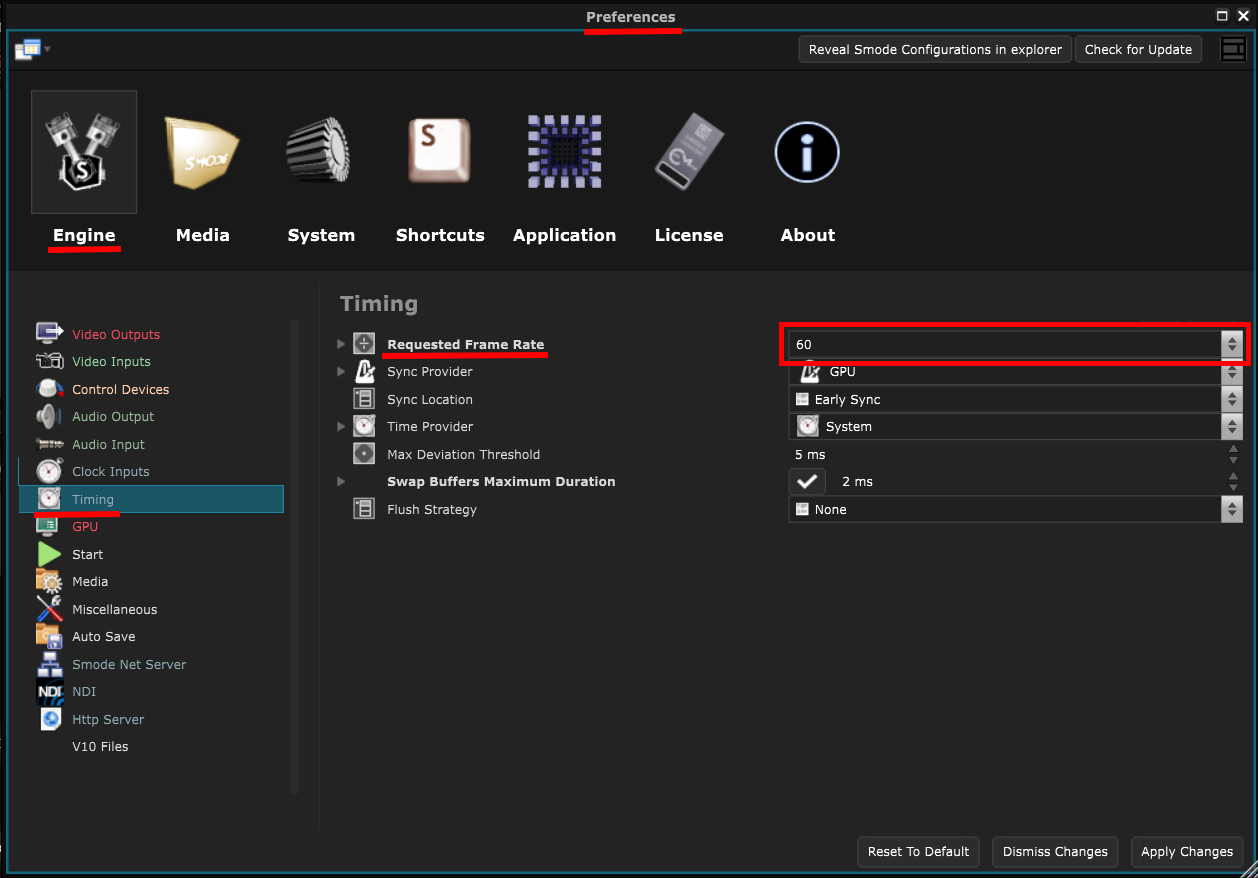
It should be the same as your display frequency (Hz), which is set in the Nvidia Control Panel .
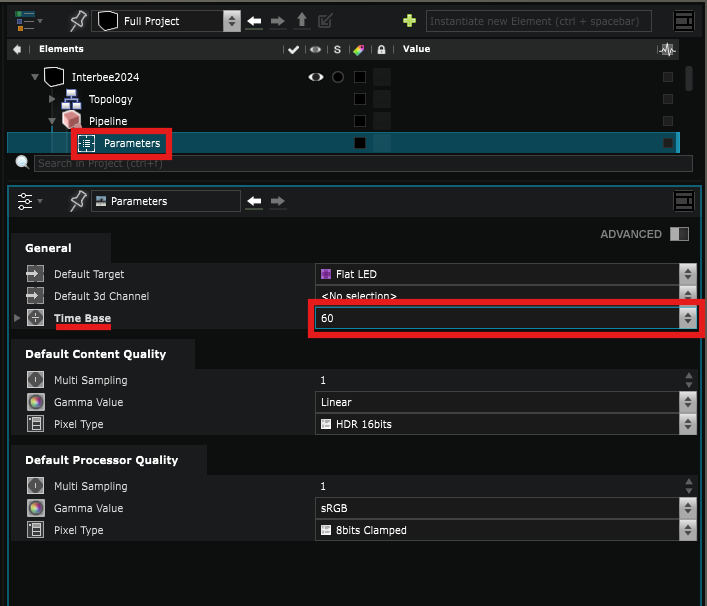
Also check in the
Project
Parameters that this project is using the same Time Base:
- Find more info on the YouTube channel:
-
User Interface:
-
Other interesting videos to check: