Unreal Key
Render a Unreal Key for Smode to use as Alpha Layer
It’s important for the name of the node to contain Smodevfx and not front or back.
The key needs a Unreal Color Viewport setup. Once you have the color viewport, you can create the second viewport.
Choose one key type and then do the Texture replacement (see later in this doc for how to do the Texture replacement)
Key types:
With Depth
In the Smode Rig you can enable the Use Depth checkbox, this will fill the FrontDepth texture:
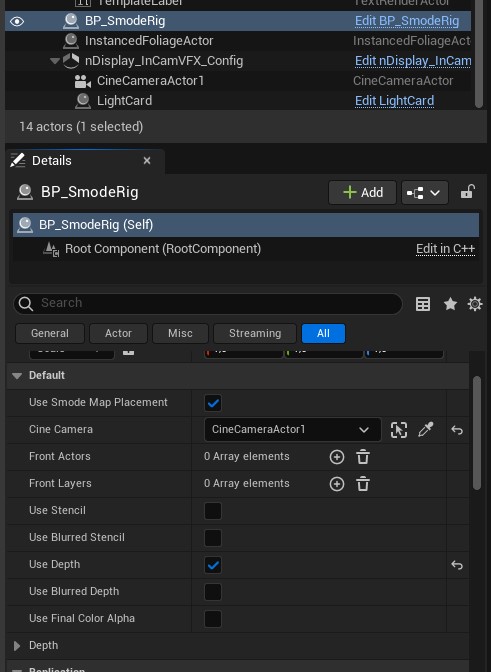
To control the depth value you can do this via the Smode rig in Smode (changing the setting property count to advanced).
With Depth and DOF
Like the depth you can just put a render target in the SmodeRig and then use that as the texture replacement of the second viewport.
Using the depth with the DOF will impact more the performance that just using the depth because we apply the DOF effect to the depth.
With Custom Stencil
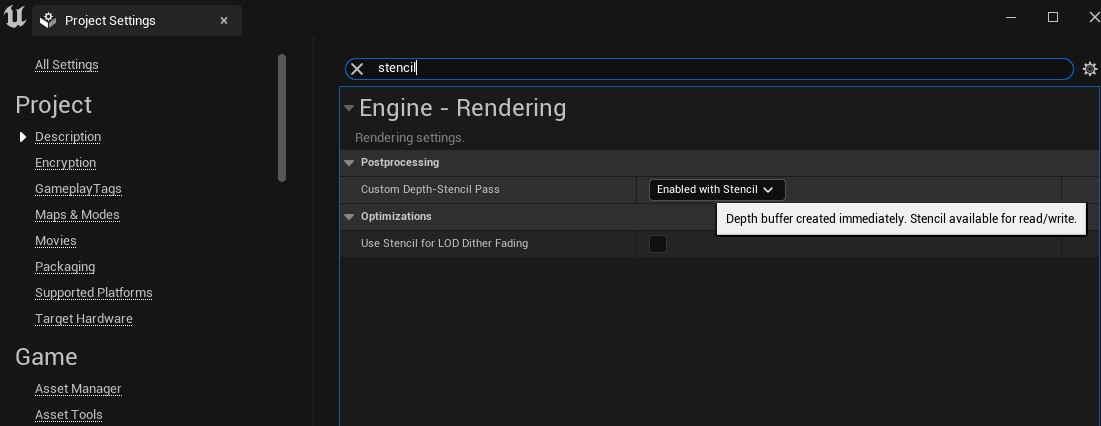
Enable custom stencil in the project settings :
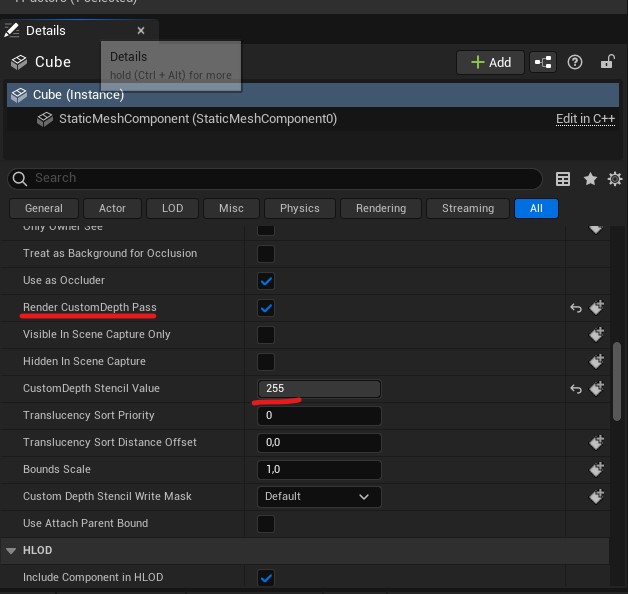
In your object, enable Render CustomDepth Pass and set the stencil value to 255:
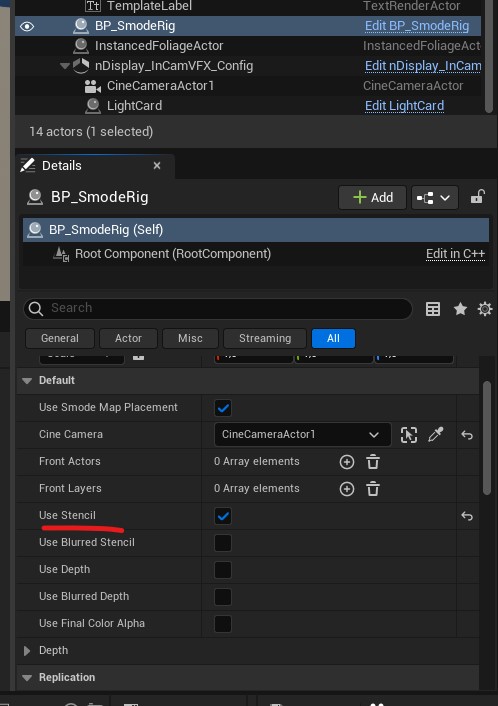
In the Smode Rig you can enable the Use Stencil checkbox, this will fill the FrontStencil texture:
With Custom Stencil and DOF
Like the custom stencil you can just enable the Use Stencil and Use Blurred Stencil checkbox in the SmodeRig, then use the FrontDOFStencil as the texture replacement of the second viewport.
Using the Custom Stencil with the DOF will have a grater impact on performance than just using the stencil, because the DOF effect is being applied to the stencil.
Rendering only specific Object and using the Alpha
This method can be used when using multiple nodes to render a Back and a Front, or when only doing Front
By calling the first viewport of your node front you can use the Front Actor list and/or Front actor Layers to make a selection of object that will be rendered in this front viewport:
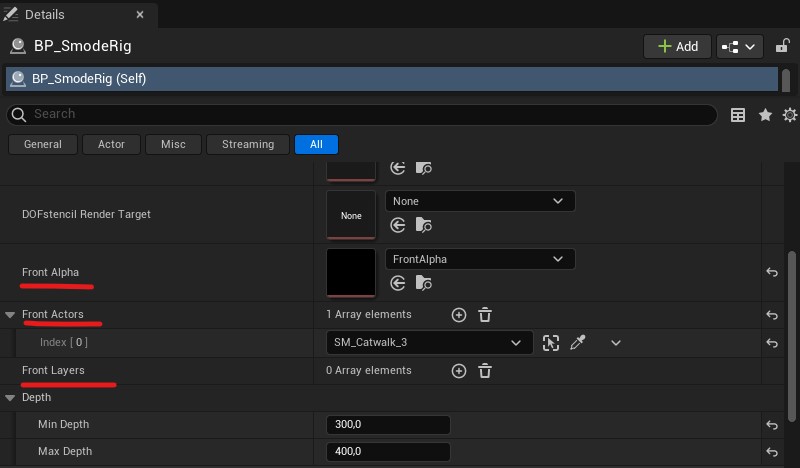
With that you can use the Front alpha render target as a texture replacement.
Texture replacement
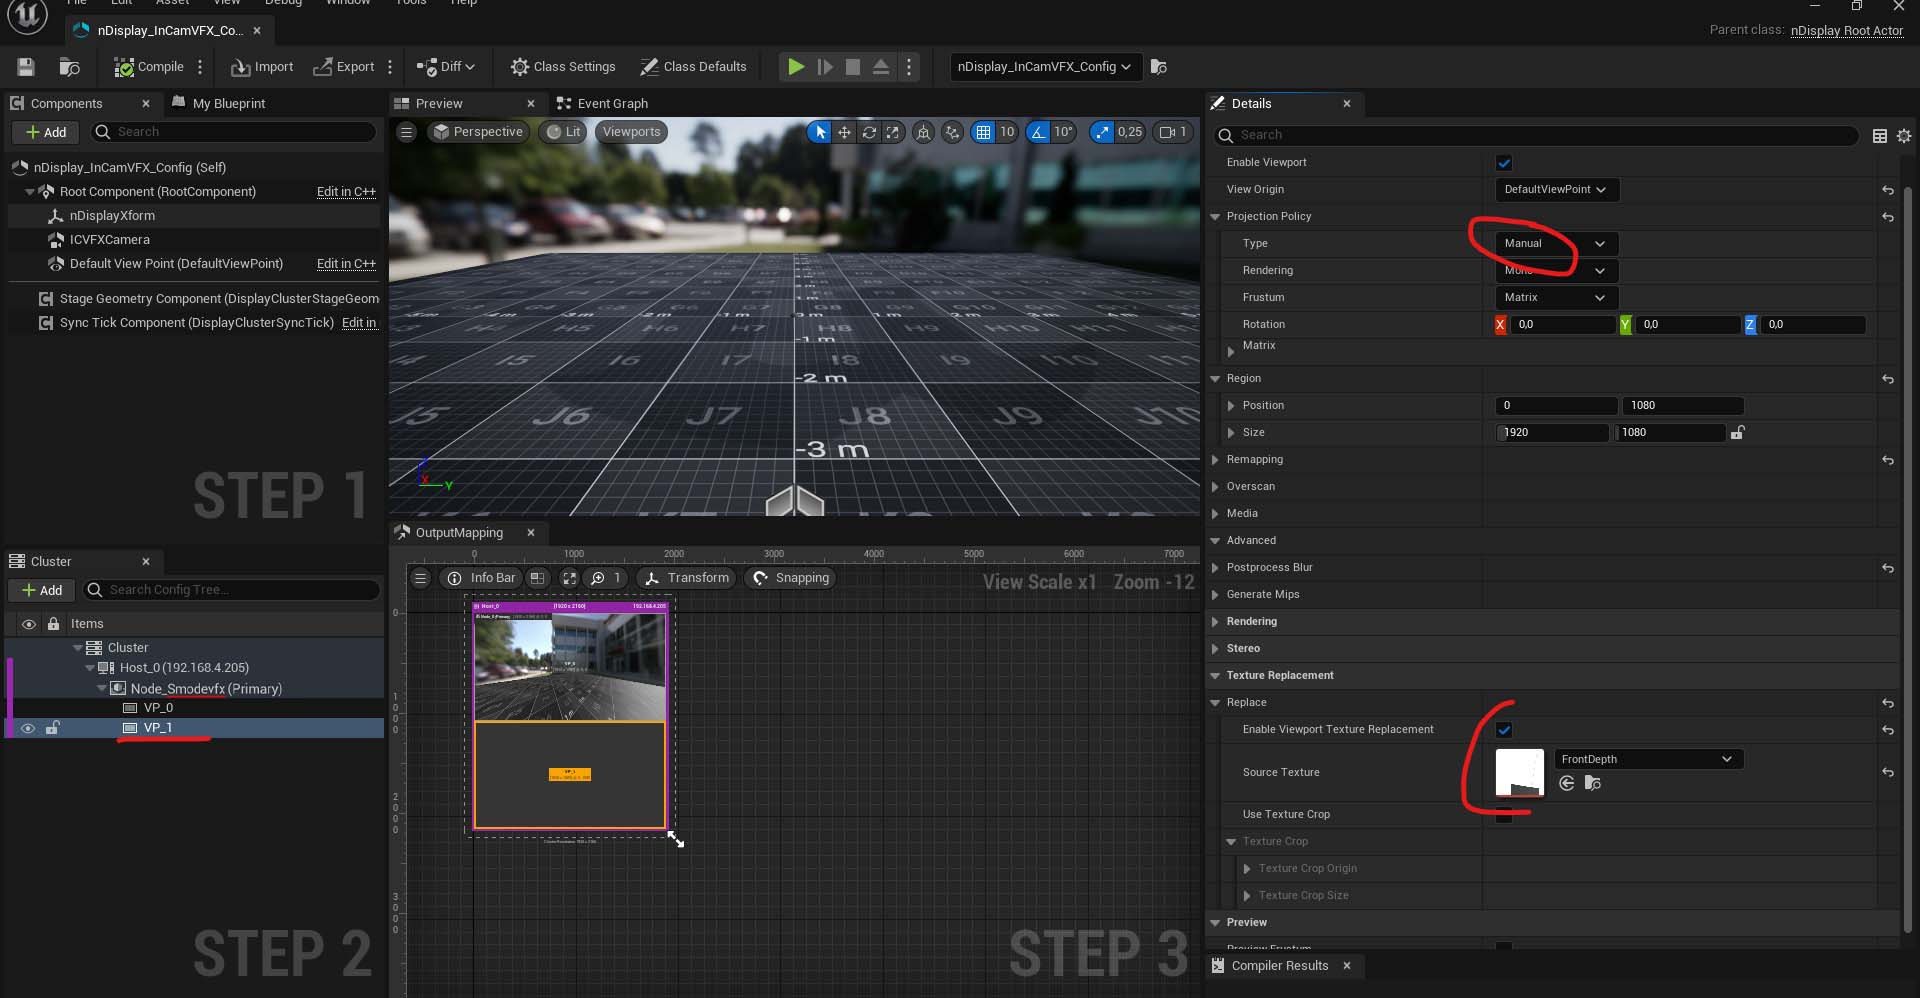
The render target that you chose in the SmodeRig needs to be used as a texture replacement for a second viewport in your nDisplay node.
This second viewport needs to have a projection policy type set to Manual.
It can be placed below the first viewport (matching your mosaic made in the NVIDIA control panel).
Do not forget to put Smodevfx in the name of the node for the texture copy to be active:
Nvidia Mosaic
When doing a Key you need to setup a Mosaic inside the NVIDIA control panel (generally 2 screens arranged vertically).
You can also use the https://www.nvidia.com/en-us/drivers/mosaic-utility/
and use the following command line :
configureMosaic.exe set rows=2 cols=1 res=3840,2160,60Limitations
There are, of course, limitations to the depth and stencil key techniques. Perhaps most apparent is that if this technique is used with either Temporal Anti-aliasing (TAA) or Temporal Super Resolution (TSR), then the edges of our mask will jitter slightly as the temporal jittering shifts the screen around ever so slightly.
The other limitation is that this technique won’t work on translucent materials, since those are rendered in a separate gbuffer. If you were to try this technique with the Separate Translucency scene texture, you’ll end up bringing forward all of the accumulated translucency within the bounds of your selected primitive, which may not be desirable.
Be carefull if you have multiple GPUs in your server because Unreal may try to run the different viewports on different GPUs, even on the integrated GPU of the CPU.