Track Block
Animate video Transport inside a Track
A track block allows a Video or any layer with a track (such as
 Noise layer
or a
Noise layer
or a
 Compo
with a Main timeline)
Compo
with a Main timeline)
to be cut, mount and time-remapped inside a
 Timeline
.
Timeline
.
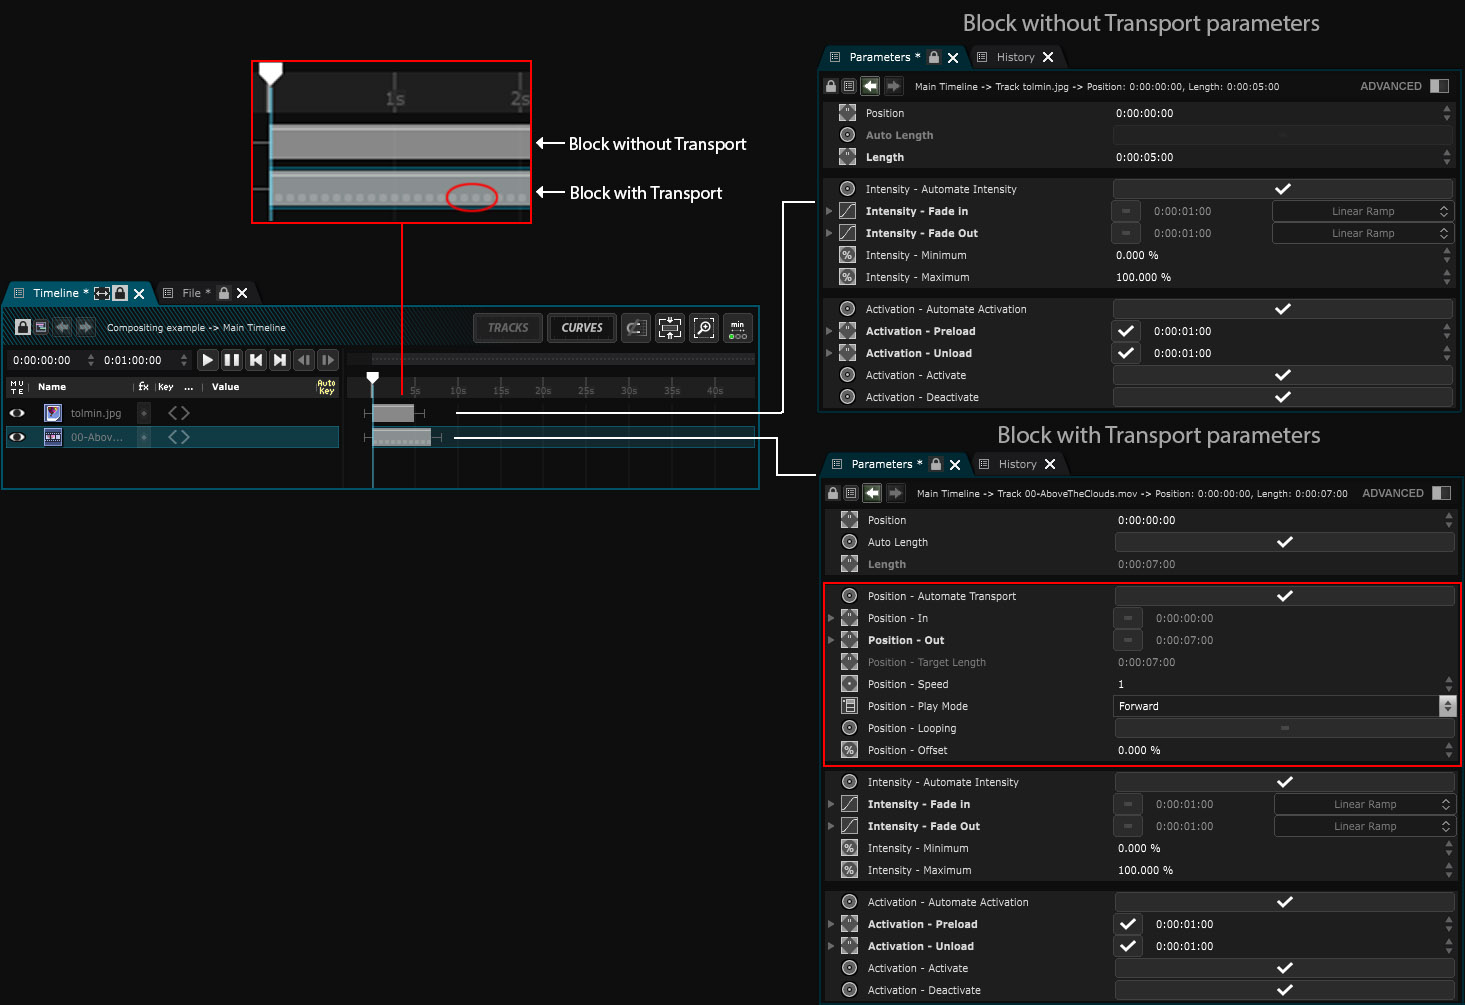
Note that there are 2 types of blocks:
-
Blocks with Transport can be Video files, Noises or a
Compo
containing a main Timeline. In this case its transport will be bind to the timeline in which it is located. -
Blocks without Transport are still layers, such as an Image file. It can also be a video file played with a
 Standalone Player
and then merged into the timeline as Standalone. Blocks without transport have embedded activation and a fade in / fade out.
Standalone Player
and then merged into the timeline as Standalone. Blocks without transport have embedded activation and a fade in / fade out.
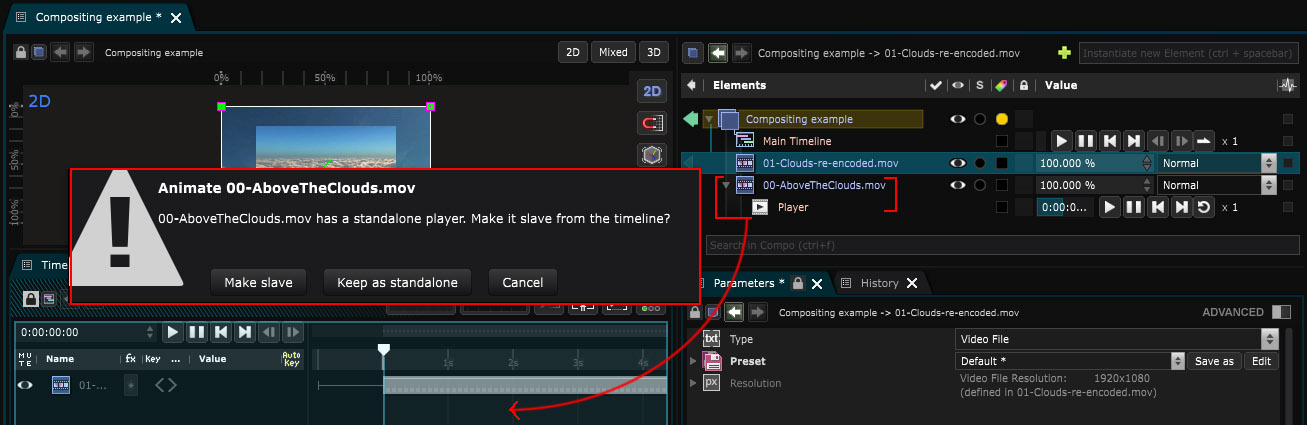
When a standalone video is merged into the timeline, you have 2 choices:
-
Make slave will create a block with transport inside of the timeline and destroy the
Standalone Player
. -
Keep as Standalone will create a block without transport (so only activation and opacity will be animated inside of the timeline).
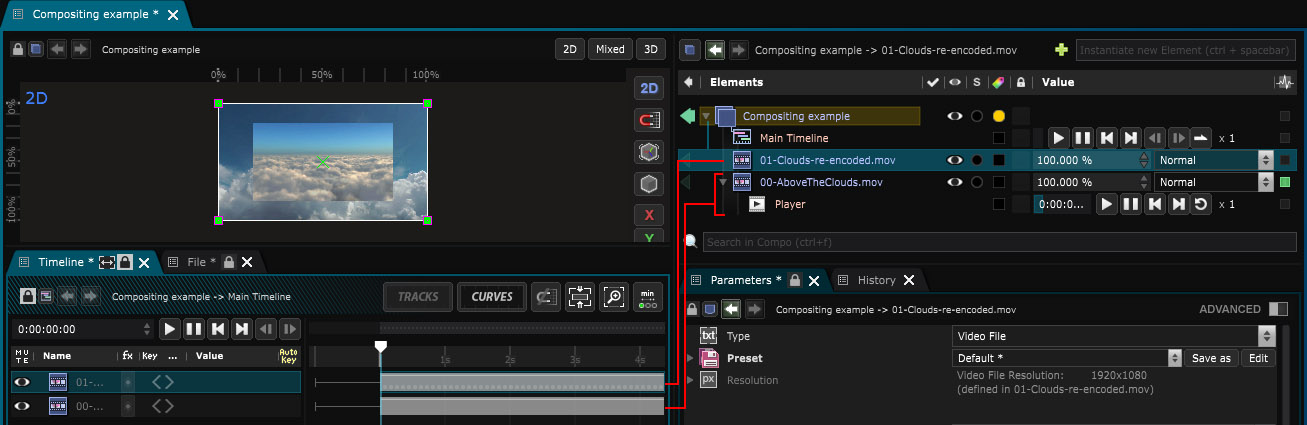
When child elements of the blocks are also animated, they will appear as a schematic representation when the block is closed:
A block is an easy way of animating for basic purpose such as fade in/fade out.
When you select a block inside of the timeline you can access its parameters.
It can be looped, played in ping pong, backward or forward. It can be cut and duplicated, accelerated or slowed down and even time-remapped.
Here is all block manipulations that will come in handy:
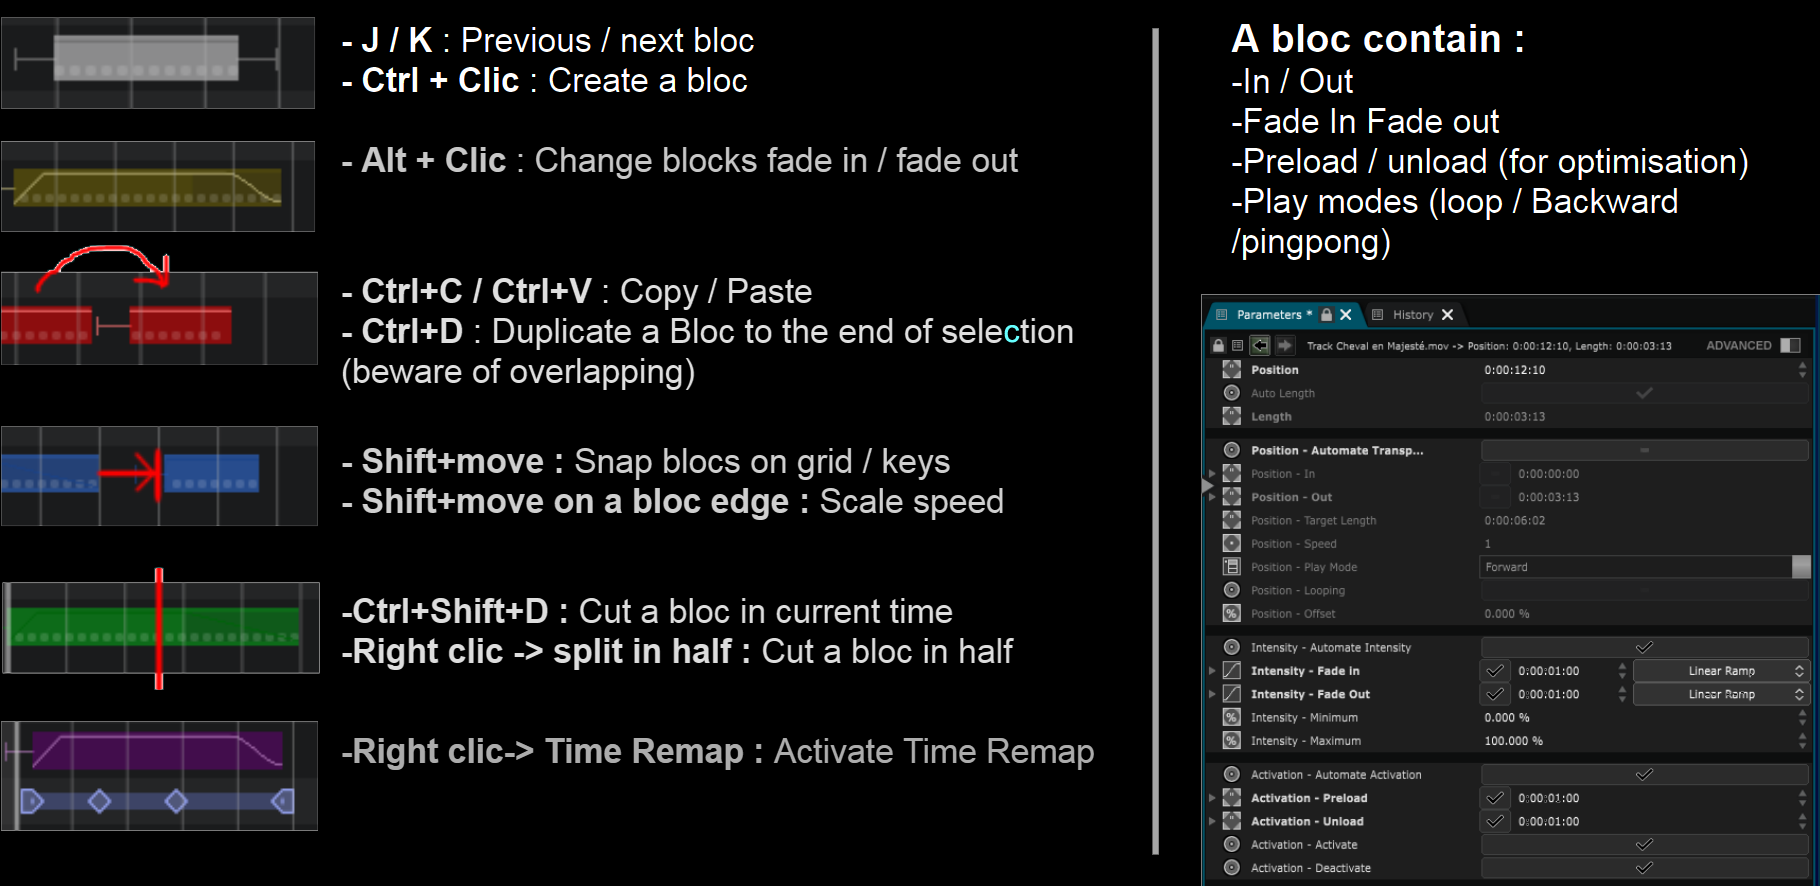
Time Remapping
One particular thing you can do with blocks is to time-remap them.
Time remapping will only work on blocks with a transport.
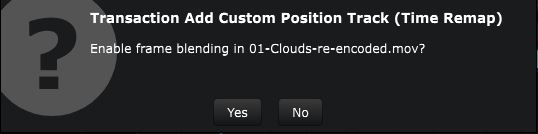
To activate the time remap, right click on a block and choose “Custom Position Track (Time Remap)”. Once you do that, you can activate the frame blending (you only have this choice when doing Time remapping over a
 Video File
Layer).
Video File
Layer).
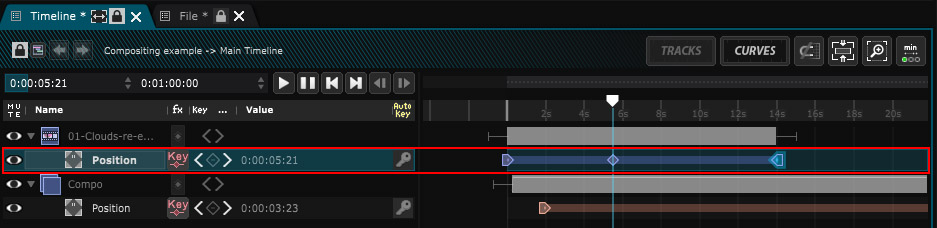
Once the time remapping is done, you can notice that the little dots indicating that the block contains a transport have disappeared. That’s because the transport of the video will directly be animated through the newly created Track below the Block.
Smode will automatically create a Key at the beginning and another at the end corresponding to the start/end time of the Layer.
All you have to do is to add other keys with [Ctrl+Click].
Time remapping is only animating a Layer Transport with a
Function Cue .
To deactivate the time remapping, right click on the block and uncheck the “Custom Position Track (Time Remap)” option.
Or if you simply deleted all the time-remap keys, be sure te reactivate the “automate transport” option inside of the Block parameters:

You can see the little dots reappear inside of the block which means that it will now behave as expected.
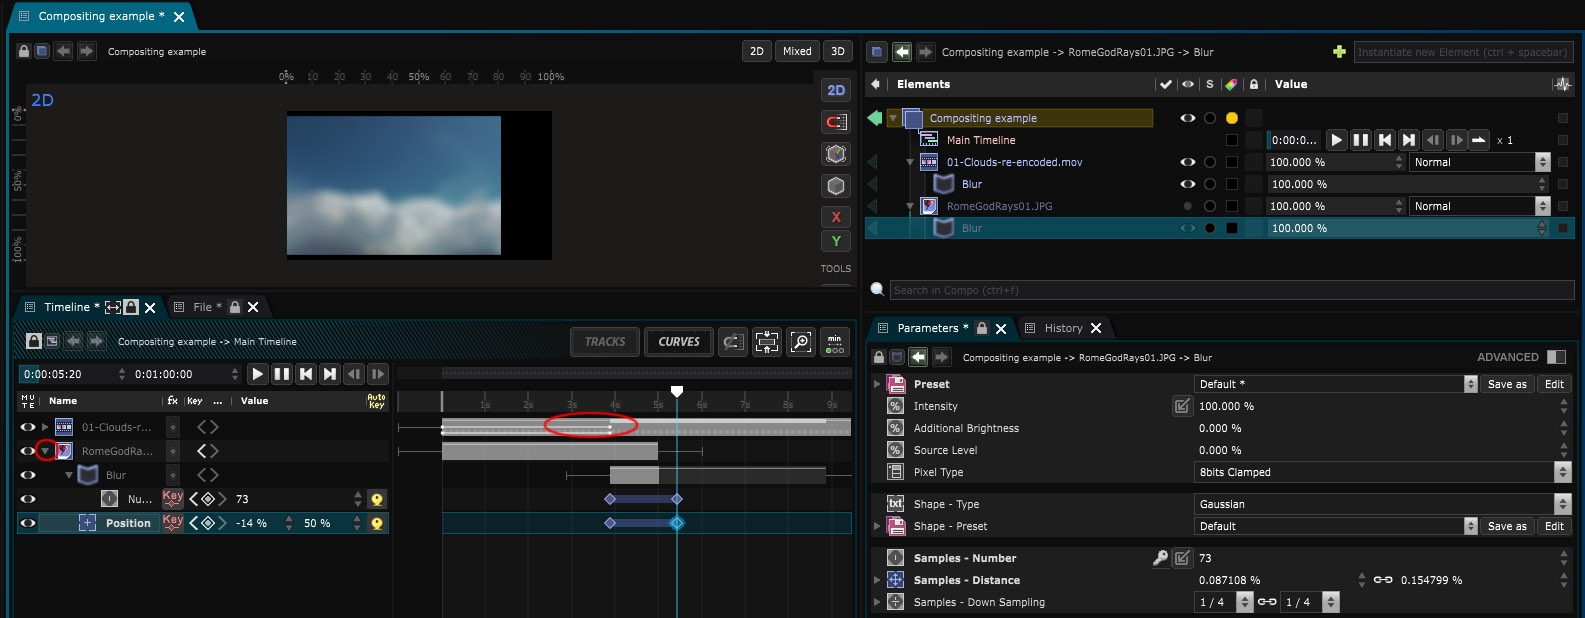
Here is an exampe of basic block manipulation and time remapping over a video block:
Variables:
- Position: Position of the track block
- Auto Length: Auto length of the track block
- Length: Length of the track block
- Footage: Footage of the track block