XR - Calibration procedures
Calibrate your XR Studio
XR calibration needs a specific XR/AR license.
If you’d like to try out these features to decide whether you want to purchase an XR/AR license, please contact us.
The calibration procedures aim to ensure a cohesive image while doing virtual production and set extension, by establishing a visual bridge between the real world (captured by the camera) and the virtual world (generated by Smode).
It is considered the most critical aspect of XR projects.
To initiate the calibration process, ensure you have a
 Video Input
connected to the input camera device.
Video Input
connected to the input camera device.
In the
 Stage
, click on the
Stage
, click on the
 XR Calibrator
icon on the
XR Calibrator
icon on the
 Physical Camera
.
Physical Camera
.
In the
XR Calibrator
window, select the right
Video Input
and point the camera at the LED screens.
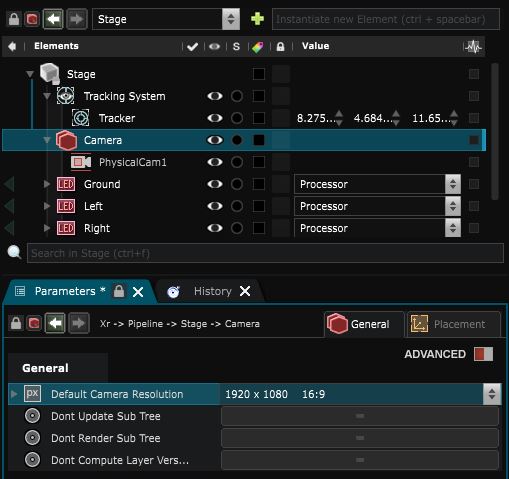
Ensure your
Physical Camera
is within a
 Stage Elements Group
and set the appropriate resolution in the Group’s parameters to match the real camera device.
Stage Elements Group
and set the appropriate resolution in the Group’s parameters to match the real camera device.
Also, ensure that you follow the correct layer order as explained in the topic:
Camera Tracking
.
There are three different calibrators:
-
XR - Latency Calibration : Automatically assesses the frame delay between sending an image to the LED screens and receiving it back through the camera.
-
XR - Geometry Calibration : Adjusts the placement of the
 Tracking System
, corrects the position of the
Tracking System
, corrects the position of the
 Tracker
and modifies the Camera Model of the
Physical Camera
.
Tracker
and modifies the Camera Model of the
Physical Camera
. -
XR - Color Calibration : Generates a Lookup Table (LUT) that can be applied later on the set-extension with a
 Smart Lut
.
Smart Lut
.
It’s important to follow the order of these calibration steps.
The Geometry calibrator relies on information from the Latency calibration.
Then, the Color calibration needs the information provided by both the Geometry and Latency calibrators.
Therefore, the calibration must be done in the following order:
- Latency
- Geometry
- Color
Before proceeding with the calibration, we recommend reviewing the topic: Sanity Check for XR setups .