Polygonal mask
2D Mask - Define a 2D mask with a polygonal selection
This mask is defined through a polygon and a feather parameter.
To edit the points of the polygon, you need to use the
Edit Mode
of the
 Viewport
:
Viewport
:
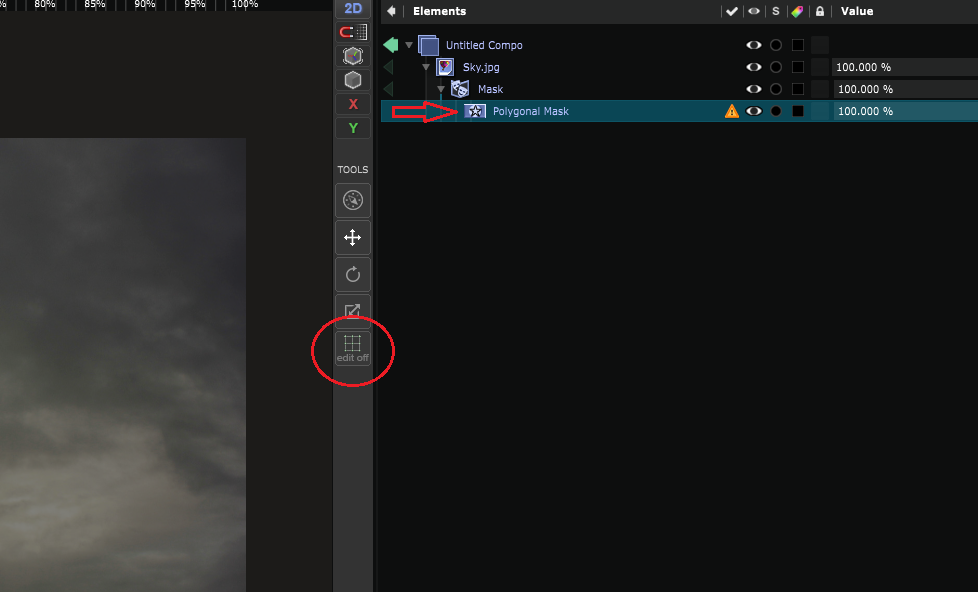
The
Edit Mode
is relevant to the currently selected element in the
 Element Tree
, so take care that the polygonal mask is currently selected.
Element Tree
, so take care that the polygonal mask is currently selected.
Now, press [CTRL] and click in the
Viewport
to create points:

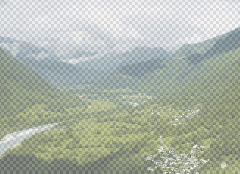
When there are more than two points but the polygonal mask is not closed, it will display a 50% overlay on the whole image.
To close the mask, [CTRL] + [CLICK] on the first point:

The points of the polygon can be moved at anytime by dragging them in the
Viewport
.
The only necessary thing is to be in
Edit Mode
with the polygonal mask currently selected.
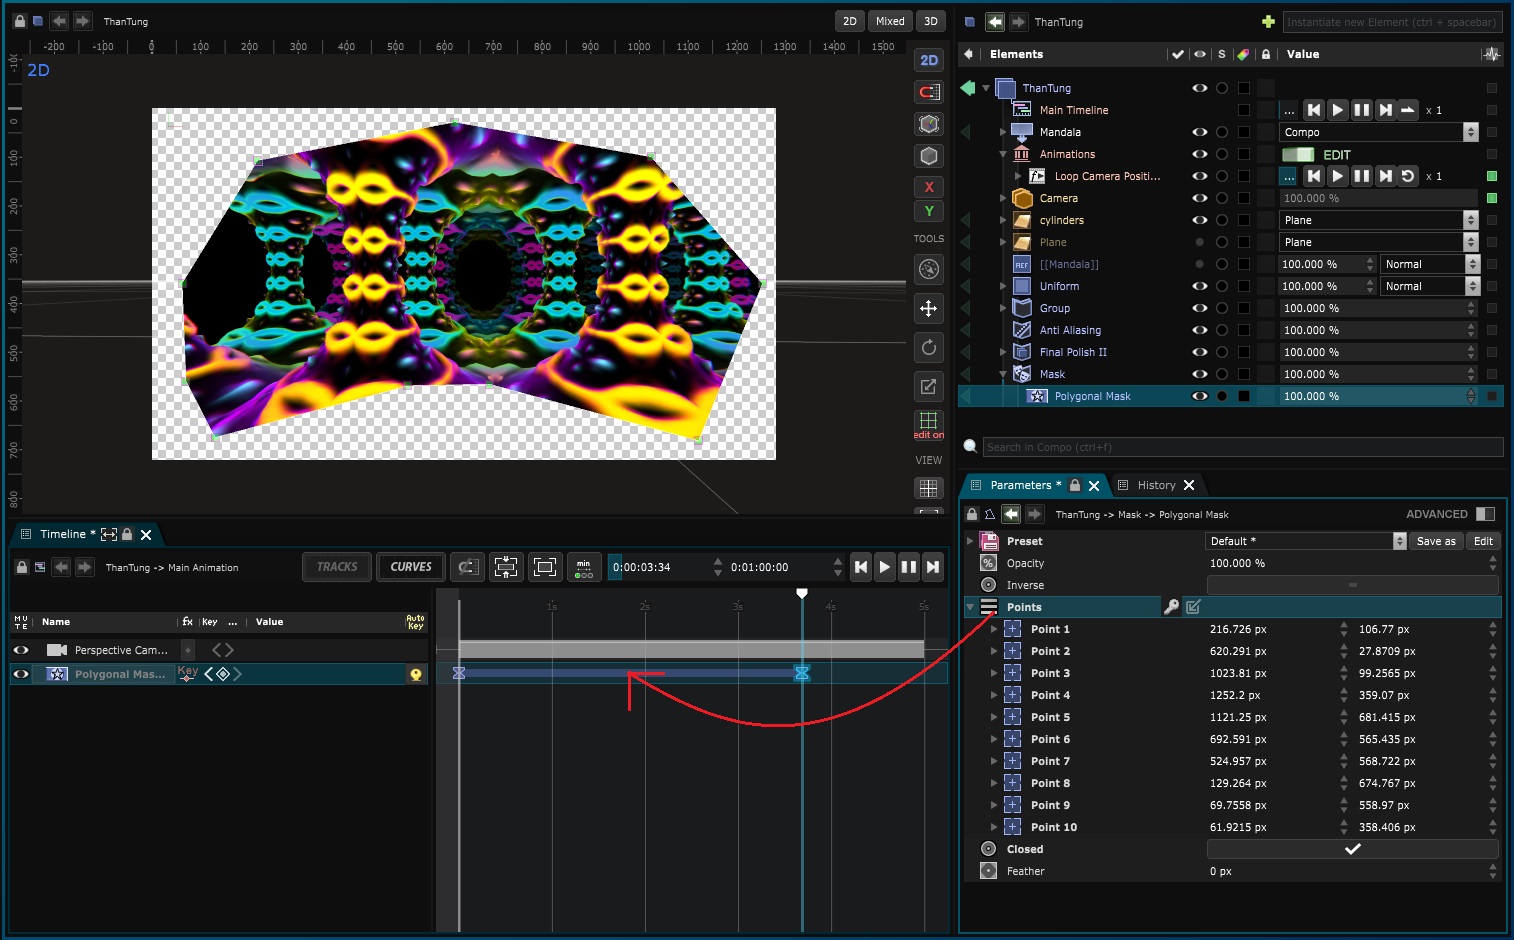
To animate a polygonal mask , just drag and drop the “polygonal mask points” parameter inside of the
 Timeline
. Now each key you’ll add on this parameters will concern every point of the mask :
Timeline
. Now each key you’ll add on this parameters will concern every point of the mask :
You could also animate all the mask by using
 Exposed Parameter
on the “Points” parameters.
Exposed Parameter
on the “Points” parameters.
Variables:
- Points: Defines the polygonal selection and the position of the mask points in px or in %
- Feather: Amount of feather
Python
Oil.createObject("PolygonalTextureMask")