How to Make a SmodeNet Project
A SmodeNet Project is a sharing environment of multiple SMODE engines that run the same project. To render large resolutions or for a Main, Spare setup
Requirements
- The media directory containing the project should have been configured with the same label, on all servers beforehand.
- Other Media directories owning the media should be configured the same way
- All medias referenced by this project should be manually replicated to other machines with external tools, such as https://freefilesync.org/ for instance.
Setup
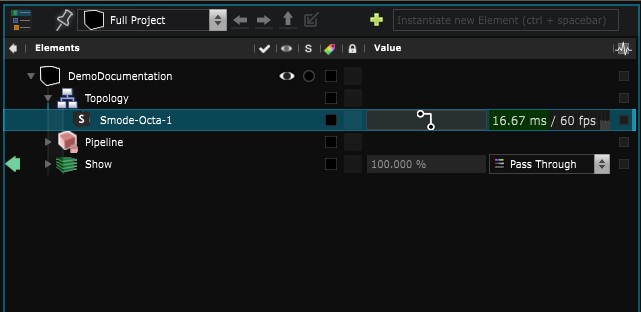
- On one server go to your topology and verify that you only have the server you are curently working on:
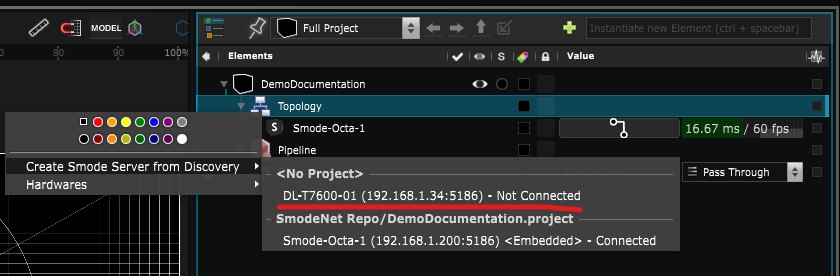
- You can start adding other
 Smode Server
to the topology :
Smode Server
to the topology :
- After adding all your servers they do not directly Run the projet. You’ll need to push the project to them :
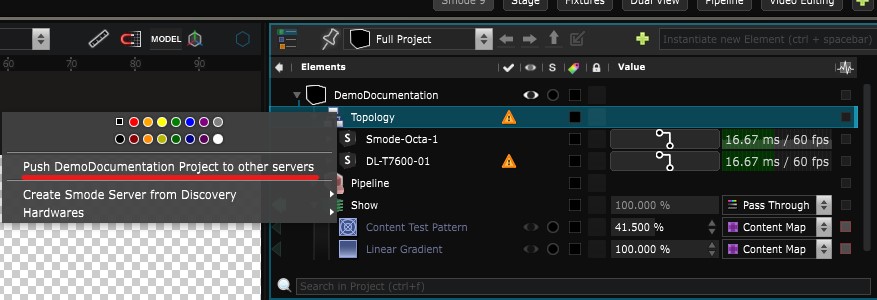
Now your project is setup to run in a network configuration, and every connected
Smode Server
will receive the change made on the project.
Also each server will render the part of the content that is needed for its output (called the Per Server Loading) :
On a computer where you want to see all the content : enable the option “Disable Per Server Content Loading” in the network part of Engine Preferences .
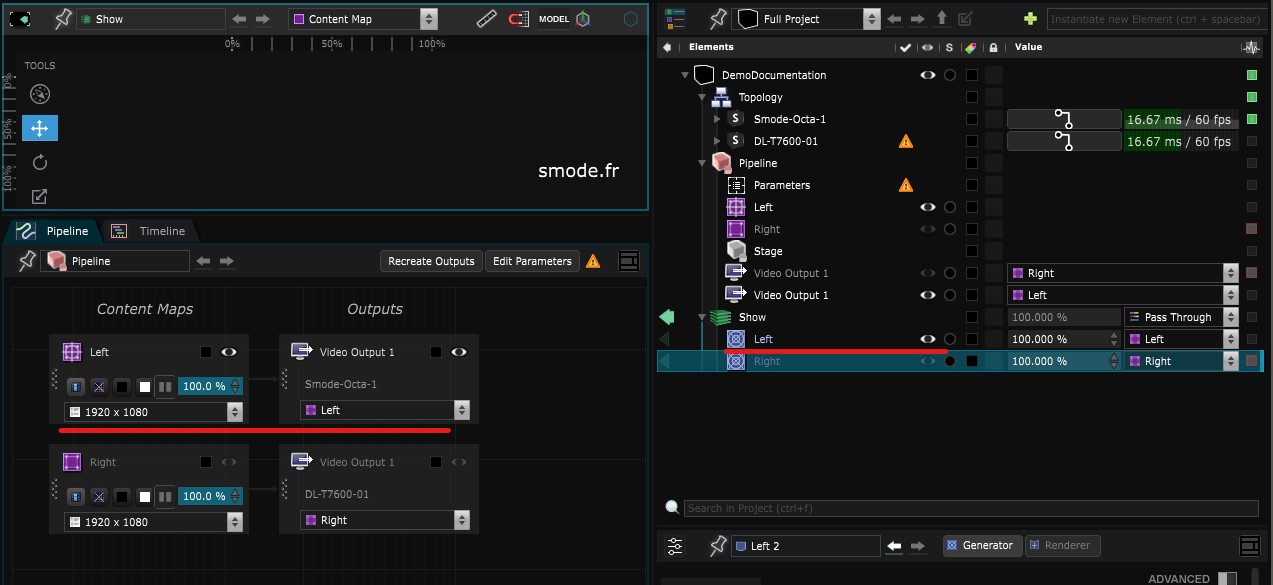
Creating the Output in the pipeline
Before creating your output in your
 Pipeline
, you’ll need to set the Master in the
Topology
.
Pipeline
, you’ll need to set the Master in the
Topology
.
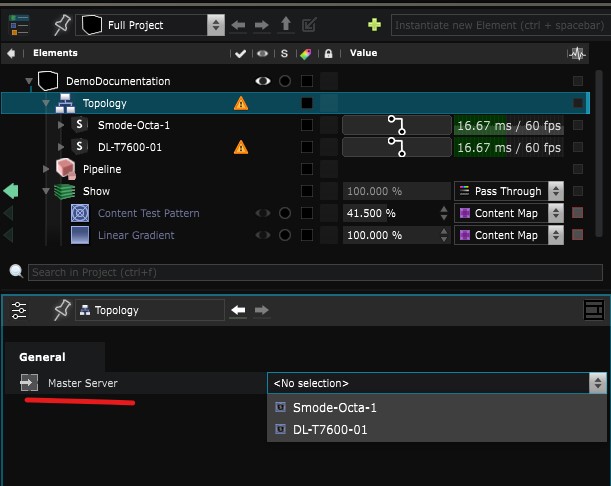
Then you can click the recreate output in the
 Pipeline Editor
Toolbar.
Pipeline Editor
Toolbar.
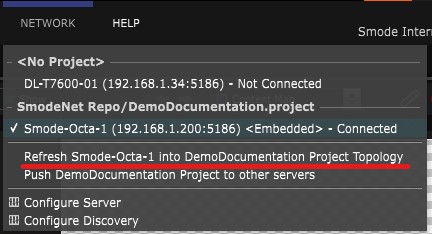
If you have created your Device and it doesn’t appear in the topology, refresh them using the option in the Network dropdown menu from the concerned computer.
Main and Spare
If you want to set a computer as a backup for another, and compute the same
Pipeline
output. You can set the ‘spare of’ option, in the
Smode Server
.
There is no automatic fail detection! You will need to switch from the main to the spare manually, with a switch grid for example
Show Playback
For your show to be in perfect sync you should
 Bind the Show Timelines to Timecode
.
Bind the Show Timelines to Timecode
.