Video File
2D Generator
-
Generate an animated image by playing a video file. Play it either with its
Transport
or from a
 Timeline
(by drag n dropping the layer inside it)
Timeline
(by drag n dropping the layer inside it)
Supported video formats
All videos must be encoded in constant bitrate
Allowed formats:
-
Hap / Hap Alpha / Hap-R: Compression format developed for real time. Read directly by the GPU. For better performances, specially if you have many videos playing at the same time, use the Smode Tech plug-in here : HapQuickTimeSetup-SmodeTech.msi. If you want to know everything about hap, go check the Export in Hap from third party softwares part of the documentation. This will allow to encode the HAP in 16 chunks, so they can be computed by up to 16 cores of the processor.
-
Prores : Standard / Hq / Lt / 4444 / 4444xq (for quality)
-
Quicktime animation
-
NotchLC or quicktime mjpeg codec with respect to certain conditions
-
WMV
Experimental formats:
Refer to
Media
topic (on the bottom of the page) to learn how to read almost every video format and encode them into Hap directly inside of Smode.
Video Export:
Refer to
Export a Video
topic for further information.
HAP-R
You can import video file encoded in hapR. This codec provides better quality gradients playback.
Import a Video Layer
To create a video layer, simply drag and drop the video file from the file tree into your
 Compo
:
Compo
:
Learn more about 2D compositing by reading: Basics of 2D Compositing .
Play a Video Layer (either as a Standalone or inside a Timeline)
There is a
Transport
parameter in the video layer to control the playback of the video (play, pause, playback speed, etc).
The
Transport
shows the current displayed frame and the video file’s duration in the SMPTE time format.
To animate the video, the first option is to create a
 Standalone Player
:
Standalone Player
:
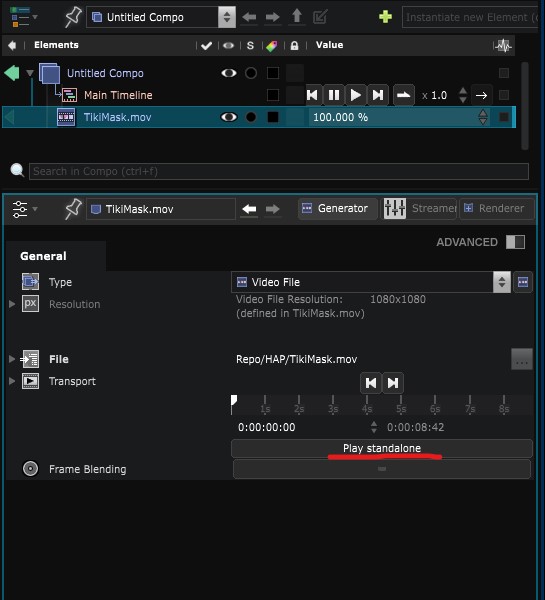
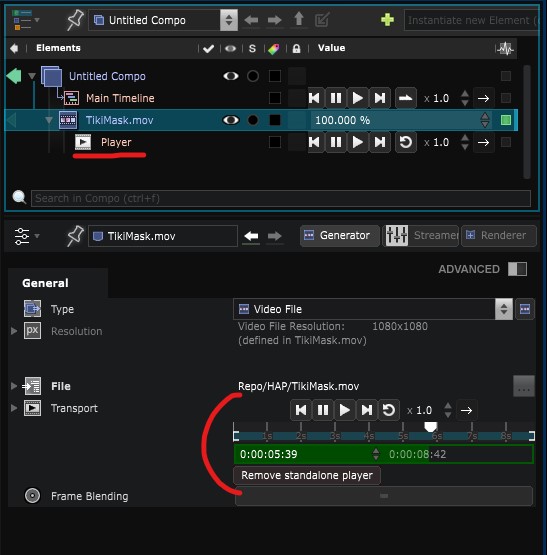
Which will be created just below the video layer:
Otherwise, the video can be played by a
Timeline
. To do this, drag and drop the video layer into a
Timeline
and it will create a
Track
, and inside that track a
Track Block
:
Note that in the second case, there is a shortcut to simultaneously create a video layer and animate it inside the timeline by drag and dropping a file video directly into the timeline.
Note that anytime Frame Blending can be activated inside of a Video Layer inside of its parameters :
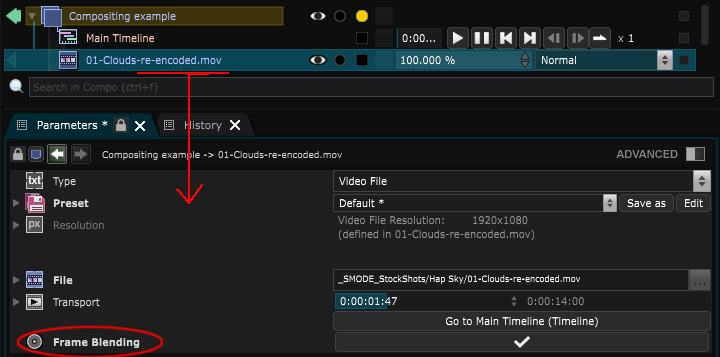
Learn more about animation by reading: Animate content .
-
You can also use a video profiler over a video. Go check the Issues with video Playback topic in the How To section for further information.
-
To enhance Time remapping, go check that chapter inside of the Track Block part of the documentation.
/!\ NEVER duplicate a video file inside of your
As seeking through the same file in different times is a hard drive killer and may generate important performances losses at
Compo
re-opening.
-If you want to use a Video several times, then use a
 Group 2D Renderer
and add renderer (simply select the video layer and [Ctrl] + [Shift] + [A] ) or use a
Group 2D Renderer
and add renderer (simply select the video layer and [Ctrl] + [Shift] + [A] ) or use a
 Shared Element
-If you want to use a video file with delay, you can use a
 Frame Delay
which will be exhausting and non recommended for your peace of mind. Or use some sprite-sheets tricks.
Frame Delay
which will be exhausting and non recommended for your peace of mind. Or use some sprite-sheets tricks.
Learn more about 2D compositing by reading: Basics of 2D Compositing .
Variables:
- File: File
- Audio Layer: Index of the audio stream in the file (-1 for none by default. Can be used to change the audio source (language, track… ). Should not be confused with the concept of channels (Left, Right…) video file
- Video Layer: Index of the video stream in the file (zero by default, can be used to change the video source (Camera, track… ) video file
- Transport: Transport
- Thread Count: Number of CPU threads to decode the compressed video stream.
- Frame Blending: Blends previous and next frame of the video to avoid stuttering when fps is less or not a multiple of the display fps. Add GPU costs.
-
Streamer:
The
 AVStreamer
settings of the video file .
AVStreamer
settings of the video file .
Python
Oil.createObject("VideoFileTextureGenerator")