Create a stage pre-visualization
How to display your stage simulation through an Output and export it as a video
You already have a
 Stage
simulation created in SMODE. Now we are going to make it prettier through a
Stage
simulation created in SMODE. Now we are going to make it prettier through a
 Processor
to display it through an output and / or export it as a video.
Processor
to display it through an output and / or export it as a video.
This topic is a part of the " Create a full multi LED pipeline from scratch " tutorial.
Create a Processor and import pipeline Layers
To create a pre-visualisation you have to create a new
Processor
:
If you already made 3D
Stage
simulation, then you can get it back inside the processors as a
 Pipeline Layer
:
Pipeline Layer
:
-
 Stage Preview
to get the preview of your stage without stage lighting
Stage Preview
to get the preview of your stage without stage lighting -
 Stage Simulation
to get the preview of your stage with stage lighting
Stage Simulation
to get the preview of your stage with stage lighting -
 Stage Lights
to only get the stage lighting
Stage Lights
to only get the stage lighting -
 Stage Display
to work with a
Stage Elements
like an independent
Stage Display
to work with a
Stage Elements
like an independent
 3D Generator
And create a
 Camera
:
Camera
:
From now on, you have every compositing tool available to make this stage pre-visualization look prettier. You can also import some
 3D File
to add details (such as stage elements / singers / artists etc.)
3D File
to add details (such as stage elements / singers / artists etc.)
You just have to connect this previz processor to any output to have a stage pre-vizualisation for client demonstrations or simply for working and creating content.
Note that if you have not created a Stage simulation, then 2D pipeline layers, such as content maps can still be exploited as or in 3D objects inside a processor.
To do that just import a 3D file or create a SMODE primitive mesh and you can then use any content map as texture,
or simply put the content map
 Parent Input layer
’s
Parent Input layer
’s
 2D Renderer
in
2D Renderer
in
 3D Renderer for 2D Layers
mode.
3D Renderer for 2D Layers
mode.
Add beauty elements and do some compositing
Compositing inside a
Processor
is actually the same as in any other composition and the same rules apply, except that you can access the
Pipeline Layer
:
Remember these simple rules:
-
Apply all your transformations before importing a 3D file in SMODE (Ctrl+A-> Apply all transformations on Blender, Freeze transform on maya)
-
SMODE can take a lot of polygons but few objects.
-
Combine your 3D object to have the least amount of meshes possibles inside your file. (After selecting many objects, do a Ctrl+J on Blender, or a “Mesh>Combine” on Maya.)
It’s recommended to separate objects by materials, as it is easier to then manipulate them inside of SMODE.
Add
 Light
Light
There are different types of lights available to illuminate your 3D scenes. In every light you will find more or less the same parameters, like the
diffuse, specular and volumetric (available in advanced mode, to use with a
 Volumetric Light
layer) level and color.
Volumetric Light
layer) level and color.
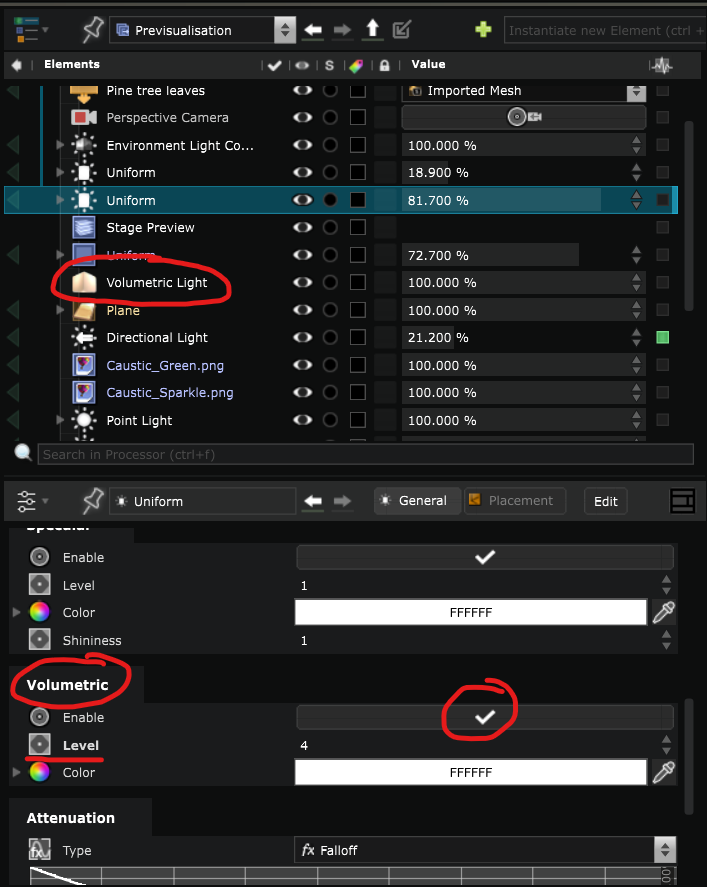
Add
Volumetric Light
For a more realistic look, you might want to add some
Volumetric Light
.
Volumetric Light
is an independent layer in SMODE. If you change the volumetric parameters of lights, it will not do anything unless you have that layer in the same
 Compo
or
Processor
.
Compo
or
Processor
.
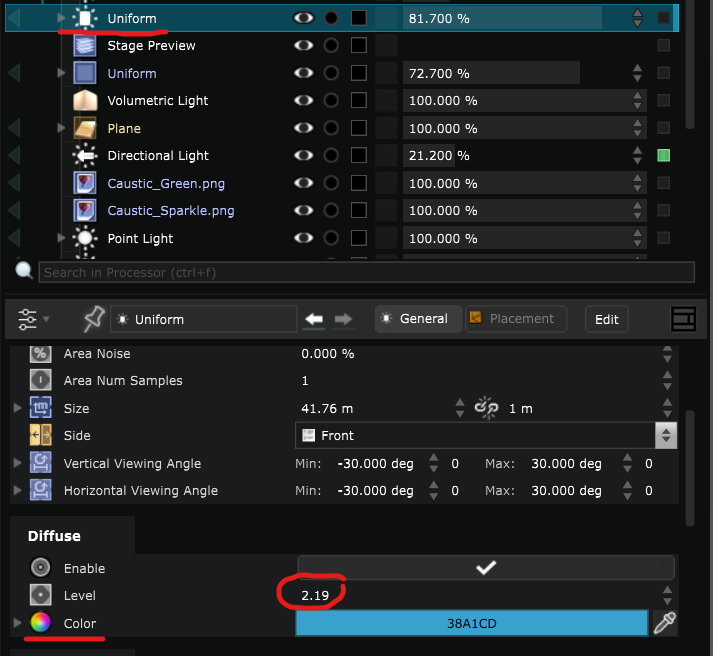
Once you add it, make sure to enable the volumetric option in the advanced parameters of the light you want to be affected by it and you can change the level and color.
Create an
 Environment Light
An
Environment Light
is an ambient illumination based on an environment map, like an hdr file for instance.
Refer to the
Environment Light
documentation to learn more about it.
Add a traveling camera
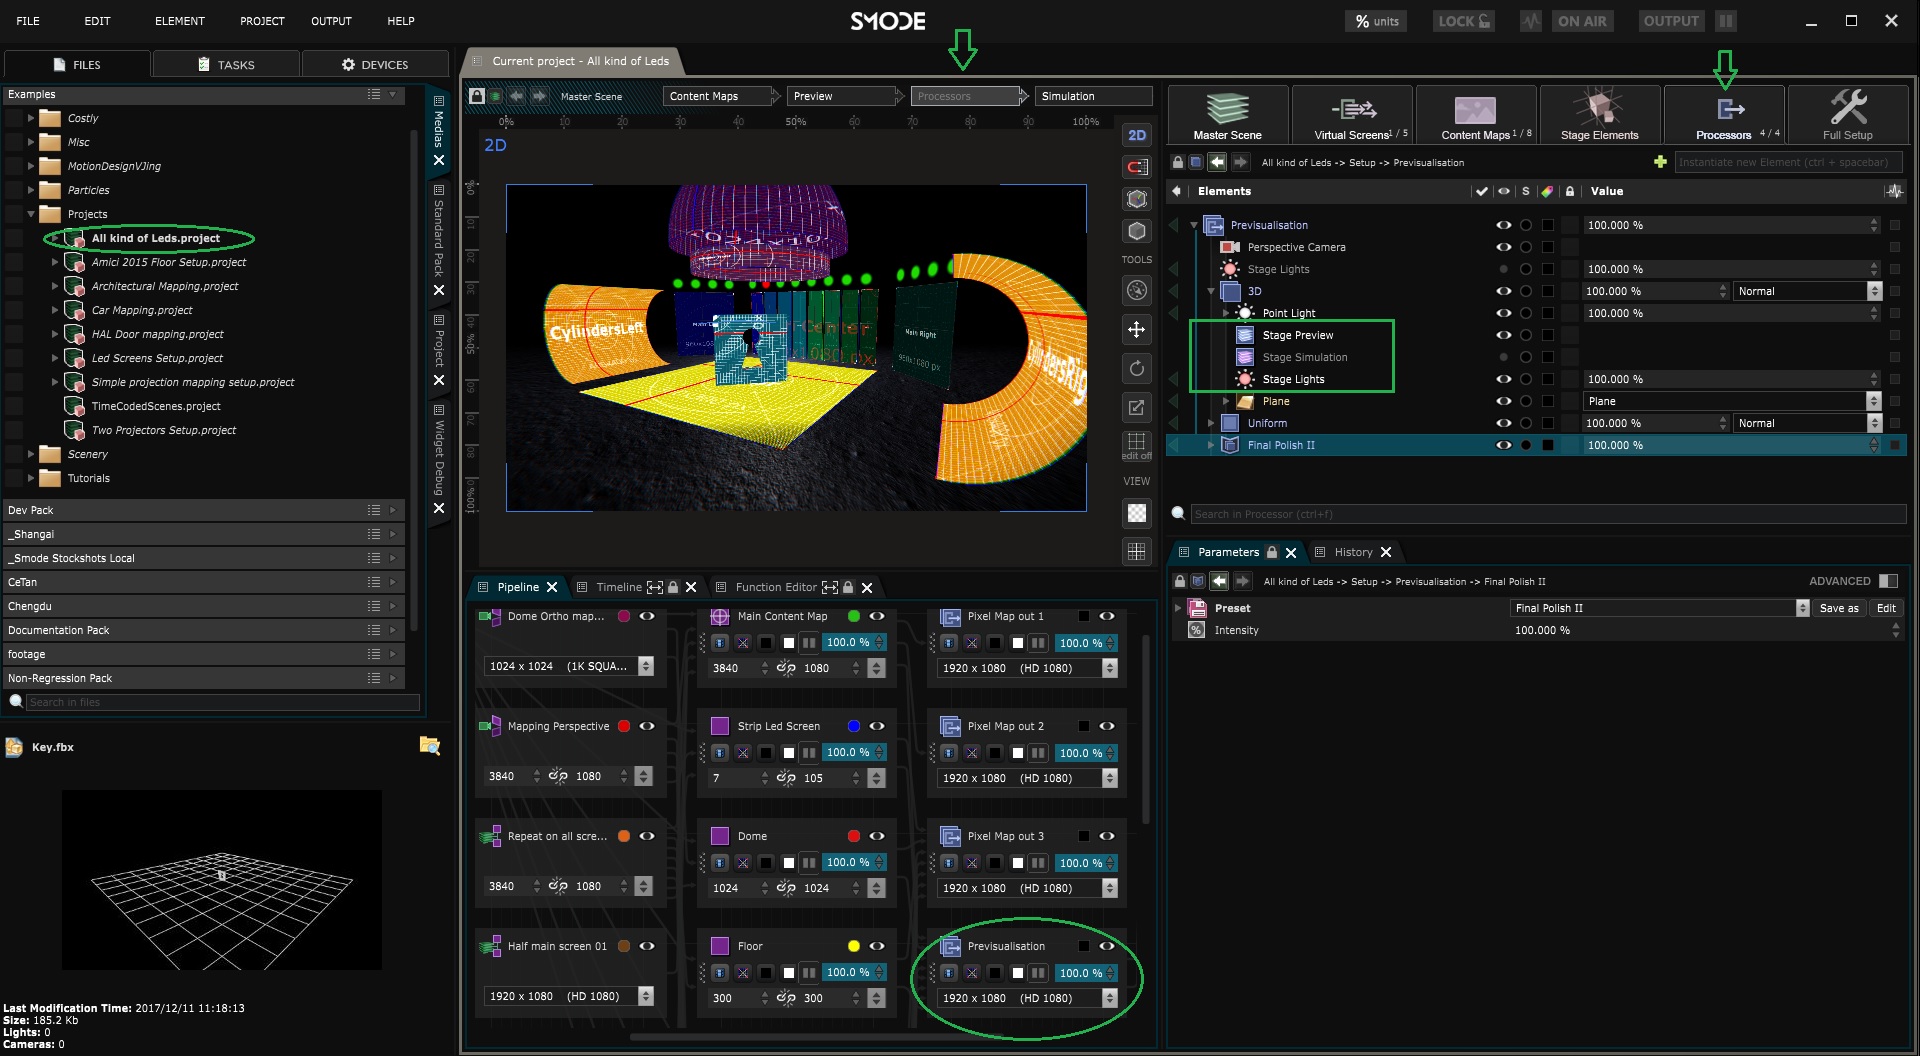
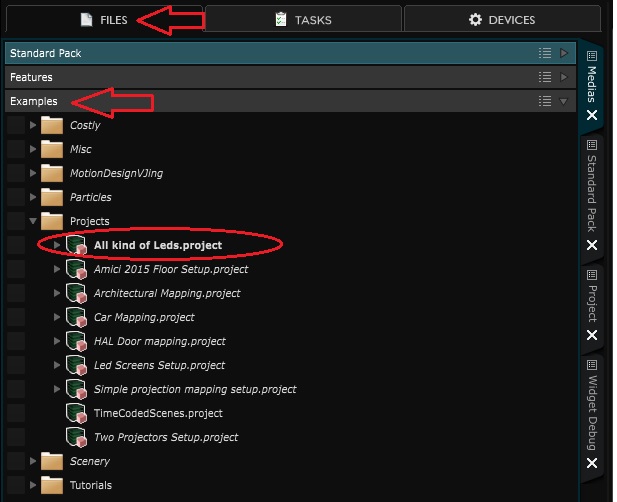
For this example, we will use the “All kind of Leds” project example:
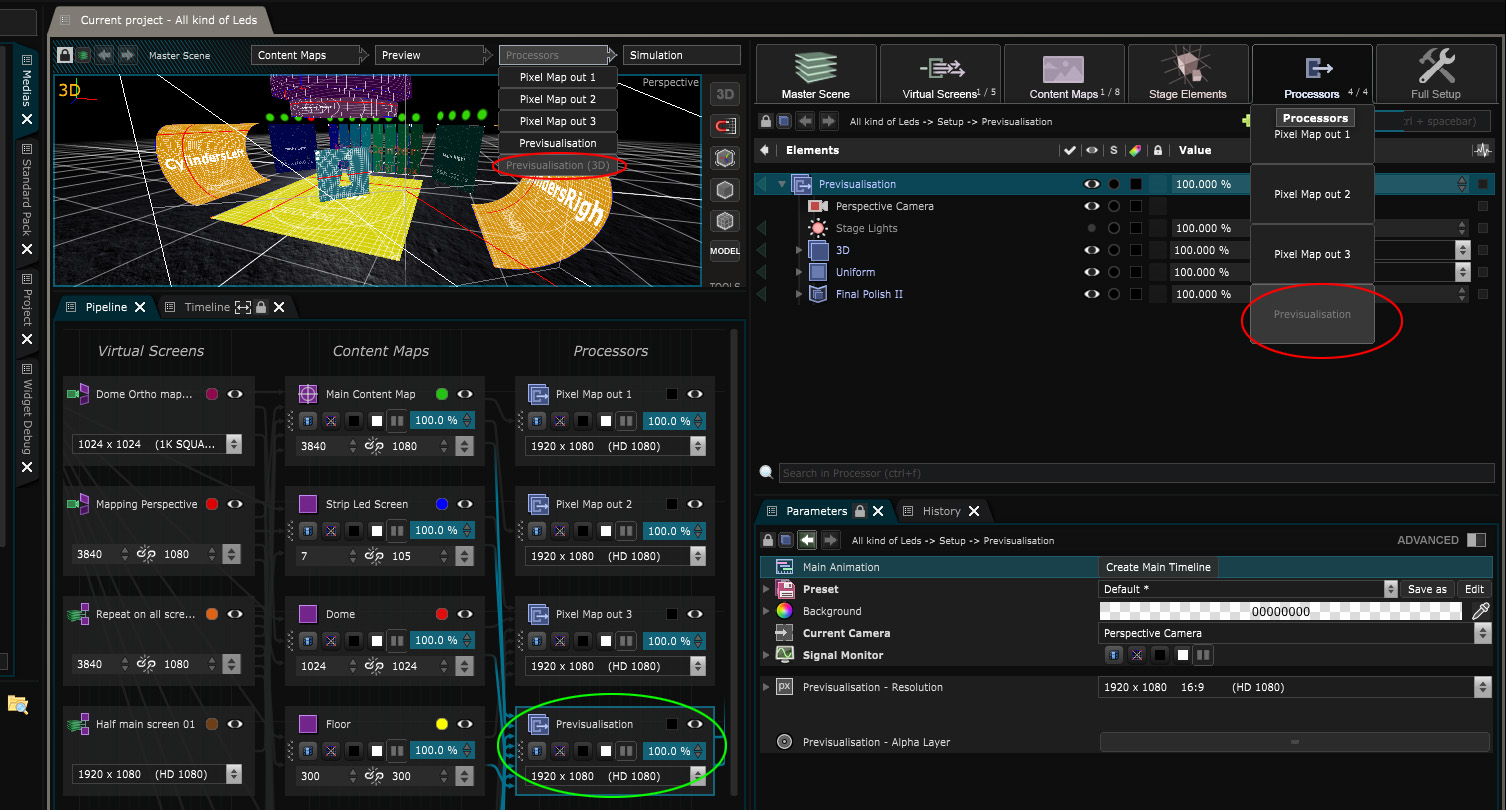
Go inside the
Processor
, to do that, just select the “Previsualisation” processor inside the
 Pipeline
(green circle),
Pipeline
(green circle),
the
 Element Tree
as well as the
Element Tree
as well as the
 Viewport
will automatically update. In case it does not, you can still select them as shown on the red circles. Here we will go in 3D mode (Left red circle):
Viewport
will automatically update. In case it does not, you can still select them as shown on the red circles. Here we will go in 3D mode (Left red circle):
Now let’s create a camera inside of the processor with “right click -> Camera”.
To animate the camera we have two choices, either animate it through the
Expose Parameters as percentage
methodology. Or simply animate it through a main
 Timeline
.
Timeline
.
I will here use the Expose parameter methodology as it will be easier to learn the camera animations on a midi console.
First expose one of your camera parameter as percentage and then connect any other parameters to the same function. Here I called it “Cam Anim” :
You now have access to all the parameters you connected to the “Cam Anim” exposed parameter inside the
 Function Editor
:
Function Editor
:
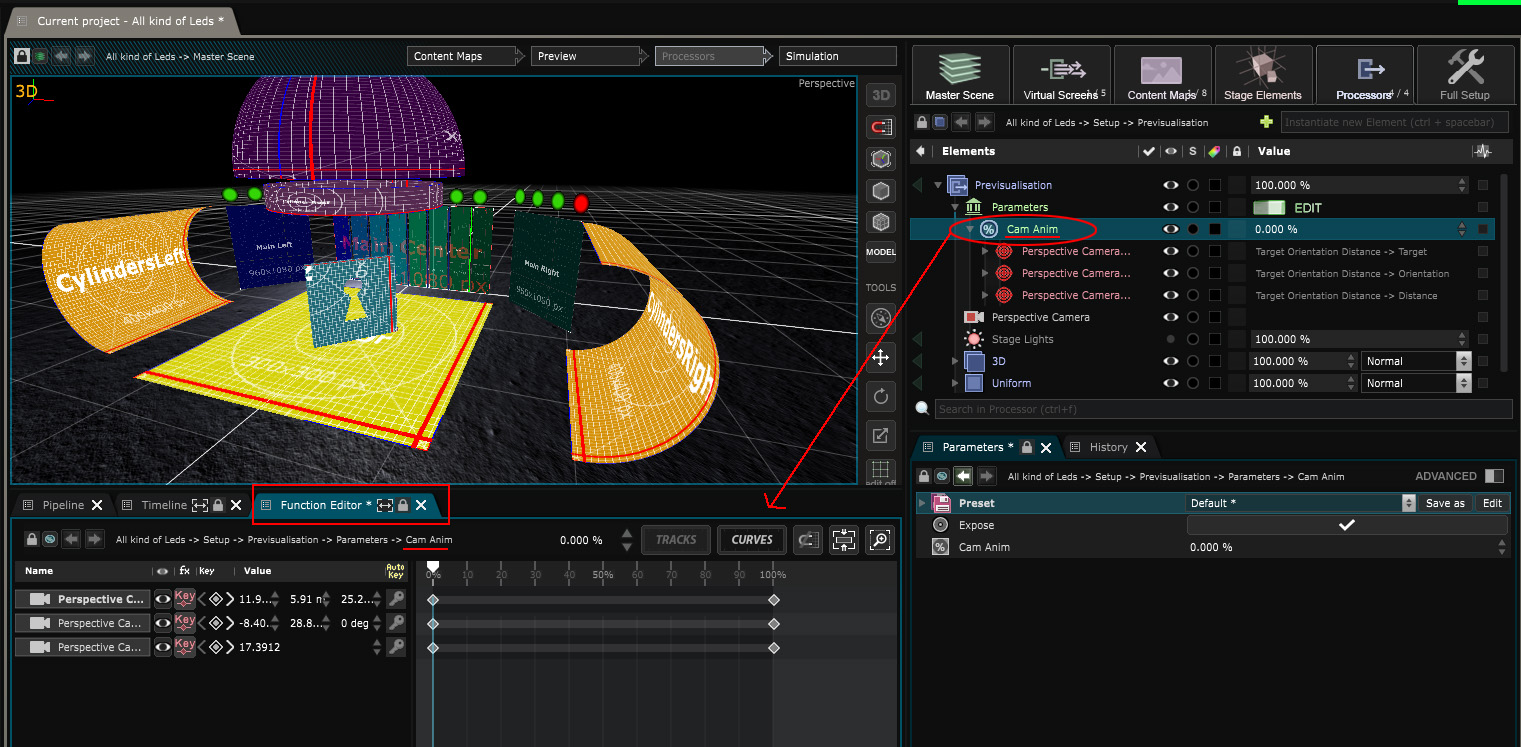
From there, you can animate any of theses parameters. Put the auto-key mode on on each track to simplify the process.
Once it’s done you can then learn the “Cam Anim” function to a fader. As now the camera animation is a parameter determined by a 0-100% range value, you can now also create function cues over it, as any other parameter. For instance to assign camera positions determined by different % to different buttons on a midi controller.
If you want to export a video with the camera animation playing you can either create a Timeline Cue and animate your camera inside of this timeline :
Otherwise just create a
 Function Cue
on the percentage of the “Cam Anim” function and set it up as “restart with activation”. In this example, we set the function cue to play the whole Camera animation in 30sec :
Function Cue
on the percentage of the “Cam Anim” function and set it up as “restart with activation”. In this example, we set the function cue to play the whole Camera animation in 30sec :
Export a video from a processor
Now to export a video of the processor, right click on the project tab and select “export video”:
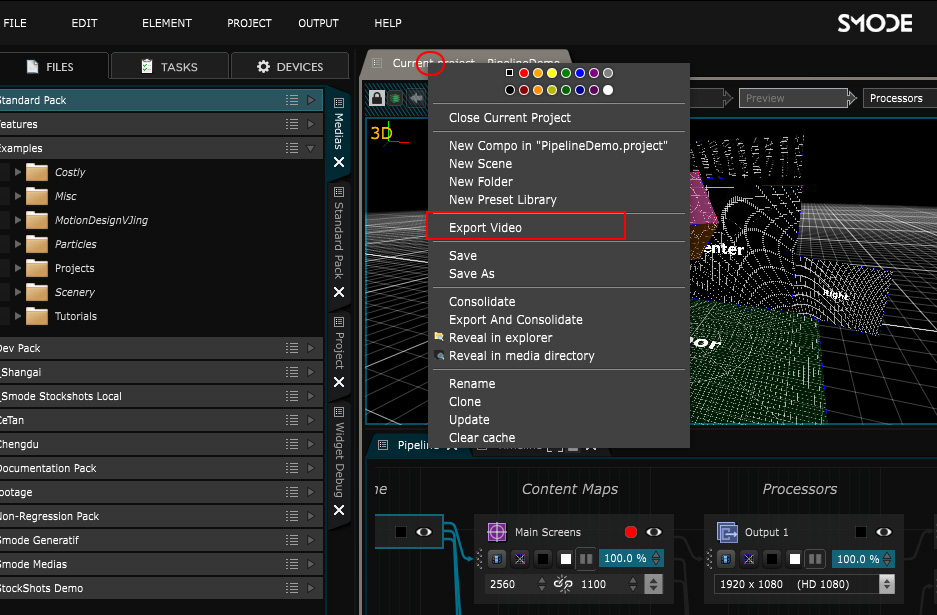
Now inside the video export window, you can choose which target you want to export. Both
 Content Map
and
Processor
can be exported as video.
Content Map
and
Processor
can be exported as video.
Here just choose to export the “Previz” video processor (as it is how we called the processor in which we made our previz) and export:
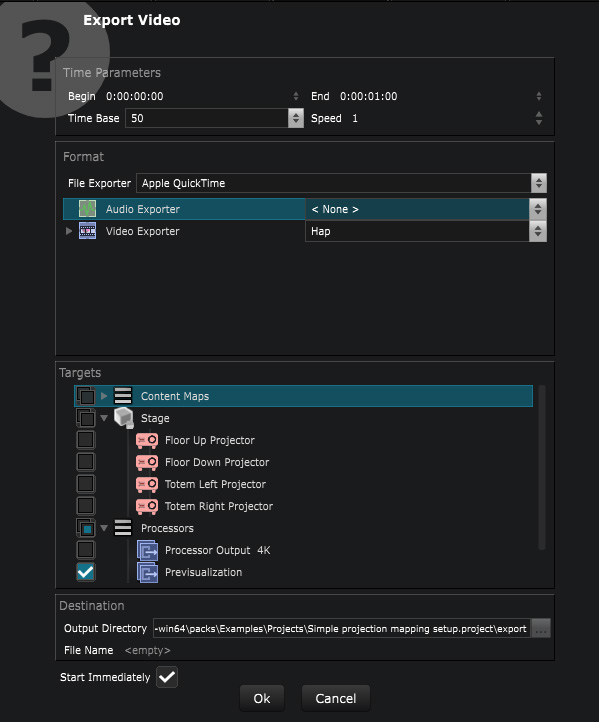
For further details about video exporting, please refer to the " Export a Video " topic.
Here is a little video showing how to create a stage pre-visualisation from scratch from one of the example projects.
Do not forget Ctrl+D and Ctrl+Drag to duplicate a layer, Ctrl+Shift+A to add a renderer (and expose it to move it as you’ll see from 13:55 on this video).
Here is an example of a stage previsualisation made for a project with SMODE :