Basics of 3D Compositing
A comprehensive guide to 3D compositing with Smode.
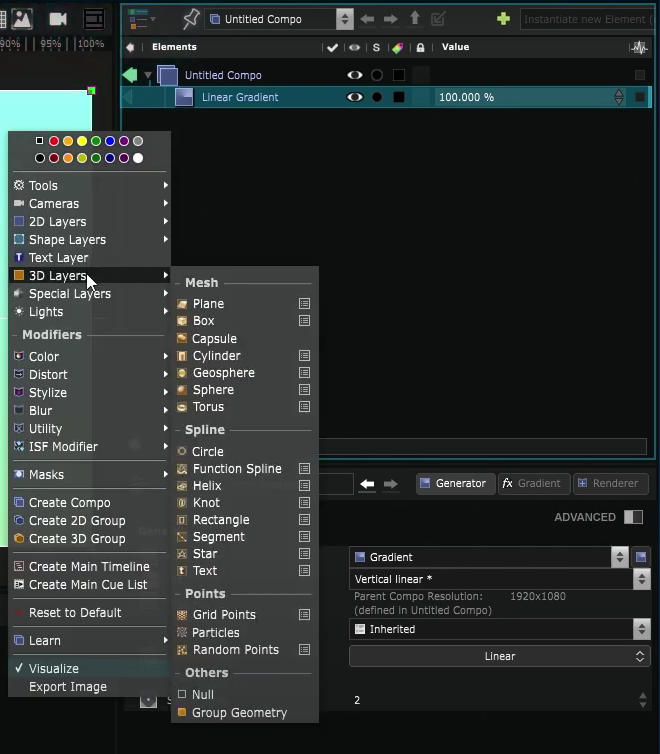
Create a new
 3D Layer
3D Layer
follow the same structure as
 2D Layer
with a
2D Layer
with a
 3D Generator
and a
3D Generator
and a
 3D Renderer
.
3D Renderer
.
They need to be created inside of a 2D container like a
 Compo
or a
Compo
or a
 Processor
that will determine the point of view and resolution.
Processor
that will determine the point of view and resolution.
You can create different types of
3D Layer
: a mesh, a spline or points.
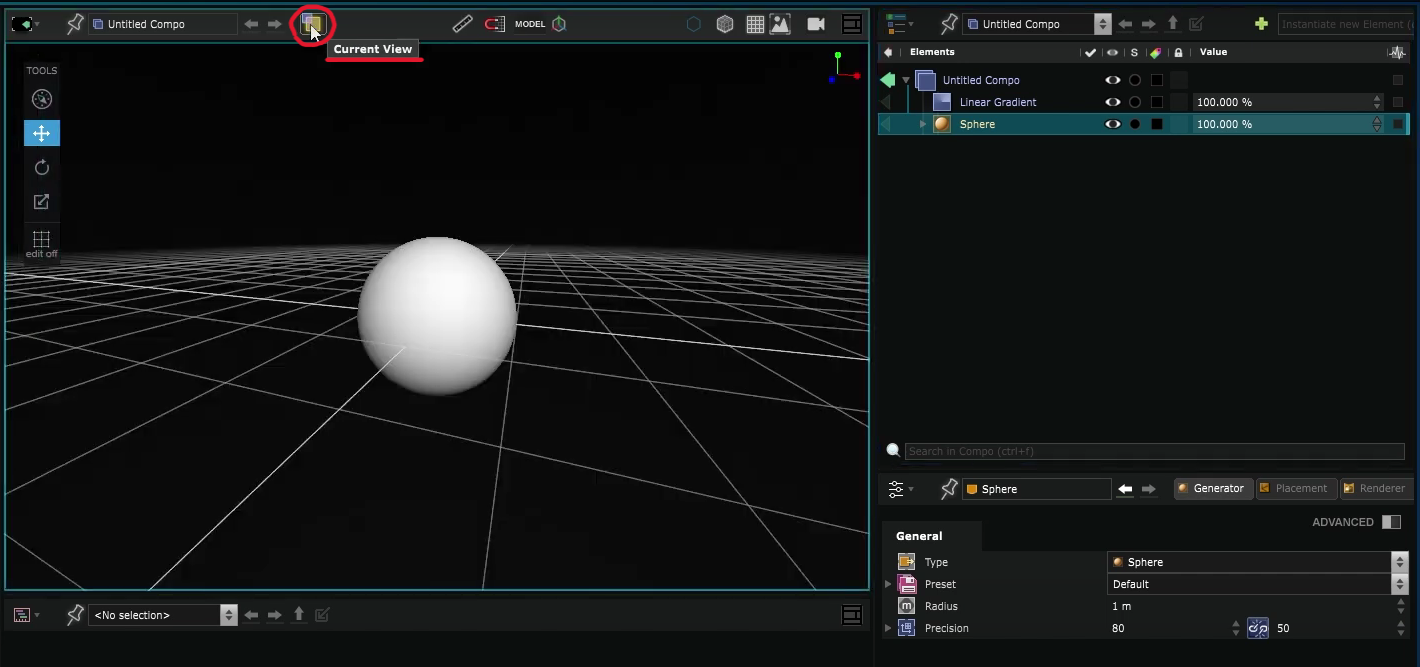
2D-3D view
When you are working on a
Compo
that contains 3D elements, you can choose to preview the 3D view of your objects in the
 Viewport
,
Viewport
,
allowing you to move around in the 3D space, or the 2D view from a specific viewpoint.
Learn how it works by reading: 2D-3D view .
Move 3D objects in space
To move a 3D object in the 3D space you can either move it directly in the
Viewport
using the helpers:
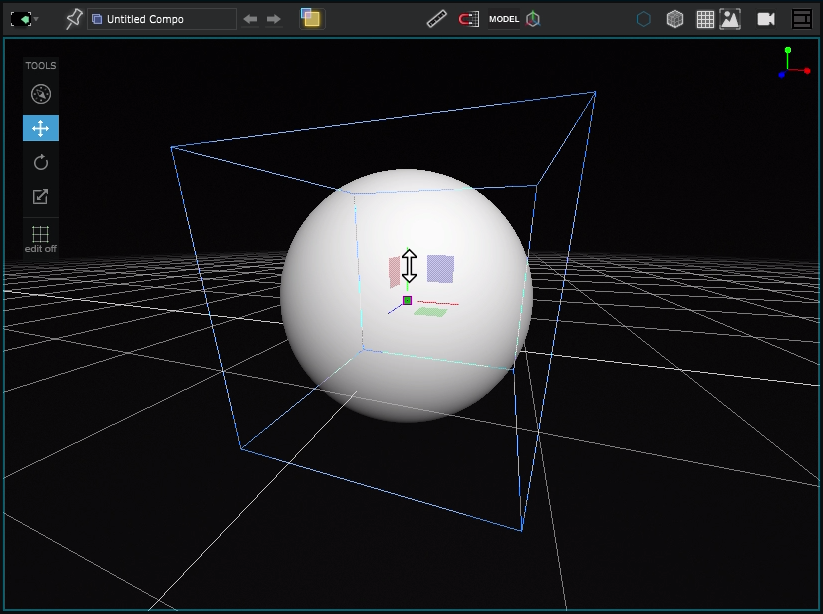
Or by changing the values in the
 3D Placement
parameters:
3D Placement
parameters:
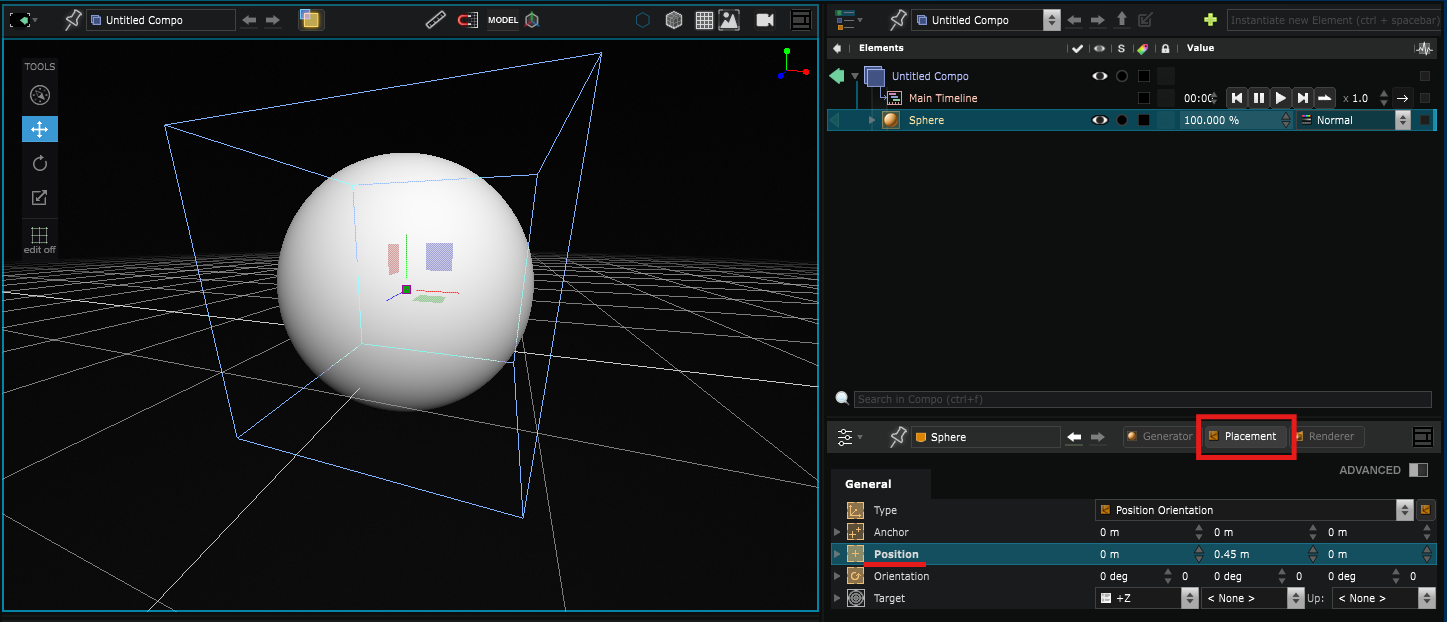
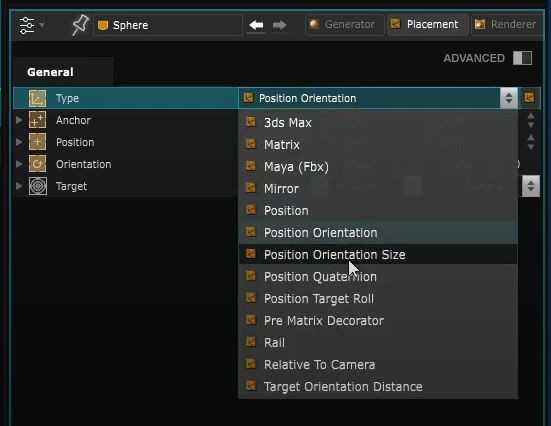
There are different types of
3D Placement
that give you access to different parameters to help you place your object in space in the most suitable way for your need.
For example, to resize a 3D object you need the size parameter so you can choose the placement type Position Orientation Size.
Add
 Camera
A
Compo
is a
2D Layer
so you can create one or more
Camera
to choose a point of view for your 3D scene in the 2D view.
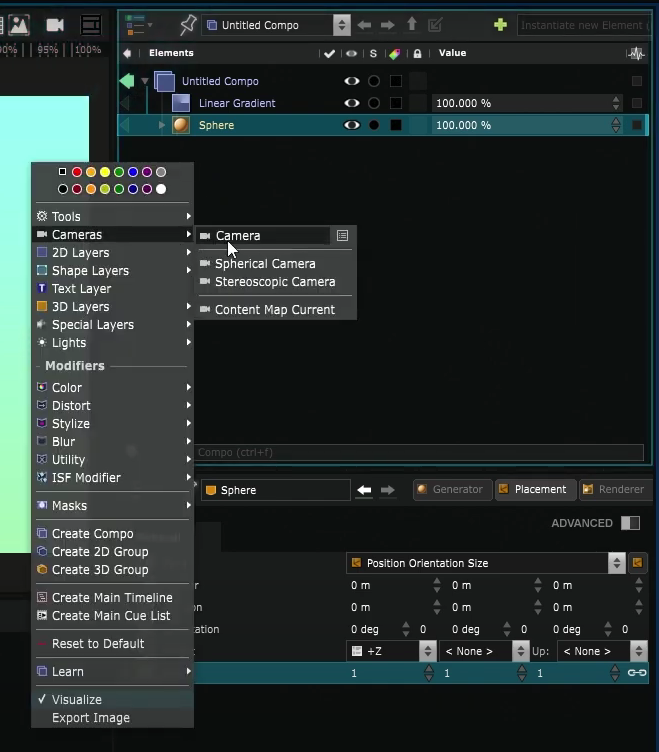
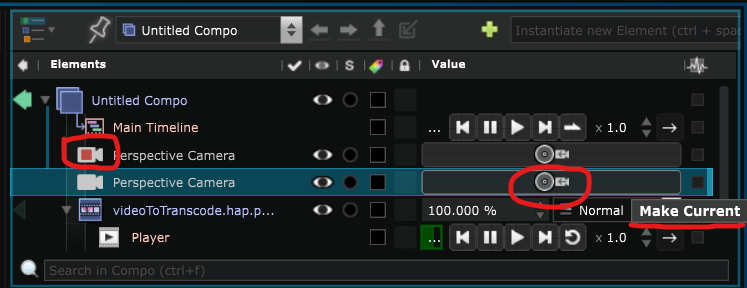
If you have several, set the
Camera
you want as Current Camera by clicking on the icon.
If you still want to be able to look around the object without moving the point of view of the
Camera
, you can still switch back to 3D view at any time
or create a 2nd
Camera
for that purpose (and temporarily set it as Current Camera).
Learn more about cameras by reading: Using Cameras .
Add
 3D Modifier
Similarly to
2D Layer
, you can also apply effects to
3D Layer
using
3D Modifier
.
There are different categories of modifiers depending on the type of effect you want to apply to your layer.
Refer to the
3D Modifier
documentation to learn more about each modifier.
Add
 3D Mask
It is also possible to add a
3D Mask
over the
3D Modifier
.
Refer to the
Using 3D Masks
documentation to learn how to use
3D Mask
.
Change
3D Generator
type
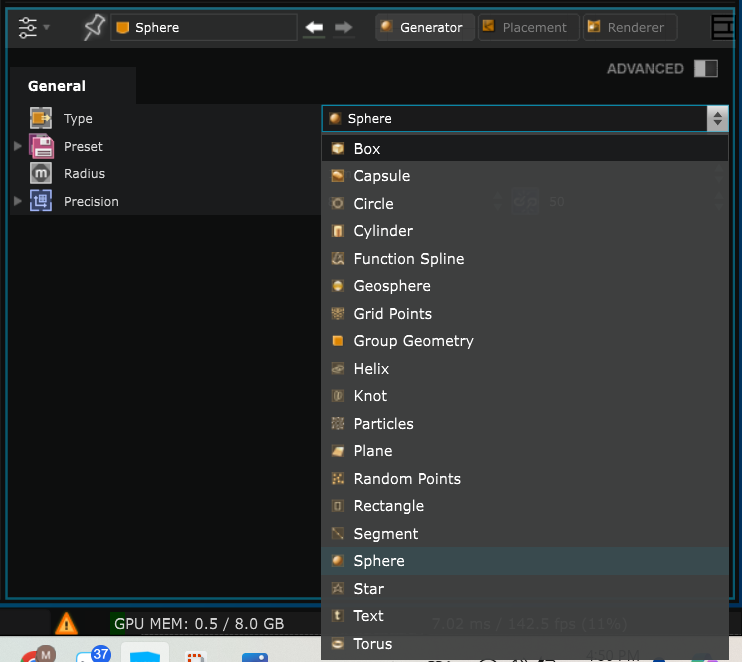
One advantage of creating 3D object directly in Smode is that it’s easy to change their type at any time.
For example, if you created a Sphere but now want a Box, all you have to do is change the
3D Generator
type and it will keep the same
3D Placement
and
3D Renderer
.
Render
2D Layer
in 3D
In some cases, you may want a
2D Layer
to be at a specific point in 3D space to create certain types of effect.
The problem is that, as a
2D Layer
, it’s not visible in the 3D view.
To make it look like a 3D element (plane), you can change its
 2D Renderer
to 3D Renderer so that it acts like a
3D Layer
.
2D Renderer
to 3D Renderer so that it acts like a
3D Layer
.
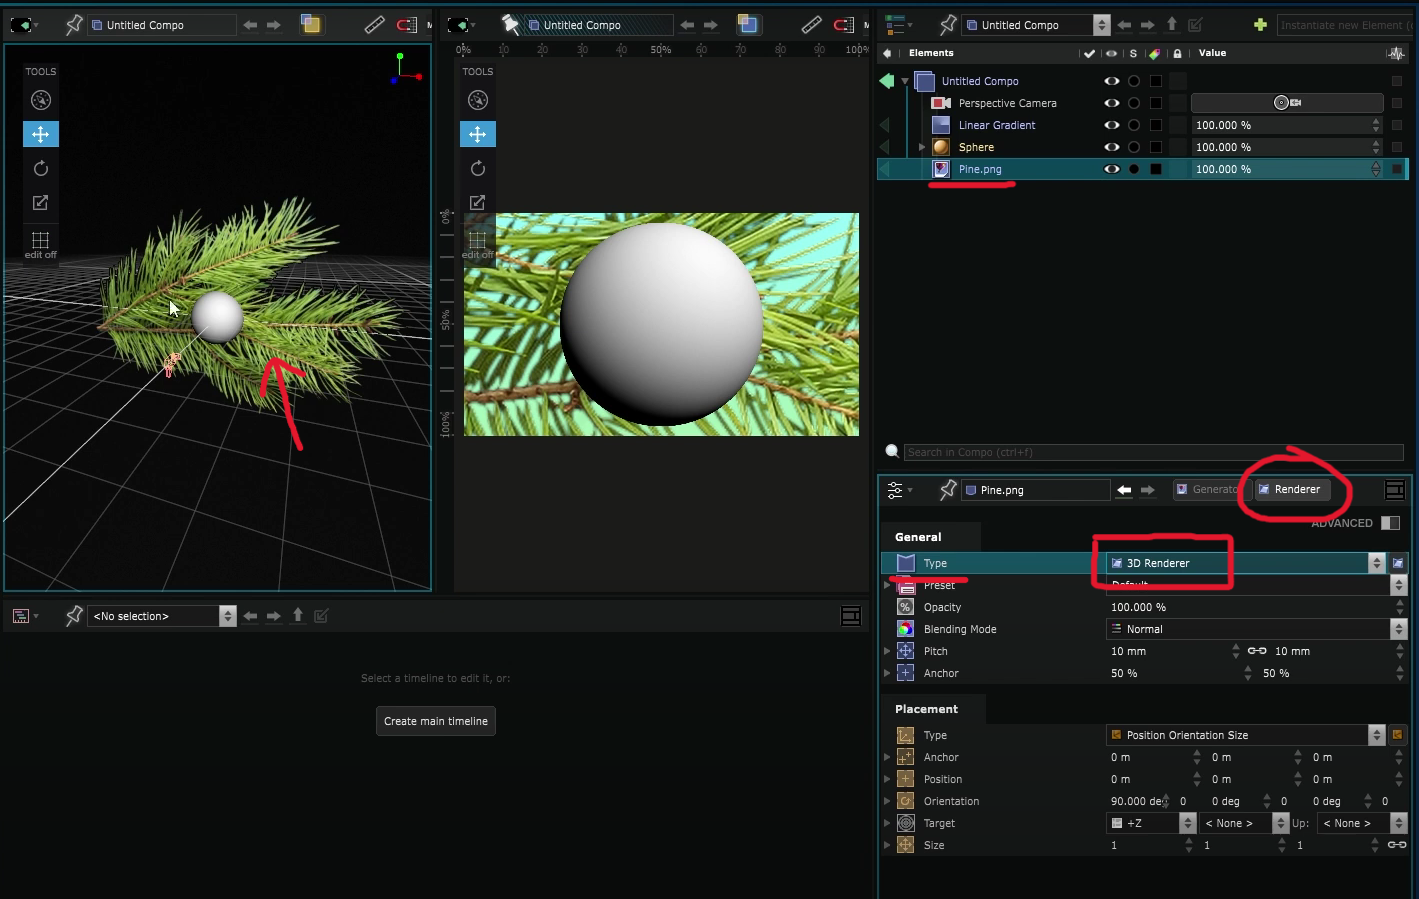
Refer to the
 3D Renderer for 2D Layers
topic for more details.
3D Renderer for 2D Layers
topic for more details.
Convert a
2D Layer
into 3D
 Plane
Plane
If you want a
2D Layer
to completely become a
3D Layer
, you can transform it into a 3D
Plane
by right clicking on it and selecting Transform into 3D layer plane.
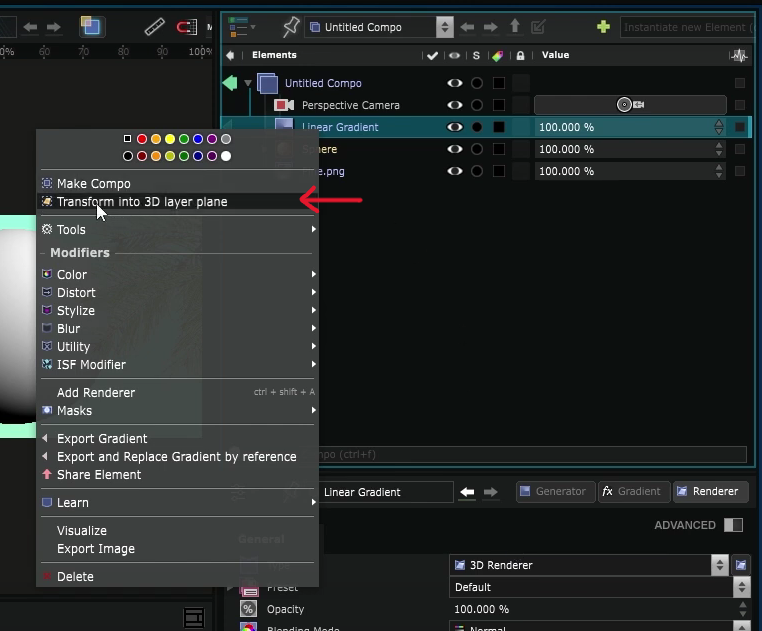
Note: This option is only available when the renderer of the 2D layer has already been changed to
3D Renderer for 2D Layers
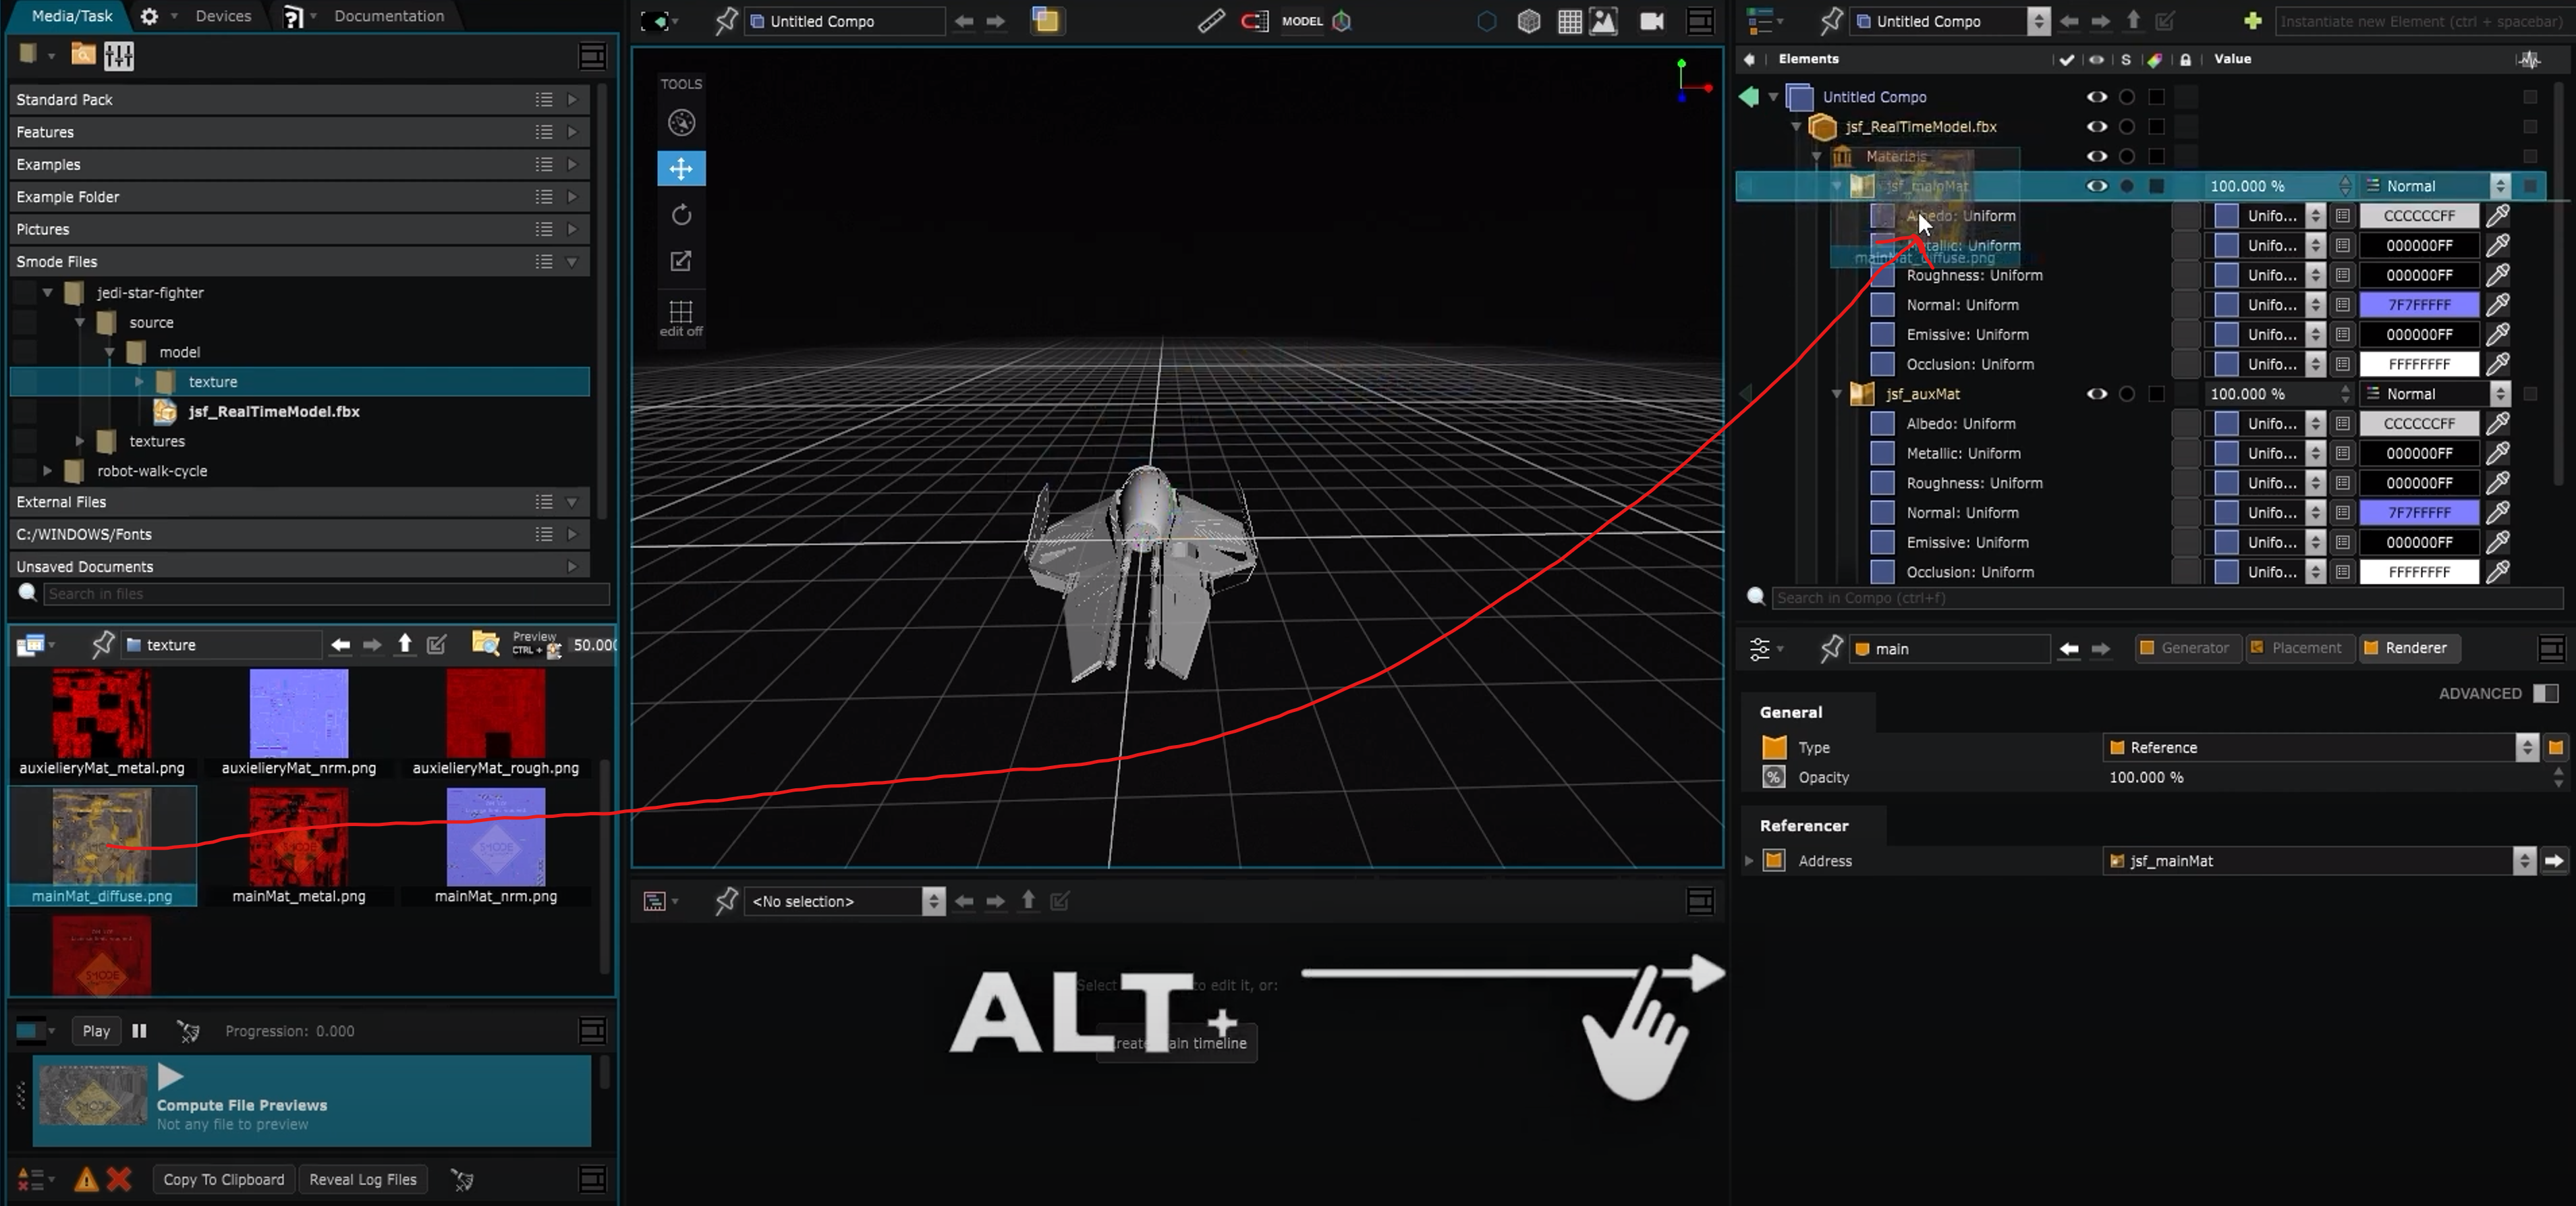
Import
 3D File
It is possible to import
3D File
into Smode, like FBX or OBJ files.
Learn more about how to import them by reading: Using 3D files .
Import textures
There are different types of materials in Smode. If you import a
3D File
and you have images to texture it,
you might want to use the
 PBR Surface
and simply drag and drop the images to the corresponding passes while pressing Alt.
PBR Surface
and simply drag and drop the images to the corresponding passes while pressing Alt.
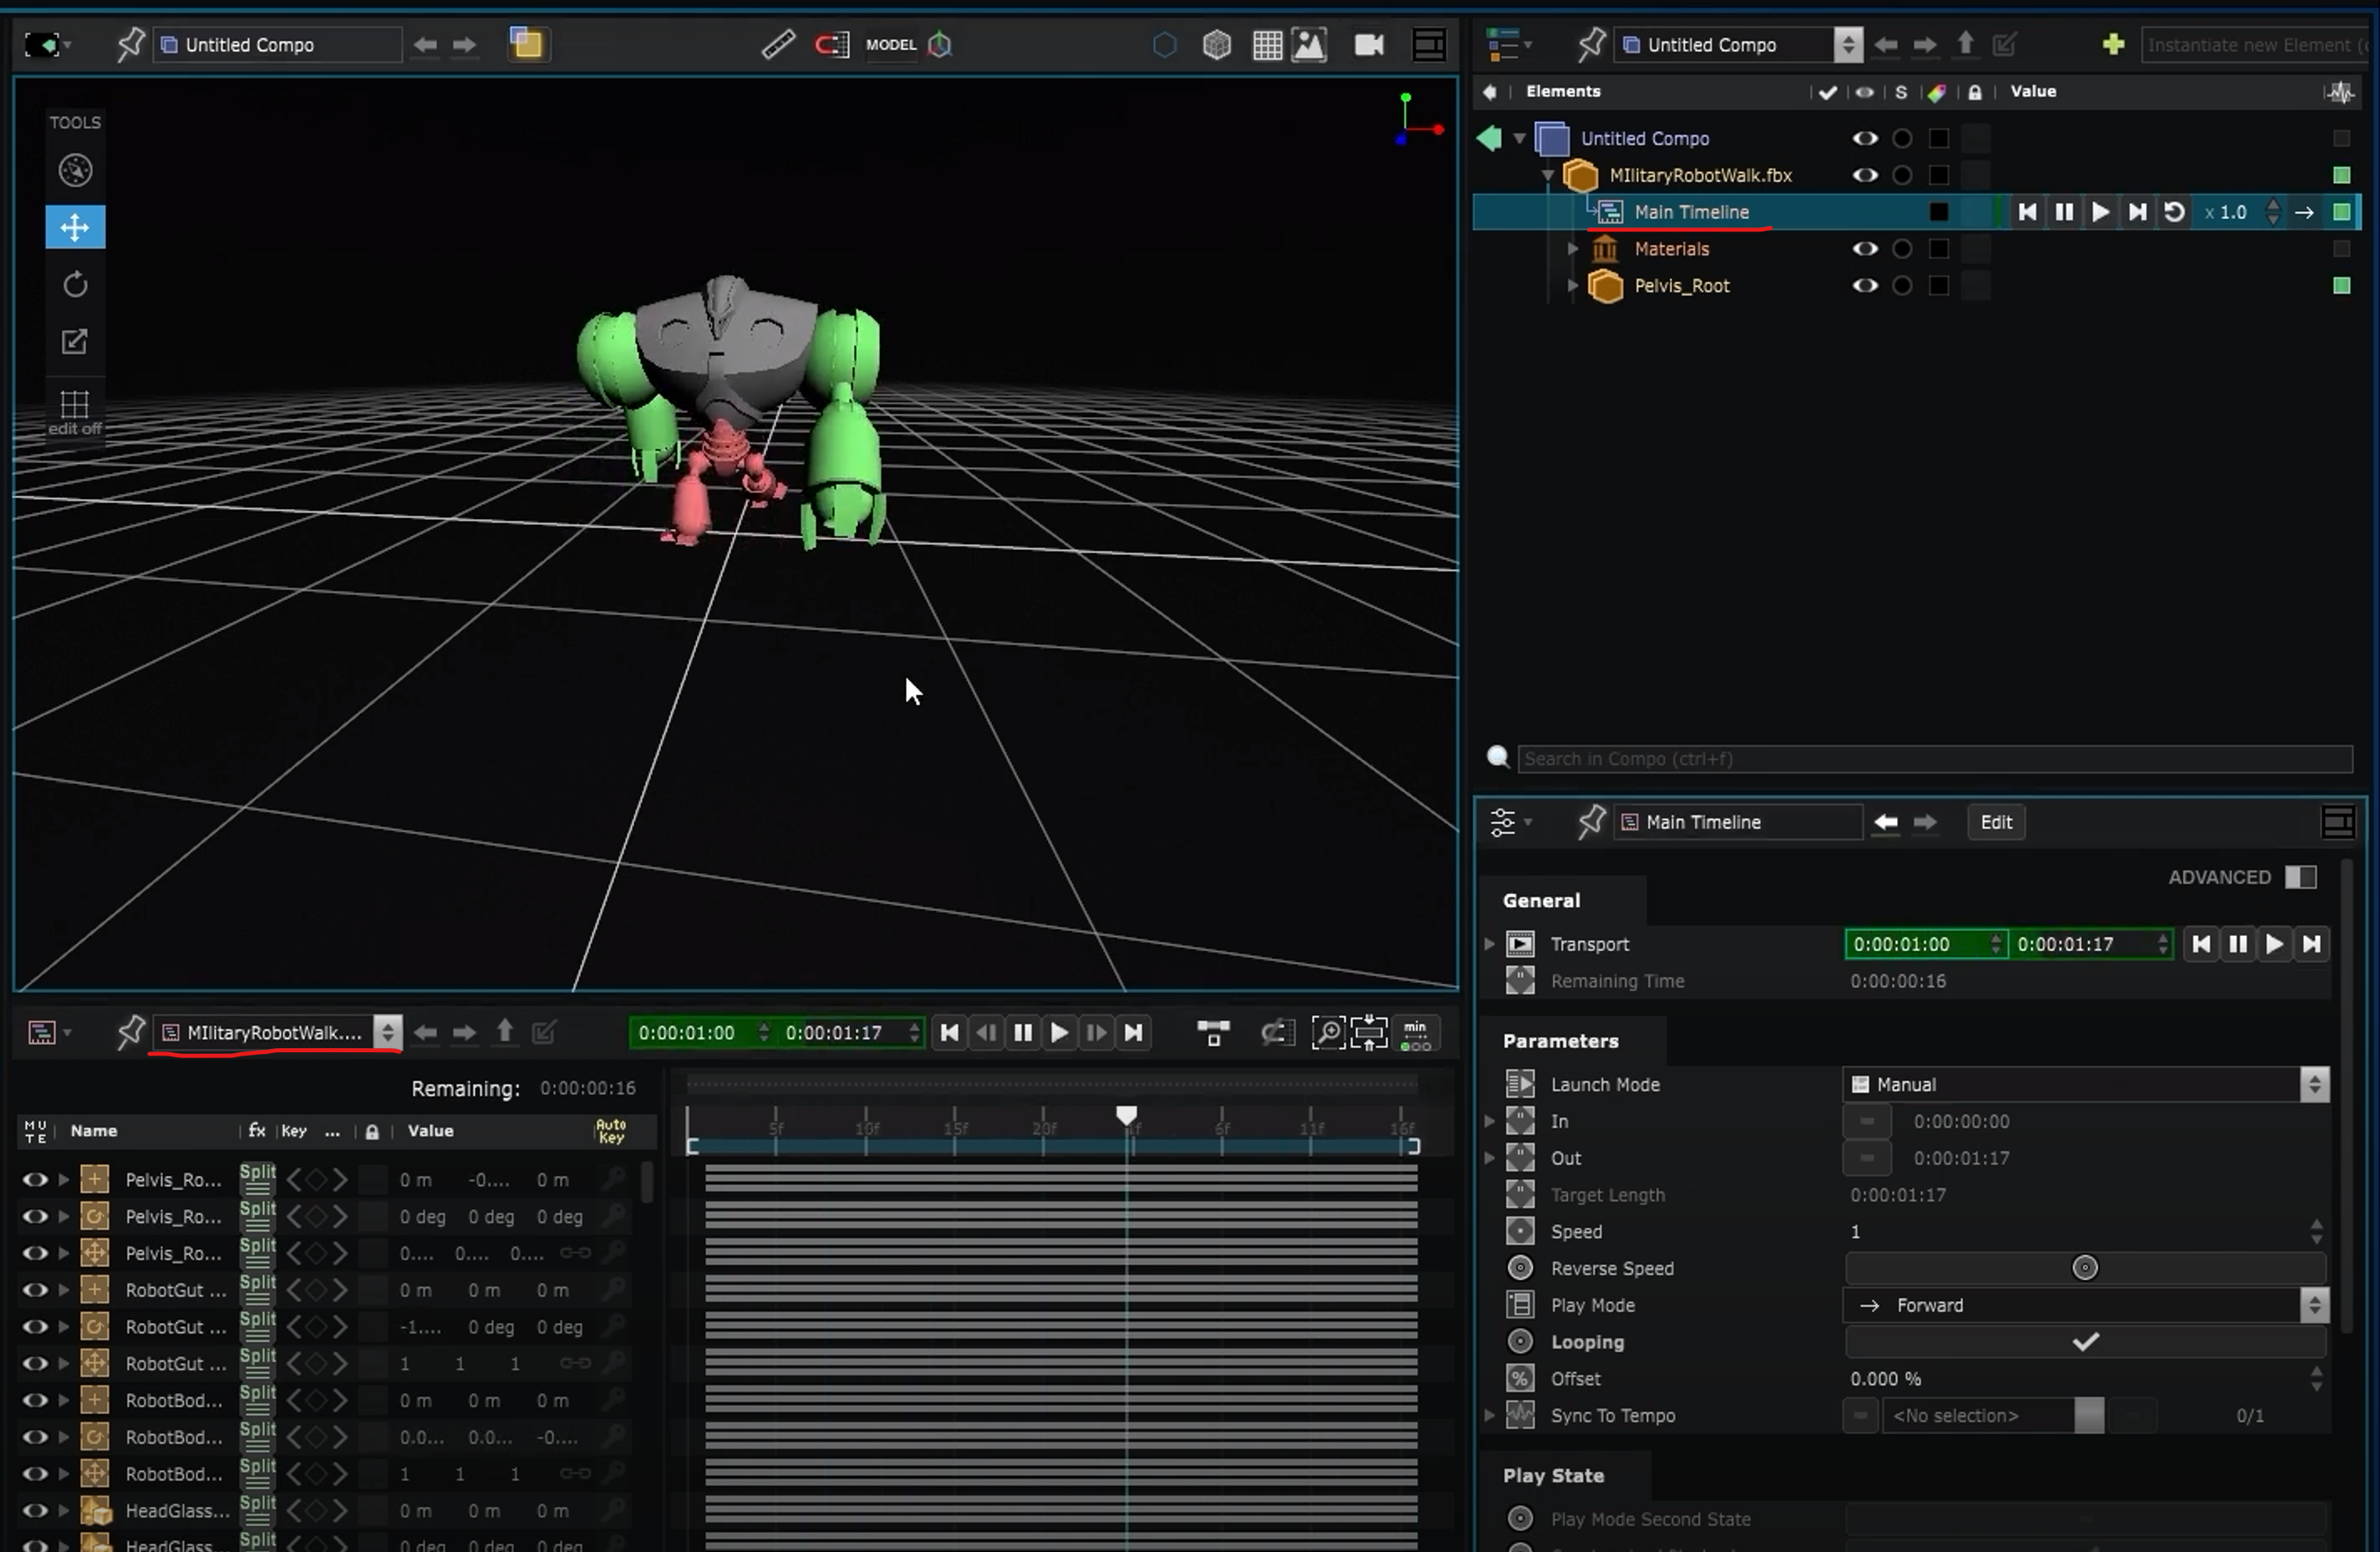
FBX with animation
If you import an fbx
3D File
with animation, a
 Timeline
will automatically be created.
Timeline
will automatically be created.
You just have to press play to see the animation playing.
Create a
 Particles
system
Particles
system
Smode has a native
Particles
system. It is a type of 3D layer consisting only of points.
Check out the
Particles
documentation for more information.
Particles come with Emission parameters like their speed, life time etc. There is a Manual Emit parameter that allows to manually emit a given number of particles all at once by pressing the Emit Now button.
To shape the particle emission the way you want, you can add some
 Field
that represent forces in space. They will act on the particle system using physics properties.
Field
that represent forces in space. They will act on the particle system using physics properties.
You can decide how or where a
Field
will affect your particle system using a
3D Mask
.
You can also affect the behaviour of the
Particles
system by adding
 Particle Rule
and
Particle Rule
and
 Particle Action
.
Particle Action
.
Dive deeper into their documentation to explore their full capabilities.
Tutorials
Here is a little video to show you some of the basic manipulations of 3D generators : how to slice them, display only vertical or horizontal wire-frame lines, remove caps and subdivide them. The
 Box
has embedded UV maps, but you can change the UV of any Smode primitive Geometry using the
Box
has embedded UV maps, but you can change the UV of any Smode primitive Geometry using the
 UV Mapping
modifier:
UV Mapping
modifier: