Animate content
Explore different animation techniques: linear and non-linear, keyframe-based or procedural animations.
It is time to bring life to your compos !
This can be done through parameter bindings (see
 Link
and
Link
and
 Link Modifier
,
Link Modifier
,
 Exposed Parameter
) or through animation (timeline, cues).
Exposed Parameter
) or through animation (timeline, cues).
To address complex scenarios, these two techniques can be mixed together.
It is recommended that you read about Bank before animating or automating your compos.
Here we will review some of the animation user interface properties :
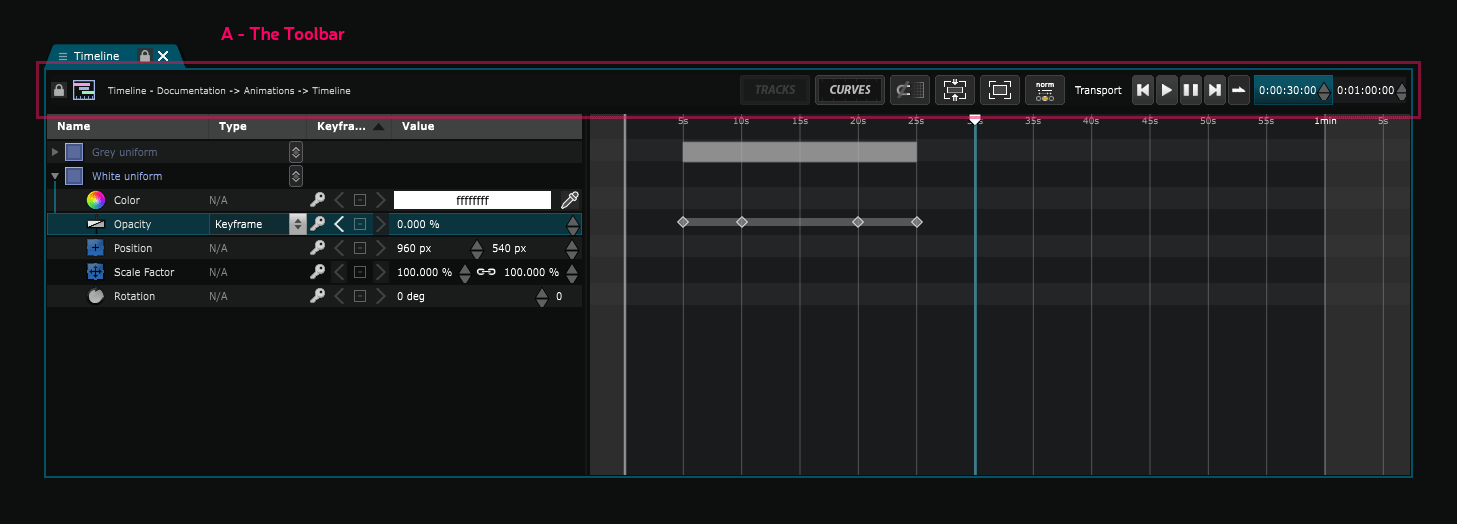
Toolbar
The toolbar has, like the other element editors, a lock and a menu buttons, and a path pointing to the edited element at its starts.

Shortcuts:
-
F : fit to screen
-
Shift : Snap
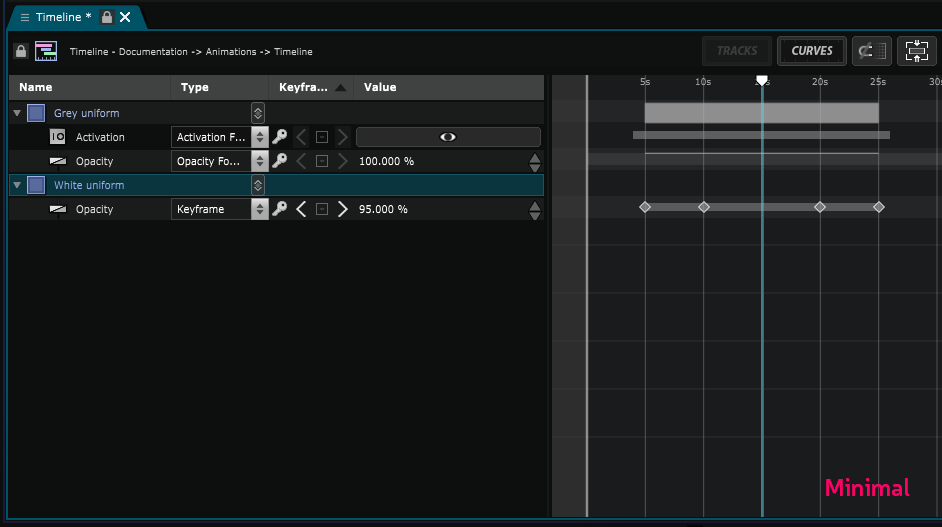
Timeline editor Element Tree
The
 Timeline Editor
tree is a duplicate of the main
Timeline Editor
tree is a duplicate of the main
 Element Tree
, but with a little bit more information. Indeed, you can directly see the parameters of the elements in the tree. To make it easier to read, not all parameters will be displayed, they are filtered by the Track View Mode.
Element Tree
, but with a little bit more information. Indeed, you can directly see the parameters of the elements in the tree. To make it easier to read, not all parameters will be displayed, they are filtered by the Track View Mode.
You can change the Track View Mode in the timeline. It will switch between showing only animated tracks (minimal), showing usually animated tracks (normal) and showing all animatable tracks (full).
Tracks vs Curves view
The
Timeline Editor
can display an animation in two ways : the track and curve view.

We will first see the tracks view.
There are 2 different kinds of Track :
-
The Track Block which can be a video layer Transport or a an image/composition track.
-
The Parameter Tracks which is a Keyframe Function and consists in keyframes or curves animating parameters
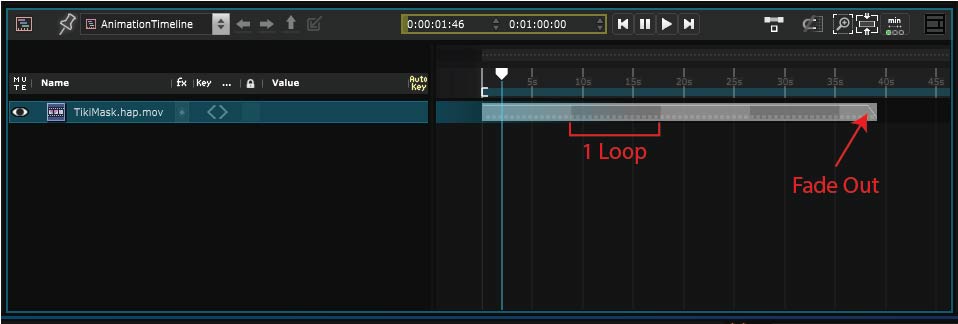
Here is an Element track with 3 Parameter tracks inside of it :

A track is a block matching an object or a layer. Outside the block, the element is invisible. Inside the block, it is visible and can be animated. The track corresponds to the “life” of the element. For a video or a timeline, it represents its transport.
To play a video inside a Timeline, drag and drop it into the timeline. A track will automatically be created.
By CTRL+Clicking on the timeline in the video layer’s row, you can create a new
Track Block
.
By default, the track will have the length of the video layer.
Selecting the track itself allows you to set parameters such as fade-in, fade-out, begin, end, loop, etc.:
You can also split a track at the current time with [Ctrl+Shift+D]:

To improve the performances of your compo, you can use tracks to activate and deactivate elements. You can also use it to play a video, like in any standard video editing software.
Now Parameter tracks :

A parameter track is a collection of keyframes.
To add a Keyframe, CTRL+click or use the keyframe manipulator of the user interface. You can select one or more keyframe(s) and its properties will be displayed in the
 Parameters Editor
.
Parameters Editor
.
Navigate from keyframe to keyframe with J/K or the Keyframe manipulators.
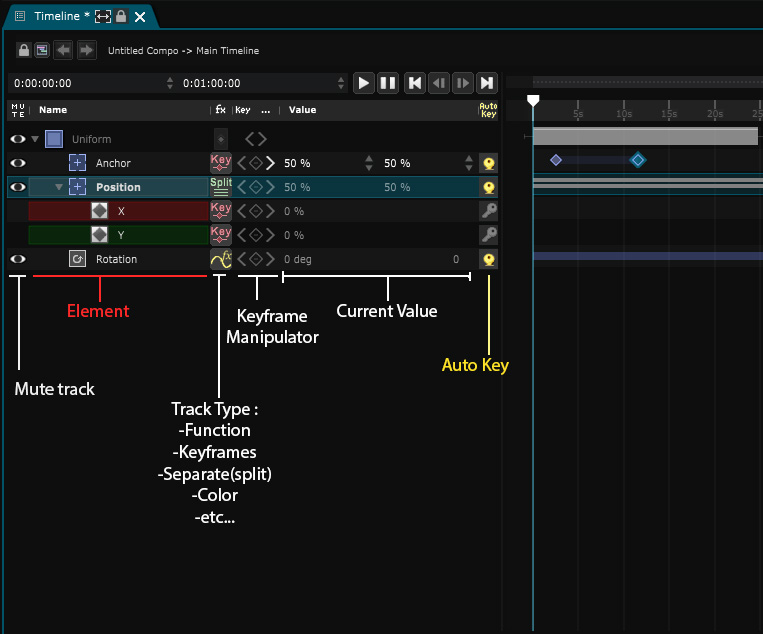
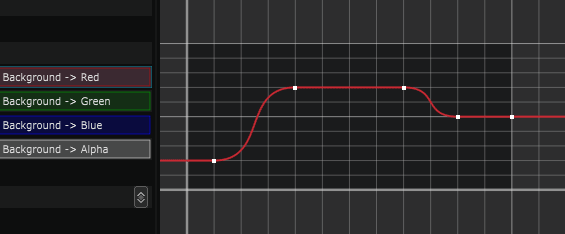
When values do change between keyframes, the space between them is highlighted. In the case of color tracks, you can see the color values change over time.

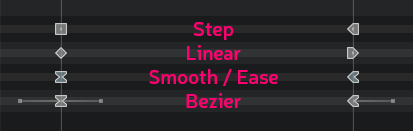
The transition from one value to another between keyframes is called the interpolation. Smode performs interpolations between keyframes based on different algorithms.
They can be:

You can change those interpolations by selecting keyframes, in their parameters, by the right click or with ALT+click.
The look of the keyframe is generated by its interpolators:
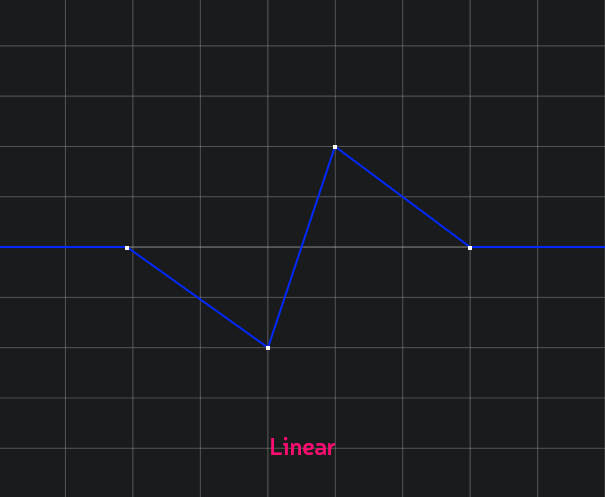
The curves view allows you to edit your track’s keyframes in 2D instead of a 1D. This brings you a fine tuned control over the animation curves. To activate this mode, first click on the Curves button in the toolbar. The curves you will see in the view will be the rows you select.
You can select more than one row to see more than one curve.
Just like in the tracks view, you can ALT click the view to create a new point.
If you want to change its interpolation, right clicking a selection of keyframes will display a menu to quickly set them.
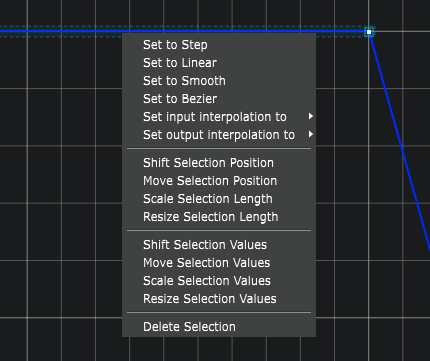
Be careful, the Ease interpolation is not offered in the right click menu yet !
You have to go to the parameters of your selected keyframe and change it with the drop-down menu for input and output interpolator types.
You can also control click a point to cycle through its interpolations :
Change Tracks Function Mode
You can change the track mode of any parameter inside of the timeline. By default it will be in “Key” mode (keyframes).
To change track mode, just click here and choose the track mode you want :

Hre are the different track modes :
-
Key: Classic keyframe mode. Each key represents the full value (e.g. XYZ). Curve view is not implemented yet for this function. To see curve you’ll have to split dimensions
-
Split (separate): separate the dimensions of a track. Split the XYZ trajectory by combining three independent functions for X, Y and Z.
-
Fx: transform a keyframe track into a simple function (sinus, power, noise, etc.). Go see the
 Function
part of the doc for further details
Function
part of the doc for further details -
Custom: allows you to draw a curve inside the
 Function Editor
.
Function Editor
. -
Binary file: allows you to use a existing binary file as recorded source values. File values can have offset and gap. Values can be integer or floating point of different size or endianness.
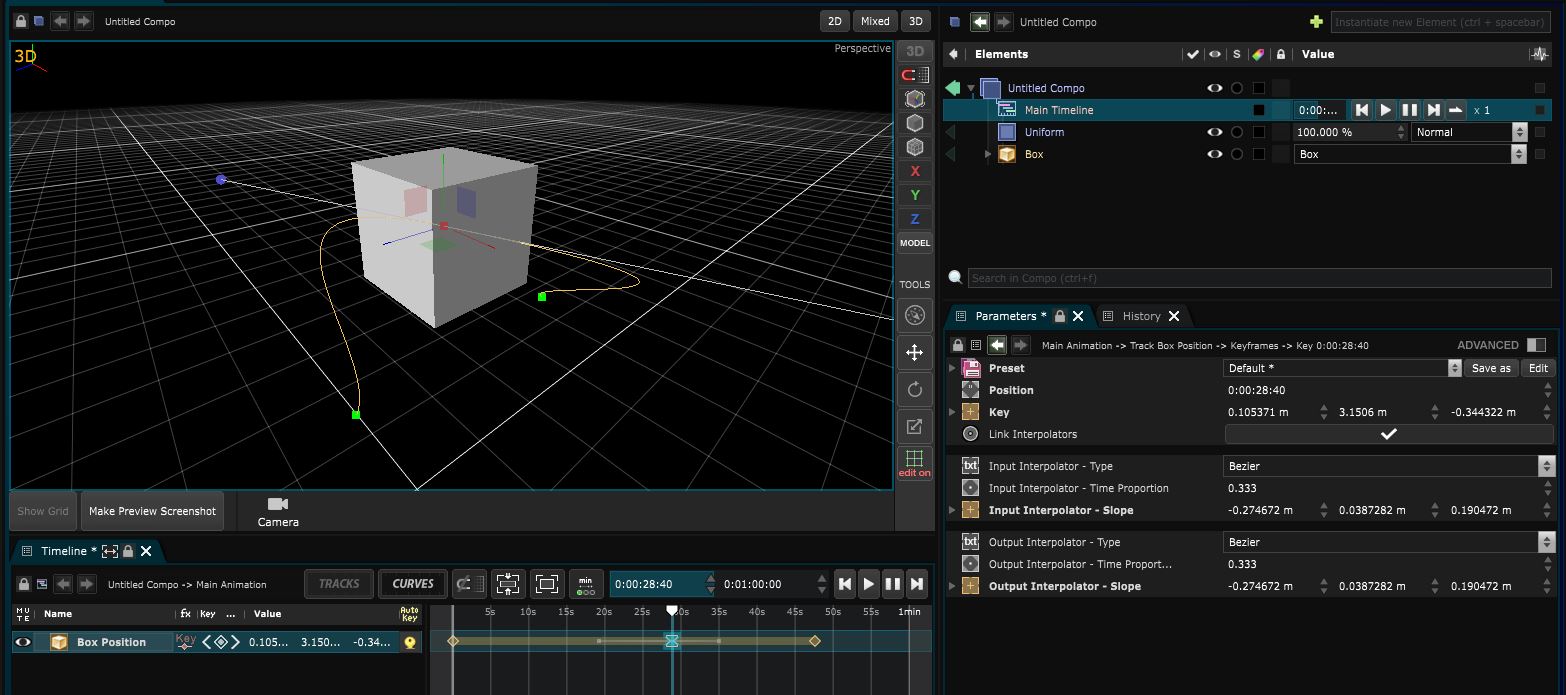
Trajectories manipulation
If the Placement of
 2D Layer
or the Position of a
2D Layer
or the Position of a
 3D Layer
is animated inside of Smode, then it’s position trajectory can be seen inside the
3D Layer
is animated inside of Smode, then it’s position trajectory can be seen inside the
 Viewport
and is manipulable.
Viewport
and is manipulable.
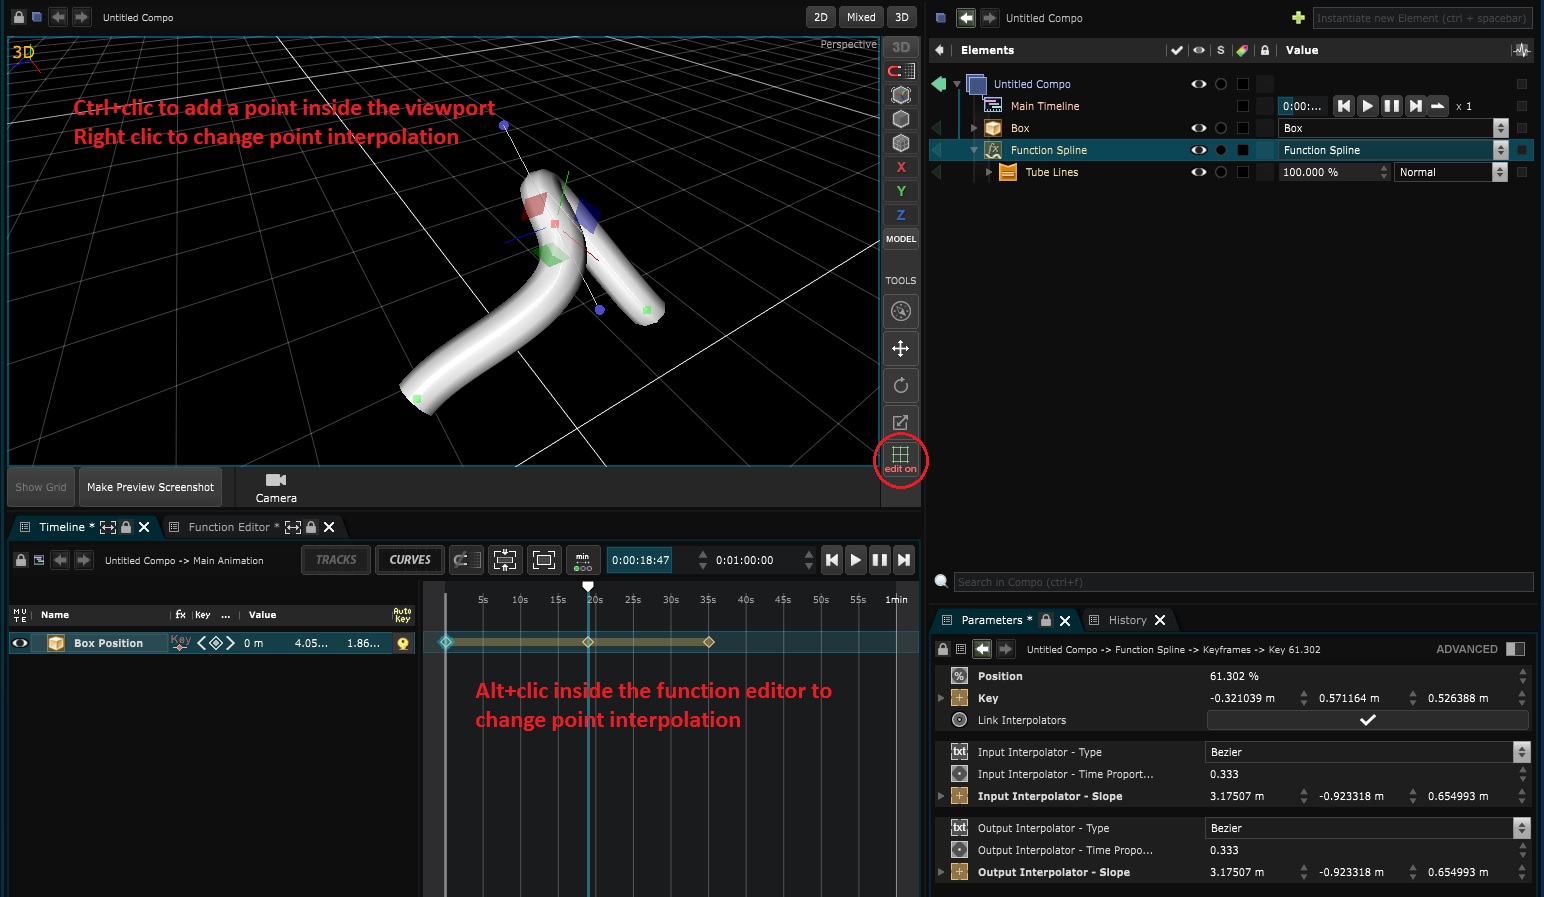
To do so, simply go in edit mode. Trajectories point interpolation can be changed with right click in the
Viewport
or with [ALT] + [CLICK] on a keyframe inside the Timeline or
Function Editor
.
A point can be added on the curve inside the
Viewport
with [CTRL] + [CLICK] either in 2D or in 3D view.

Note that both 2D and 3D trajectories work the same way:
Trajectories can be used either inside a
 Timeline
or through the
Function Editor
:
Timeline
or through the
Function Editor
:
- Inside the
Timeline
their units will be in frames :
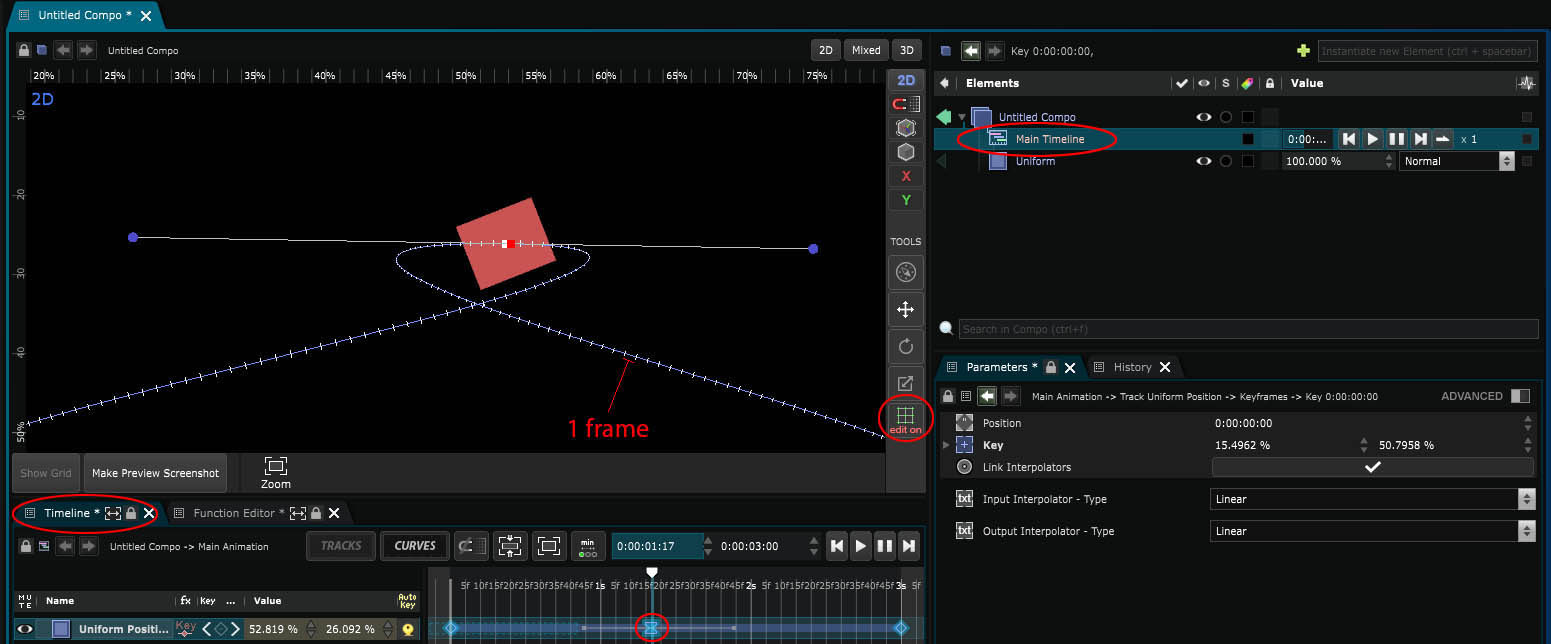
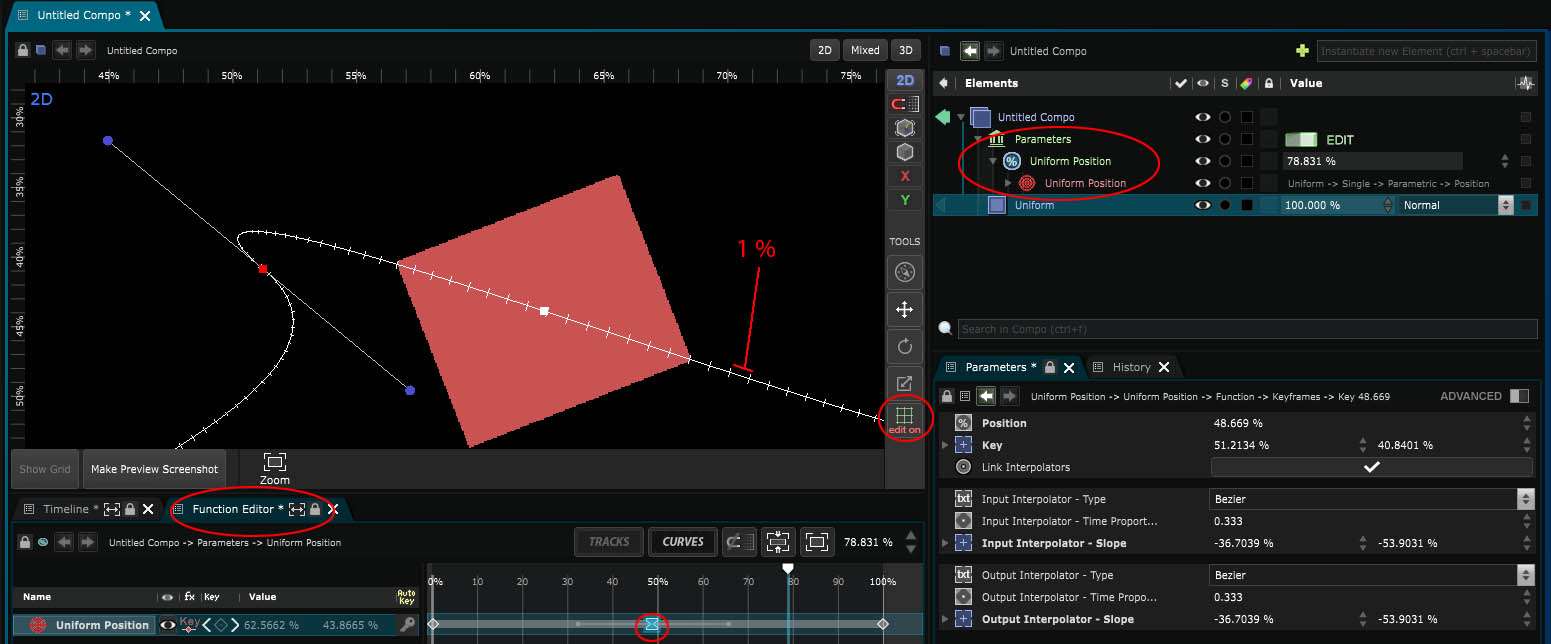
- Inside the
Function Editor
, their units will be in percentage. This is useful for animating using the
Exposed Parameter
:
Trajectories can be used both for animation and some layers like
Function Spline .
You can also check the
Function Editor
for further informations.