How to use Links in Smode
Understand the
 Link
logic in Smode
Link
logic in Smode
A composition in Smode can be a lot more than just visual, especially through the use of
Link
.
Link
offer the possibility of inserting logic in your compos, to create dynamic, interactive, and customizable content.
Coupled with animation, parameters and external inputs (OSC, MIDI, video input, audio input, etc.), you can turn a composition into an interactive object.
Read Learn user guide to learn how to make your content interactive.
Create a Link
Here is how to link a parameter to another (here 2 vertical positions):
In order to keep visual consistency, it can be interesting to propagate the change of a parameter to another parameter (eg. link the opacity of two layers, or the intensity of two modifiers on different layers).
It can be done by creating a
Link
between the two parameters.
Let’s take the example of two layers opacity bound together. To do this, you need to right click on the source Layer’s opacity and select the command Create Link From.
This will create a new
Link
in a
 Link Bank
with a disconnected
Link Bank
with a disconnected
 Link Target
.
Link Target
.
Expand the
Link
in the
 Element Tree
to see its
Link Target
.
Element Tree
to see its
Link Target
.
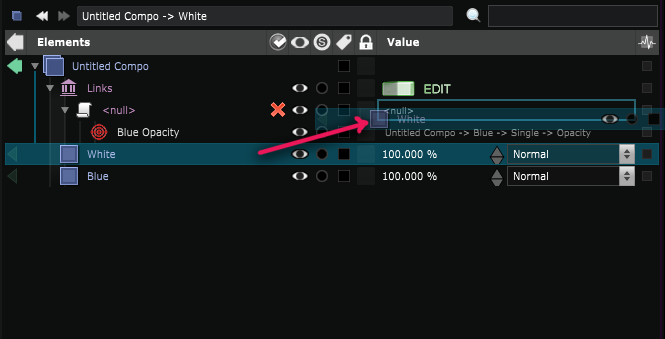
When a
Link Target
is visible, you can drag the second layer into its value and select the opacity in the contextual menu.
You just created your first variables link: when you modify the White opacity, the Blue opacity follows.
Parameter bindings are unidirectional: if you modify the Blue opacity, it will not change the White’s. Target parameters are only updated when the source parameter is modified.
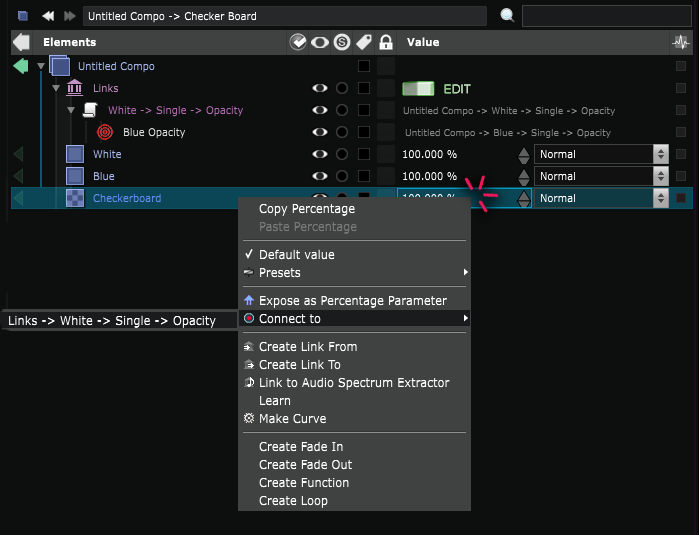
An alternative way to create that link would be to create a new
Link
from the target opacity, by using the Create Rule To menu entry when right clicking on the target opacity.
That would create a disconnected
Link Source
with a correct target. To set the
Link Source
, you just have to drag the White Layer in the Link value.
The source and target parameters of a Link can be replaced at anytime by a simple drag and drop.
Navigate to Target
You can navigate from a Link to its target parameter in the
Element Tree
by right clicking on the value and selecting the Goto menu entry :

Multiple Targets
Links can have multiple targets:
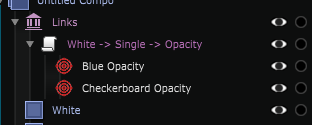
To add a new target to an existing Link, right click on the new target parameter and use the Connect to menu:
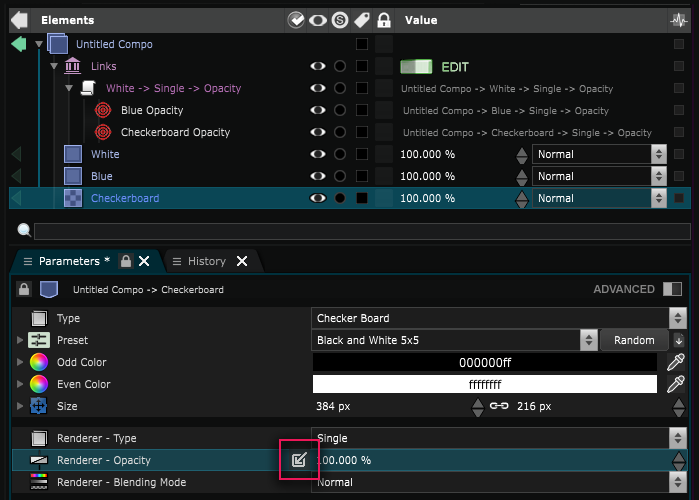
You can also know visually which parameters of an Element are automated by selecting it.
In the
 Parameters Editor
, you will see a button listing the objects that target that parameter:
Parameters Editor
, you will see a button listing the objects that target that parameter:
Learn command
Read Learn user guide to learn how to make your content interactive.
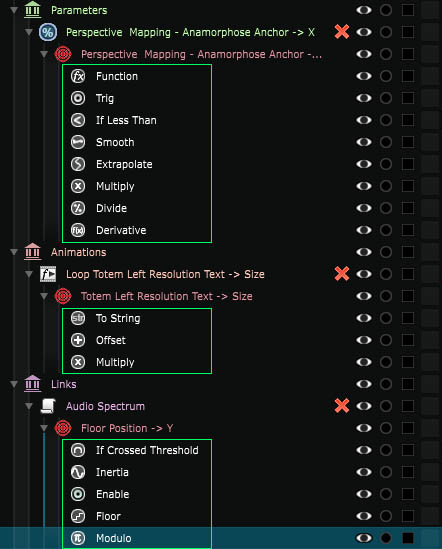
Link Modifiers
On every Link you can add a
 Link Modifier
:
Link Modifier
:
In the previous chapters, we discovered the power of Links in your composition. We also discovered that link targets are used a lot in Smode (in cues, exposed parameters, local links and links with hardware devices).
Since the targets can always contain
Link Modifier
and
 Link Condition
, what you’ll learn in these part of the documentation is how to use them in different scenarios.
Link Condition
, what you’ll learn in these part of the documentation is how to use them in different scenarios.
Now here is a small tutorial to demonstrate the use of different types of links in order to create procedural animations and interactive setups.
Here the links are made from the “controller” position, but indeed, links can be made from any input and open wide possibilities :