PC2 cache File
A PC2 cache File to import per vertex animation from 3D animations or simulations
A PC2 cache file work only for a SINGLE Mesh.
If you exported your cache from several objects then you should either:
-
Merge theses objects in your 3D software, then export the PC2 cache, and finally export as an obj.
-
Import the multiples mesh from the .obj as a “Reference”, so Smode could interpret them as a single mesh.
Before exporting the mesh and the cache from your 3D software, here is some stuff to do:
-
Triangulate your mesh. It should work with quads also but…well, triangulate just in case.
-
Export the Mesh in .obj with theses settings (here from Blender):
Each cache exported must correspond to a single mesh. It’s beter to select your object before exporting
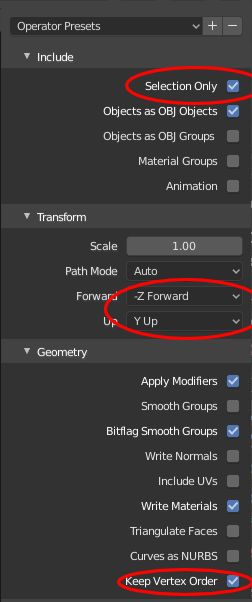
- Do not forget to apply all the transformations to your mesh prior to export it
Exporting a PC2 with Blender use the addons “Export Pointcache Format(.pc2)”, you can activate it inside the Blender preference.
- Export the PointCache .pc2 with theses settings:
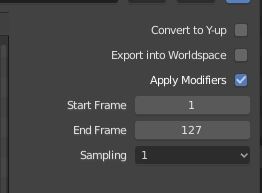
You need to set your start and end frame depending on your animation.
Here are the addons documentation in the Blender manual: pc2.html
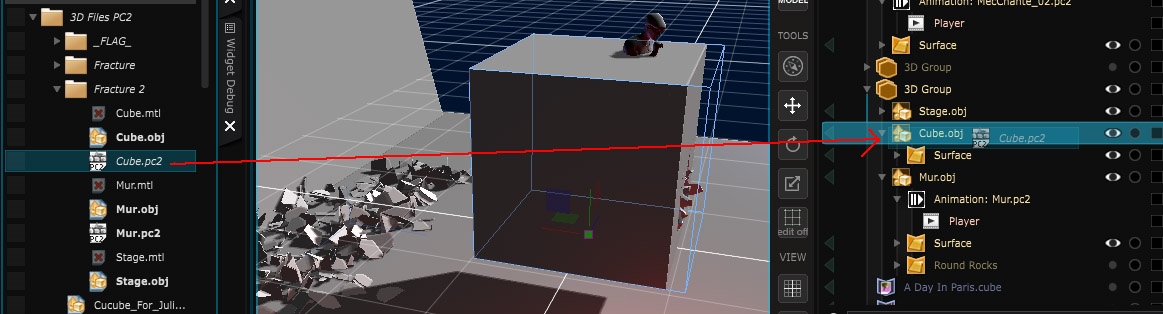
To import an animated mesh baked with a PC2 cache files:
-
First import the
 3D File
-
If the pc2 file have the same name as the obj (filename.obj = filename.pc2 or filename.obj.pc2) the animation is imported directly
-
Overwise you can drag and drop the .pc2 file into the good position (over the imported .obj).
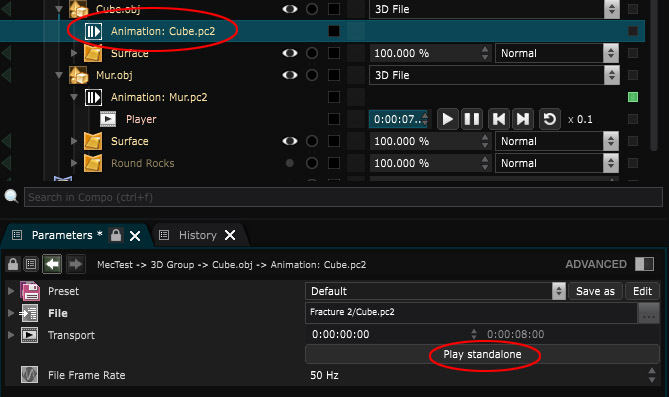
- This will create an animation node, just activate it’s Transport :
Or drag and drop it into the
 Timeline
:
Timeline
:

The Cube explosion was made using a special version of Blender: The fracturemodifier
(to make the explosion in one object)
And watch the magic happen:
Variables:
- File: File of the pc2 cache file
- Transport: Transport of the pc2 cache file