UV Camera Mapping
3D Modifier - Remap UV of a mesh using a Camera
This modifier uses a
 Camera
present in the composition in order to do an UV mapping over any object.
Camera
present in the composition in order to do an UV mapping over any object.
In the case of the other mapping tool, the
 UV Mapping
the camera is embedded to the modifier, here it actually is in the scene.
UV Mapping
the camera is embedded to the modifier, here it actually is in the scene.
This modifier, as its name indicates is the one used for camera Mapping.
To use this modifier, first apply it to the surface you want to map, then select your projection camera:
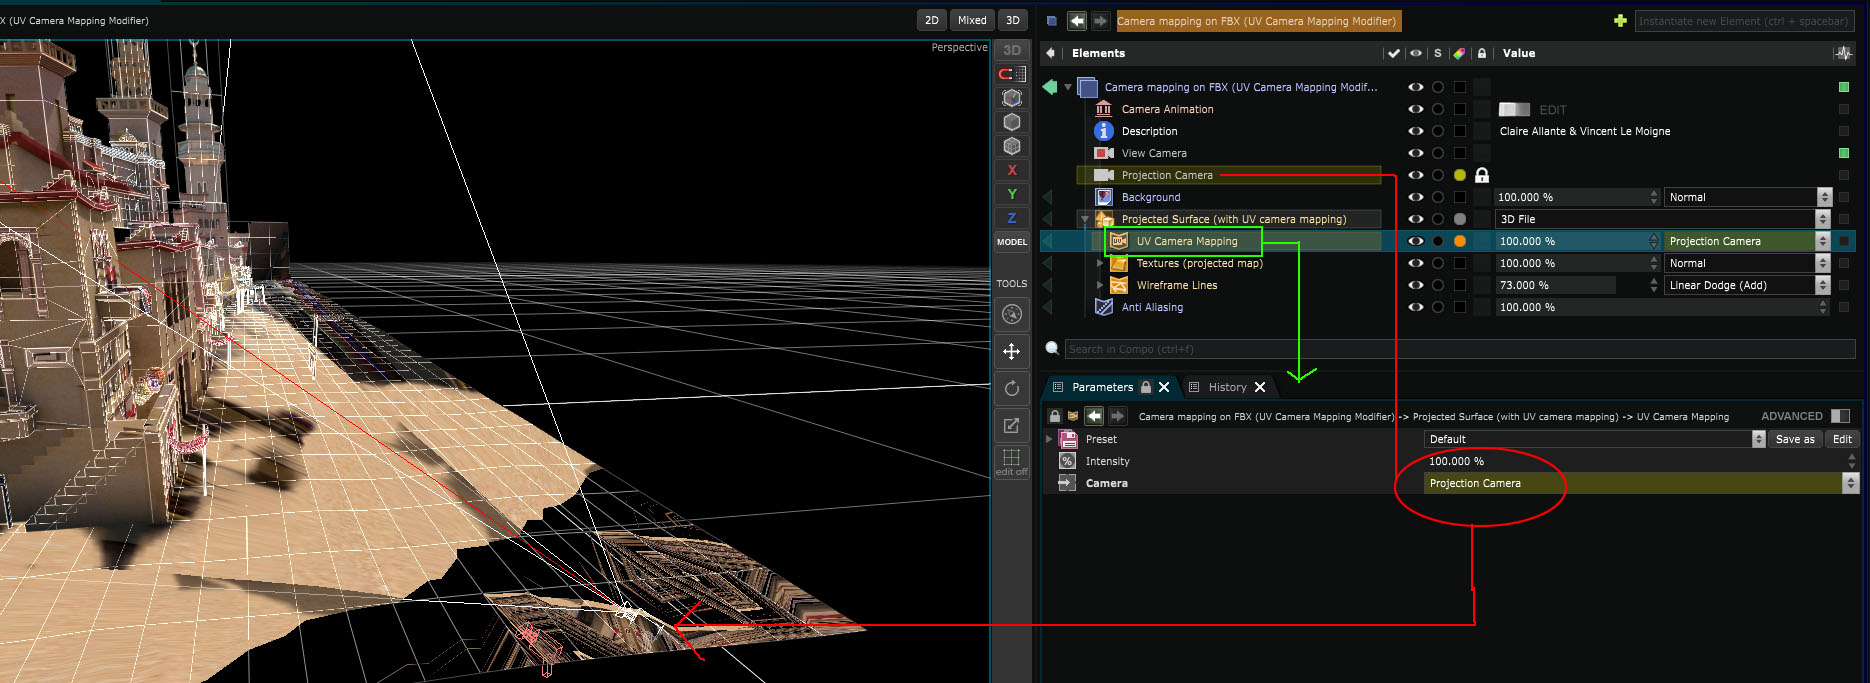
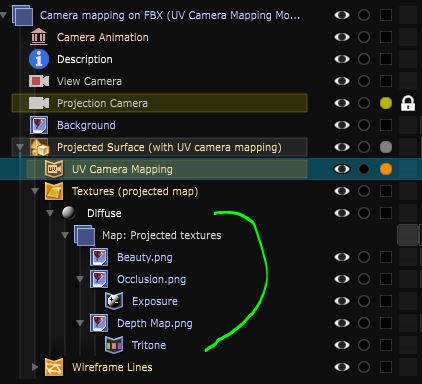
When it’s done, simply put your projected image inside of the geometry renderer :
If you are importing a scene from an .fbx or .3ds your camera position and orientation should be well imported (if you crushed all transformation before the export) but you may have to verify the Horizontal FOV of the projection camera :
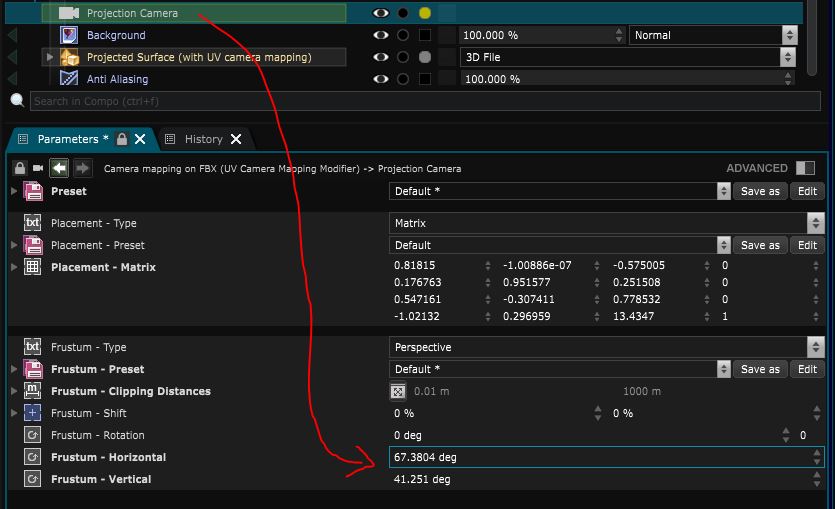
The camera will probably be imported with a “matrix” placement, so do not forget to change it back to “target, orientation, distance” which is Camera default placement :
Here is an example:
Variables:
- Camera: Camera of the uv camera mapping
Python
Oil.createObject("UVCameraMappingGeometryModifier")